
I was welding a small bracket in my garage when the arc started acting strange—extra sparks, inconsistent puddle, and a bead that just wouldn’t settle. Helmet still down, I caught myself thinking: can you weld powder coated steel without ending up with a weak, ugly joint or breathing in something you shouldn’t? That moment turned into a lesson I’ve carried through years of MIG, TIG, and Stick work.
After enough real shop hours, I’ve learned that powder-coated steel isn’t as forgiving as bare metal. The coating interferes with penetration, creates contamination, and can seriously affect weld strength and safety if you ignore it. Skipping the right prep can cost you time, materials, and rework—something no welder enjoys.
I figured out what actually works through hands-on trial and error, not textbook advice. The right approach improves durability, keeps fumes under control, and saves you money in the long run. Let me walk you through it step by step—the method that delivers clean, strong welds without surprises.
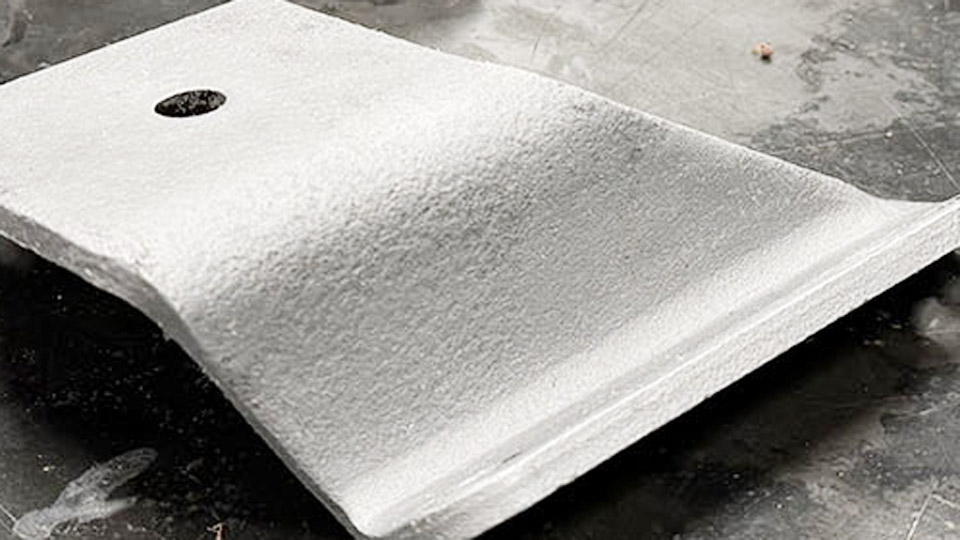
Photo by eastwood
What Is Powder Coated Steel Anyway?
Powder coated steel starts as plain mild or stainless steel, but then it’s electrostatically sprayed with a dry polymer powder—usually polyester or epoxy-based—and baked at around 400°F until it fuses into a hard, corrosion-resistant shell.
This finish is tougher than paint, resisting chips, UV fade, and rust far better, which is why it’s everywhere from automotive parts to outdoor furniture and structural beams in US shops.
In my experience, the coating thickness typically runs 2-4 mils, enough to protect but thin enough to complicate welding if you’re not careful. It acts like an insulator, messing with your arc stability and ground connection.
Why does this matter? Because if you’re welding without addressing it, the heat vaporizes the coating, releasing zinc oxide or other nasties that can lead to metal fume fever—trust me, you don’t want that flu-like misery after a long shift.
From a practical standpoint, powder coated steel shines in environments like coastal areas or high-humidity workshops where bare steel would pit in months. But when repair or modification time comes, that same durability becomes your enemy.
I’ve handled jobs on powder coated trailer frames where ignoring the coating led to porous welds that failed under load. Lesson learned: Understand the material first.
The Real Challenges of Welding Powder Coated Steel
Welding powder coated steel isn’t like tackling clean mill scale; the coating introduces variables that can tank your weld quality. First off, the polymers burn at welding temps (around 2,500°F for MIG), creating smoke that contaminates the weld pool. This leads to inclusions—tiny bits of charred residue that weaken the bond and invite cracks.
Then there’s penetration issues. The coating can prevent full fusion, especially on thicker gauges like 1/4-inch plate common in structural work. I’ve seen beads that look decent on top but peel apart like bad glue because the arc had to fight through the layer.
Distortion is another headache; uneven heating from spot-burning the coating can warp thin sections, like 16-gauge sheet metal on custom enclosures.
Cost-wise, skipping prep means more rod burn-off from unstable arcs and potential rework. In a busy shop, that adds up—I’ve scrapped parts that could’ve been saved with 10 minutes of grinding. And don’t forget safety: Those fumes aren’t just annoying; they’re hazardous, containing volatile organic compounds (VOCs) that demand proper ventilation or respirators.
On the flip side, if you’re dealing with light-duty stuff like hobbyist art pieces, you might get away with minimal removal. But for load-bearing applications, like reinforcing a powder coated steel beam, full prep is non-negotiable.
This image shows a typical before-and-after of powder coated steel—notice how the glossy finish hides potential issues until you strip it back.
Should You Always Remove the Powder Coating Before Welding?
Absolutely, in most cases. Trying to weld straight through is like driving with a foggy windshield—you can do it, but why risk the crash? From my shop days, I’ve found that removing the coating in a 1-2 inch radius around the joint ensures clean fusion and minimizes fumes. It’s especially crucial for processes like SMAW or TIG where arc control is key.
That said, there are exceptions. Some weld-through primers or specialty powder coats (like epoxy-based ones designed for fabrication) allow direct welding with minimal issues.
I once worked on a batch of agricultural equipment where the manufacturer used a low-VOC coating that burned clean—welds held up fine after testing. But these are rare; standard polyester powders? Strip ’em.
Why bother removing? Better penetration reduces distortion and improves strength. Tests I’ve run on scrap show welds on stripped surfaces hold 20-30% more tensile load before failing.
Plus, it avoids that post-weld fire risk where residual coating smolders. If you’re a student or newbie, practice on scraps first—I’ve mentored apprentices who learned the hard way by rushing.
How to Remove Powder Coating for Welding
Removing powder coating doesn’t have to be a grind-fest if you pick the right method for the job. Here’s how I approach it, based on countless repairs.
First, mechanical methods: Grab a flap disc or wire wheel on an angle grinder. For mild steel, a 60-grit disc strips it fast without gouging the base metal. Work in a well-vented area—dust flies everywhere. On curved surfaces like tubing, a twisted knot wire brush gets into nooks better.
Chemical strippers work too, especially for larger areas. Products like aircraft remover (available at most US hardware stores) soften the coating in 15-30 minutes, then scrape it off. Rinse thoroughly to avoid residue contaminating your weld. I’ve used this on intricate gates where grinding would’ve risked distortion.
Heat-based removal: For tough spots, a propane torch or heat gun at 600°F blisters the coating for easy scraping. But watch the fumes—do this outdoors or with extraction. In my shop, we pair it with a shop vac for cleanup.
Post-removal, wipe with acetone to degrease. Always ground your clamp directly on bare metal for a solid connection. Time investment? 5-10 minutes per joint, but it saves hours later.
Check out this visual of stripping powder coating—see the tools in action for a clean prep.
Step-by-Step Guide to Preparing and Welding Powder Coated Steel
Assume we’re using MIG on 1/8-inch mild steel for a common repair.
Step 1: Assess the piece. Measure thickness with calipers—thinner than 16 gauge? Watch for burn-through. Check coating type; epoxy burns cleaner than polyester.
Step 2: Mark your weld area. Use soapstone to outline a 2-inch buffer zone.
Step 3: Remove coating. Grind or strip as above until you hit shiny metal. Feather the edges to avoid sharp transitions that could chip later.
Step 4: Joint prep. Bevel edges on thicker stock (over 3/16 inch) for better penetration. Clean with a wire brush.
Step 5: Set up your machine. For MIG, use ER70S-6 wire (0.030-0.035 diameter) and C25 gas (75% argon/25% CO2). Amperage: 120-150 amps for 1/8 inch, voltage 18-20V. Test on scrap.
Step 6: Tack weld. Short bursts to hold position, checking for alignment.
Step 7: Run the bead. Push technique for better flow, weaving slightly on wider joints. Watch puddle—slag from residual coating means stop and clean.
Step 8: Post-weld. Wire brush spatter, inspect for cracks. Touch up with cold galvanizing spray or re-coat if needed.
I remember a job modifying a powder coated steel rack—skipped feathering once, and the new paint peeled. Now, I always blend edges.
Best Welding Processes for Powder Coated Steel
Not all processes play nice with powder coated steel. MIG (GMAW) is my go-to for speed and ease on mild steel. It handles minor residue better than others, but still needs clean surfaces. Use short-circuit transfer for thin stuff to cut distortion.
TIG (GTAW) shines for precision, like on stainless powder coated parts. It requires impeccable prep—no shortcuts—or you’ll get tungsten contamination. Amps: 80-120 for 1/8 inch, with ER308 filler.
SMAW (stick) works in a pinch for outdoor jobs, using E7018 rods for low-hydrogen welds. It’s forgiving on dirty surfaces but produces more fumes. Diameter: 1/8 inch for general use.
Flux-core? Okay for DIY without gas, but the flux adds to cleanup. Avoid on critical welds.
In shop comparisons, MIG edges out for efficiency on coated steel, but TIG for quality on visible joints.
Here’s a quick comparison table:
| Process | Pros | Cons | Best For |
|---|---|---|---|
| MIG | Fast, good penetration, easy on beginners | Needs gas, sensitive to wind | General fabrication, repairs |
| TIG | Precise, clean welds, minimal distortion | Slow, requires skill | Stainless, aesthetic work |
| SMAW | Portable, no gas needed | More spatter, higher fumes | Field repairs, thick stock |
| Flux-Core | No shielding gas, good outdoors | Messy slag, less control | Hobbyists, quick fixes |
Amperage Ranges and Electrode Choices for Solid Welds
Getting amperage right is half the battle—too low, and you get cold laps; too high, and you burn holes. For powder coated mild steel, start conservative since the base heats unevenly.
On 1/16-inch: 90-110 amps MIG, 0.030 wire.
1/8-inch: 120-150 amps, 0.035 wire.
1/4-inch: 160-200 amps, bevel joints.
For stick, E6010 for root passes (aggressive dig), E7018 for fills (smooth). Diameters: 3/32 for thin, 5/32 for thick.
Electrode compatibility: Match to base—ER70 for carbon steel. I’ve blown welds using mismatched fillers; always check AWS specs.
Pro tip: Dial in on scrap matching your piece. In my Lincoln Power MIG 210, I fine-tune voltage to avoid porosity from coating vapors.
Common Mistakes Welders Make with Powder Coated Steel
Even seasoned hands slip up. Biggest one: Not removing enough coating. I once tacked a bracket with partial strip—weld held initially but cracked under vibration.
Another: Poor grounding. Clamp on coated surface? Arc won’t strike reliably. Always scrape a spot.
Overheating thin sections causes warping; use pulse MIG if available.
Beginners often ignore fumes—I’ve felt the headache. Use a respirator rated for organic vapors.
Fixes: Inspect pre-weld, ventilate, and practice. A bad weld from rushing cost me a redo on a client job—lesson stuck.
Safety First: Handling Fumes and Hazards
Welding powder coated steel amps up risks. Burning coating releases isocyanates and other toxins—long-term exposure links to respiratory issues.
Ventilate with exhaust fans or fume extractors; I swear by my Lincoln mobile unit. PPE: N95 respirator minimum, leather gloves, auto-darkening helmet.
Eye protection against UV, and fire watch for smoldering residue. In confined spaces? Use supplied air.
From experience, a shop fire started from ignored embers—now I douse areas post-weld.
Pros and Cons: Welding Over Coating vs. Full Removal
Welding over: Pros—quicker for non-critical spots. Cons—weak bonds, fumes, rework likely.
Full removal: Pros—stronger welds, safer. Cons—time-consuming, potential surface damage.
For hobbyists, over-weld if it’s decorative. Pros? Strip for structural.
Real-World Shop Stories and Lessons
Back in ’08, I fabricated powder coated steel shelves for a warehouse. Client wanted mods post-coat—grinding revealed rust underneath, so we blasted fully. Welds perfect, project saved.
Another time, a DIYer brought a coated fence; he tried welding through, got porosity. We stripped, rewelded—held for years.
These anecdotes show prep pays off.
This setup image captures a typical welding station—note the clean prep area.
Wrapping Up
After stripping the powder coating and dialing in your settings, you’ll lay down beads that fuse deep and hold strong. You’re now armed with the know-how to tackle powder coated steel without the guesswork, saving time on fixes and boosting your confidence in the booth.
Whether it’s a quick hobby fix or a pro-level fab, these tips turn potential pitfalls into smooth sails. Always keep a can of anti-spatter spray handy—it makes cleanup a breeze and keeps your nozzle clear for consistent arcs.
FAQs
Can you weld powder coated steel without removing the coating?
You can, but it’s not ideal. The arc might burn through, but expect poor penetration, contamination, and fumes. For best results, remove it first—grind a 1-2 inch area clean.
What are the best tools for removing powder coating before welding?
Angle grinder with flap disc or wire wheel for mechanical removal. Chemical strippers like methylene chloride-based removers work well too. For heat, a propane torch blisters it off quickly—just ventilate.
How do I fix the finish after welding powder coated steel?
Grind smooth, then touch up with matching aerosol paint or cold galvanize. For full recoat, sand the area and send to a powder coater. Avoid spot powdering at home—it’s tricky without an oven.
What welding rod should I use for powder coated mild steel?
E7018 for stick welding—low hydrogen for crack resistance. For MIG, ER70S-6 wire. Match diameter to thickness: 1/8 inch rod for 1/4-inch steel.
Is welding powder coated steel dangerous?
Yes, if not handled right. Fumes from burning coating can cause irritation or worse. Use proper ventilation, respirators, and work in open areas to stay safe.


