
You don’t really think about your compressor tank until the day it starts spitting water into your air lines or you notice rust flakes coming out with the pressure. I ran into that during a small fabrication job—air tools acting up, inconsistent pressure, and moisture ruining a clean finish.
That’s when I realized knowing How to Clean an Air Compressor Tank isn’t just maintenance—it’s part of keeping your whole setup running right.
In a real workshop, moisture buildup inside the tank is unavoidable, especially in humid conditions. Over time, that water turns into rust, weakens the tank, and can even damage your tools or contaminate your weld prep. Ignore it long enough, and you’re looking at costly repairs—or worse, a safety risk.
The good news is, cleaning your compressor tank isn’t complicated if you know what to look for and how to do it safely. I’ll walk you through the exact steps I use in the shop to drain, clean, and keep a tank in solid working condition without guesswork.
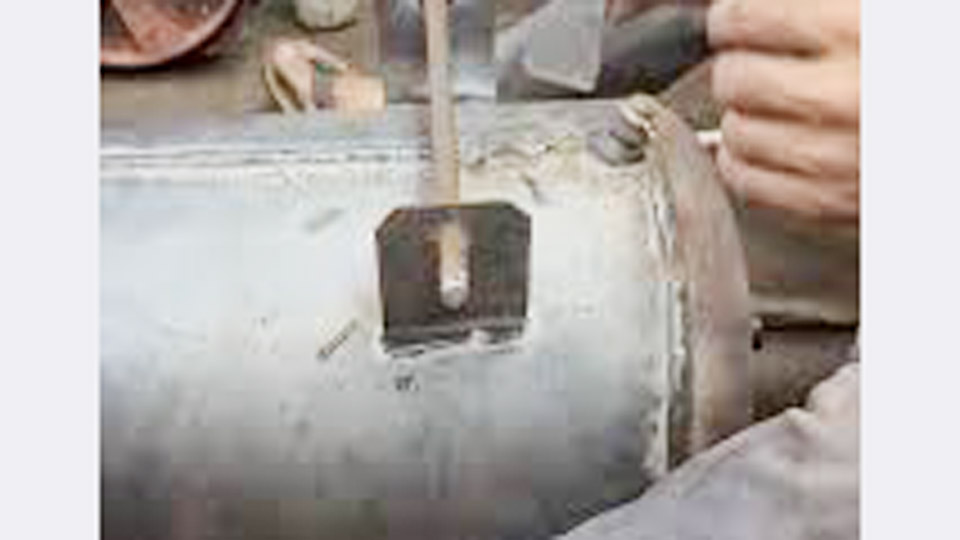
Image airmachinery
Why Cleaning Your Air Compressor Tank Actually Matters in a Welding Shop
Compressed air isn’t just “air.” It’s your shop’s lifeblood. In a typical American welding setup you’re running ¾-inch or ½-inch air lines to grinders that remove slag, needle scalers that clean welds, and air-powered bevelers that prep plate edges.
Add a plasma table or handheld air plasma cutter and the stakes go higher—any water or rust in the supply line destroys consumables and leaves ugly, hard-to-grind cut edges that slow down fit-up.
Rust also weakens the tank itself. I’ve cut open old 60-gallon tanks that looked fine from the outside only to find paper-thin walls where condensation had been sitting for years. That’s a safety issue no welder can afford.
A ruptured tank under pressure is loud, dangerous, and expensive. Regular cleaning plus daily draining extends tank life dramatically and keeps your insurance company happy.
Signs Your Air Compressor Tank Needs Immediate Attention
Don’t wait for a catastrophic failure. Watch for these red flags I see all the time:
- Brown or rusty water spitting from the drain valve instead of clear droplets.
- Reduced cut quality on your plasma cutter—more spatter, slower travel speed, and frequent tip changes.
- Air tools losing power mid-job or sounding like they’re struggling.
- Visible rust flakes when you blow down the quick-connects at the end of the day.
- The compressor running longer than usual to reach cut-in pressure because rust is taking up space inside the tank.
If you see any of these, stop what you’re doing and schedule a cleaning. In humid states like Florida or Louisiana this can happen every few months even with daily draining. In drier mountain shops you might go a full year between deep cleans.
Tools and Supplies You’ll Actually Use in the Shop
Keep it simple—no need for fancy equipment most small fab shops don’t own. Here’s my exact kit:
- Safety glasses, nitrile gloves, and hearing protection.
- Adjustable wrench and pipe wrenches for stubborn fittings.
- Garden hose with spray nozzle or shop pressure washer (low pressure setting).
- 5-gallon bucket and funnel.
- Cleaning solution of choice (more on that below).
- Length of chain or a handful of clean nuts and bolts for agitation on larger tanks.
- Shop vacuum with hose attachment or compressed air blow-out gun.
- Baking soda for neutralizing acid-based cleaners.
- Rust-inhibiting primer or epoxy tank sealer (optional but worth it on older tanks).
- Flashlight or inspection camera to check progress inside.
For most 20- to 80-gallon vertical tanks common in U.S. welding shops, you can do the entire job without pulling the pump off the top. Stationary horizontal tanks on larger Quincy or Ingersoll Rand units might require a helper to roll them safely.
Step-by-Step: How to Clean an Air Compressor Tank the Right Way
Step 1: Safety first—power down and depressurize.
Unplug the compressor or flip the breaker. Open the drain valve completely and let every last bit of pressure escape. I wait at least 30 minutes after shutdown so the tank cools; hot metal plus cleaning chemicals is a bad combination. Wear your PPE. I’ve seen guys skip this and get a face full of rusty water under residual pressure—don’t be that guy.
Step 2: Drain what’s already there.
Position a bucket under the drain valve. Open it fully and let the tank empty. Tilt the tank slightly if it’s portable so the last bit of sludge runs out. This is where you’ll see exactly how bad the situation is. Take a photo for your records; it helps track how often you need to repeat the process.
Step 3: Choose and apply your cleaning solution.
Three reliable options I’ve tested in real shops:
White vinegar and water (50/50 mix): Cheap, safe, and surprisingly effective on light to moderate rust. Pour in enough to cover about one-third of the tank volume.
Evapo-Rust or similar chelating rust remover: My current favorite for heavy buildup. Non-toxic, no fumes, and it doesn’t eat the internal factory coating the way strong acids sometimes do. Follow the label for dilution.
Phosphoric acid or CLR (diluted): Fast on stubborn rust but requires careful neutralization afterward with baking soda and thorough rinsing. Use only if you’re comfortable with acids and have good ventilation.
Seal the drain valve temporarily, add your solution through the outlet port or top opening, then roll or rock the tank to coat every interior surface. On bigger tanks I drop in a short length of chain and roll it around the shop floor like a barrel for five minutes. The mechanical action knocks loose scale that chemicals alone can’t reach.
Step 4: Let it work.
For light cleaning, 30–60 minutes is enough. Heavy rust might need overnight soaking. I’ve left Evapo-Rust in a 60-gallon tank for 24 hours with excellent results and zero damage to the metal.
Step 5: Rinse, agitate, and repeat.
Open the drain and flush with fresh water. Repeat the fill-and-roll process two or three times until the water runs clear. This is the part beginners rush and pros never skip. Any leftover cleaner or rust particles will end up in your air lines and on your next weld prep job.
Step 6: Dry the tank completely.
This is critical. Moisture left behind defeats the entire purpose. Use a shop vacuum to suck out standing water, then blow compressed air through the tank for at least 15 minutes. Leave the drain valve cracked open overnight in a warm, dry area of the shop. I sometimes throw a small 100-watt trouble light inside (unplugged from power, just for gentle heat) to speed evaporation on humid days.
Step 7: Optional protective coating.
On tanks that have lost their original internal paint, I pour in a thin coat of epoxy primer designed for fuel tanks or air receivers, roll it around, and drain the excess. It adds years of protection and is a trick I picked up from old-school compressor rebuilders.
Step 8: Reassemble and test.
Reinstall any removed fittings with fresh Teflon tape. Plug the unit back in, build pressure slowly, and check for leaks. Listen for unusual noises and watch the pressure gauge. If everything holds, you’re back in business.
The entire job usually takes me two to three hours of active work plus soak time. For a busy welding shop that’s time well spent.
How Often Should You Deep Clean Versus Just Drain?
Daily draining is non-negotiable. I tell every apprentice: the last thing you do before you walk out the door is open that drain valve. In high-humidity areas or with heavy daily use, plan a full cleaning every three to six months.
Lighter hobby shops in dry climates can stretch it to once a year. The best gauge is what comes out when you drain—if it’s consistently clear, you’re doing it right.
Common Mistakes That Cost Welders Time and Money
I’ve made most of these myself over the years, so learn from them:
- Skipping daily drains because “it’s only a little water.” That little water becomes a lot of rust.
- Using undiluted strong acids without neutralizing—leaves a corrosive residue that attacks the tank faster than the original rust did.
- Forgetting to dry the tank thoroughly before closing it up.
- Cleaning only the drain valve and ignoring the rest of the interior.
- Trying to pressure-wash the inside without protecting electrical components on the compressor head.
Another big one: assuming a brand-new compressor will stay clean forever. Even the best U.S.-made units like Rolair or Campbell Hausfeld accumulate condensation if you don’t maintain them.
Preventing Future Problems: Upgrades That Pay for Themselves
Once the tank is clean, make it easier to keep that way. Install an automatic electronic drain valve—they’re inexpensive and worth every penny in a professional shop. Add an aftercooler and refrigerated air dryer if you run plasma or paint frequently.
In my current setup I have a 3/8-inch inline desiccant dryer right before the main drop—keeps air lines bone dry even in Georgia summers.
Store the compressor in a climate-controlled area when possible. A simple dehumidifier in the compressor corner does wonders in basement or garage shops.
Comparison of Cleaning Methods
| Method | Cost | Effectiveness on Heavy Rust | Safety/Ease | Best For | Drawbacks |
|---|---|---|---|---|---|
| Vinegar + Water | Low | Moderate | Very safe | Light maintenance | Slower on thick scale |
| Evapo-Rust | Medium | Excellent | Very safe | Most shop tanks | Slightly more expensive |
| Phosphoric Acid/CLR | Low | Fast and aggressive | Requires care | Severe rust | Fumes and neutralization step |
| Mechanical tumble (chain + detergent) | Very low | Good when combined with chemicals | Moderate effort | Large stationary tanks | Messy, requires space |
Pick the one that matches your tank condition and comfort level. I rotate between vinegar for quick touch-ups and Evapo-Rust for serious jobs.
Real-World Example from the Shop Floor
Last summer we were midway through a 40-foot aluminum trailer rebuild. The plasma cutter started acting up—arc would wander and leave behind heavy dross no matter how I adjusted the settings. I drained the 80-gallon tank and got about a quart of rusty water.
Two hours later after a full Evapo-Rust clean and dry-out, the same machine cut like it was brand new. Saved us an entire day of rework and a set of consumables. That’s the kind of return you get when you treat the compressor tank as seriously as your welding machine.
Final Thoughts on Keeping Your Shop Air System Reliable
A clean air compressor tank isn’t flashy, but it’s one of the highest-ROI maintenance tasks in any welding operation. You’ll notice smoother tool performance, cleaner weld prep, fewer plasma cutter headaches, and far less frustration when deadlines are tight.
The practices I’ve shared here come straight from years of running compressors in real fabrication environments—not theory, not YouTube hype, just what actually works when the shop is loud and the clock is ticking.
The single best pro-level tip I can leave you with: treat your drain valve like the most important switch in the shop. Crack it open at the end of every single day, no exceptions. Pair that habit with a deep clean every few months and your compressor will outlast the rest of your equipment.
You now have everything you need to keep that tank spotless and your compressed air system delivering dry, clean power exactly when you need it. Get after it—your tools, your welds, and your bottom line will thank you.


