
A sheet of brand-new stainless steel is supposed to look clean and ready for work, so it can be surprising when a black film starts rubbing off onto your gloves, rag, or fingertips.
At first glance, it might seem like rust, contamination, or a manufacturing defect. That uncertainty is exactly why many fabricators and DIYers ask, What Is the Black Residue on New Stainless Steel?
This issue shows up more often than people expect, especially with freshly manufactured, polished, or protective-film-covered stainless steel. I’ve seen welders spend time scrubbing the surface, worried that the material was damaged, only to discover the residue was caused by something completely different.
Knowing what you’re dealing with before cutting, welding, painting, or installing the metal can save a lot of unnecessary frustration.
Black residue on new stainless steel is usually easy to identify and address once you understand its source. I’ll explain what causes it, when it’s harmless, when it could signal a problem, and the best ways to clean and prepare stainless steel for your next project.
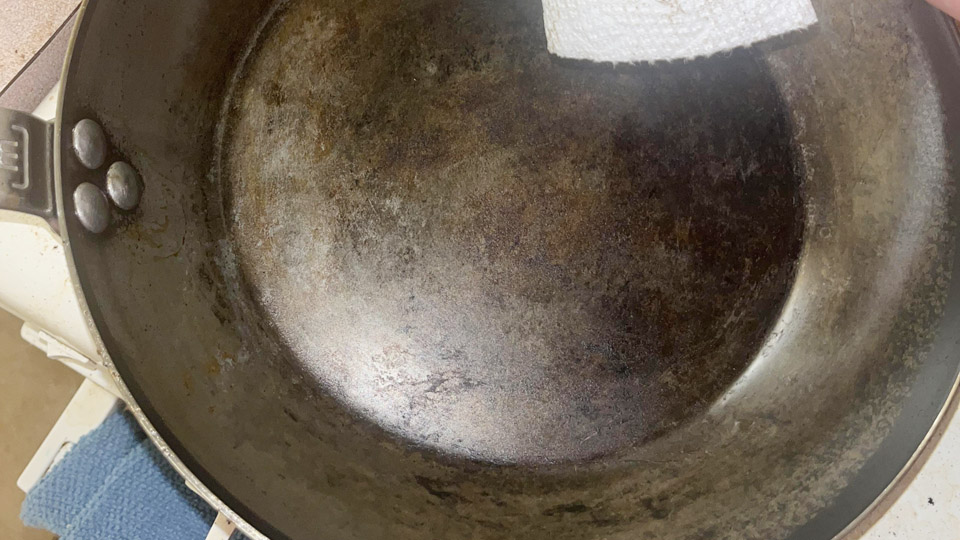
Image by r/carbonsteel
Why the Black Residue Shows Up on Fresh Stainless
New stainless steel leaves the mill or fabricator with a bright, polished surface. That shine comes from mechanical polishing using abrasive wheels, belts, and compounds.
These processes generate microscopic stainless particles, iron oxides, chromium oxides, and bits of polishing paste or oil that get embedded in the surface grain.
The residue often feels greasy or powdery. On 304 or 316 sheets, it’s common because these grades are workhorsed in fabrication. It’s not toxic in normal handling, but you don’t want it in your weld pool or on food-contact surfaces.
Real shop difference: On a fresh 1/8-inch 304 plate, you might see it most on the polished side. It wipes off easily at first but keeps coming until you clean properly. Leave it, and when you strike an arc, it can volatilize and cause spatter or inclusions.
Heat Tint and Oxide Scale: The Black Residue That Welding Creates
The manufacturing residue is one thing. Once you fire up the machine, stainless fights back with its own version of black: heat tint and heavy oxide scale.
When you weld stainless, the high heat (especially in the HAZ—heat-affected zone) breaks down the protective chromium oxide passive layer.
Oxygen from the air reacts with the hot metal, forming a colored oxide layer that ranges from straw yellow to deep blue, purple, and finally black as temperatures climb. Black usually means heavier oxidation and more chromium depletion underneath.
This isn’t just ugly. The scale is brittle, non-protective, and creates a chromium-poor zone right where corrosion loves to start. In marine, food, or chemical environments, that spells premature failure.
SMAW (Stick) Specifics: With 308L or 316L rods on 304/316 base, black scale forms fast if you run too hot or have poor shielding. 3/32-inch electrodes at 70-110 amps for thin stuff; 1/8-inch at 90-150 amps depending on position and joint. Too much amperage and you’re burning chrome out of the puddle.
TIG Real Talk: Pure argon, 15-20 CFH, and a #7 or #8 cup. Back-purge when you can. Run too slow or with too much heat and you’ll get that dark, flaky oxide that wire brushes won’t fully remove.
Common Causes in the Shop and How to Spot Them
- Manufacturing Residue: Wipes off black on a clean rag before welding. Common on polished or #4 finish material.
- Inadequate Cleaning Pre-Weld: Oil, shop dust, or marking pen residue mixes with heat and leaves black smut.
- Poor Shielding: Air gets in during TIG or MIG, creating heavy scale.
- Overheating: Running high amperage on thin gauge or multi-pass without control.
- Wrong Filler or Process: Using carbon steel brushes or contaminated wire on stainless.
Beginners often crank the machine thinking more heat equals better penetration. Pros know stainless welds cooler and cleaner than mild steel. Match your settings to the material thickness and joint.
Step-by-Step: Cleaning New Stainless Before You Weld
Don’t skip this. I’ve seen beautiful-looking welds fail inspection because of leftover black residue.
Degrease First: Wipe with acetone or a good shop degreaser. Dawn dish soap works in a pinch for light oil but follow with solvent.
Mechanical Clean: Use a dedicated stainless wire brush or flap disc (aluminum oxide, not contaminated with carbon steel). Brush in the direction of the grain.
Solvent Wipe Again: Fresh rag test—should come off clean.
For Stubborn Manufacturing Black: Bar Keeper’s Friend, citric acid, or a dedicated stainless cleaner. Some guys use vinegar soaks for light cases.
Passivation After Welding: Critical for corrosion resistance. Pickling paste or gel removes heat tint and restores the passive layer.
Pro Tip on Joint Prep: Bevel properly, gap consistently, and tack with the same care as the final weld. Clean between passes.
Welding Processes and Settings to Minimize Black Residue
SMAW (Stick Welding) Stainless
Great for field repairs or thicker sections. Use E308L-16 or E316L-16 rods. Keep them dry—rod ovens or sealed packs.
- Electrode Diameters: 3/32″ for light fab, 1/8″ for heavier.
- Amperage Ranges: 3/32″: 60-90A; 1/8″: 90-140A. DC+ usually.
- Technique: Short arc, slight weave on wider joints. Travel speed matters—too slow and you overheat.
Common mistake: Using carbon steel rods or settings. You’ll get heavy slag and black contamination.
GTAW (TIG) – The Cleanest Option
My go-to for visible stainless work.
- Settings: 1/16″ tungsten, 50-120A depending on thickness. Argon at 15-25 CFH.
- Filler: ER308L or ER316L, 1/16″ or 3/32″ rod. Clean filler with alcohol.
- Pulse if Available: Helps control heat on thin material and reduces distortion/oxidation.
Back-purging with argon is non-negotiable for pipe or tanks.
GMAW (MIG) Stainless
Use tri-mix (90% He, 7.5% Ar, 2.5% CO2) or similar for spray transfer. 0.035″ or 0.030″ wire. Lower voltage than carbon steel to control heat.
Comparison: Cleaning Methods for Black Residue and Heat Tint
| Method | Best For | Pros | Cons | When I Use It |
|---|---|---|---|---|
| Stainless Wire Brush | Light scale, pre-weld | Fast, cheap, no chemicals | Doesn’t remove Cr-depleted layer | Everyday fab |
| Flap Disc/Al Oxide | Moderate heat tint | Good mechanical removal | Can smear if aggressive | Shop cleanup |
| Pickling Paste/Gel | Heavy black scale | Removes oxides + restores passive | Messy, needs safety gear | Critical corrosion jobs |
| Citric Acid | Light manufacturing residue | Safer, food-grade friendly | Slower on heavy scale | Food/pharma work |
| Electropolishing | High-end finishes | Superior corrosion resistance | Not shop-portable | Customer-facing pieces |
Pickling gives the best long-term results because it addresses the chromium depletion that mechanical methods miss.
Safety Considerations Every Welder Needs to Know
Stainless fumes contain hexavalent chromium—nasty stuff. Good ventilation, respirator when needed, and keep your hood down. Pickling acids require gloves, eye protection, and proper neutralization before disposal. Follow OSHA guidelines and your local regs.
Never use carbon steel tools on stainless. Cross-contamination embeds iron particles that rust later.
Real-World Examples from the Shop Floor
I once had a guy building a stainless beer fermentation tank. Fresh 316 sheets had heavy black manufacturing residue. He tacked it up quick without full cleaning.
Post-weld, the heat tint was black in places, and after a few months in service, pitting started along the seams. We cut out sections, properly prepped, welded with back-purge, pickled, and passivated. No more issues.
Another time on a structural handrail job—mild steel contamination from a shared grinder left rust streaks after installation. Lesson: dedicated stainless tools only.
Common Mistakes and How to Avoid Them
- Rushing Prep: Takes longer to fix bad welds than to clean right.
- Wrong Amperage: Stainless needs lower heat input than carbon steel. Practice on scrap.
- Poor Shielding Gas Coverage: Trailing shields or good torch angle prevent oxidation.
- Skipping Post-Weld Clean: Looks fine in the shop, fails in the field.
- Using the Wrong Brush: One carbon steel bristle ruins the piece.
Material Compatibility and Filler Choices
Stick with L-grade fillers (low carbon) for most 304/316 to prevent sensitization. Know your base metal—201, 304, 316, duplex all behave differently. Match chemistry and consider service environment (acidic, salty, high temp).
For dissimilar welds, like stainless to mild, use 309L as a butter layer or transition rod.
Practical Tips That Separate Hobbyists from Pros
- Keep material stored flat and covered to minimize shop contamination.
- Test your cleaning with a white rag wipe before and after.
- On pipe welds, purge until the back side stays silver.
- For cosmetic work, plan your passes to minimize heat input—stringer beads over wide weaves when possible.
- Invest in a good pickling paste; it pays for itself in avoided rework.
Taking It Further: Controlling Distortion and Achieving Clean Results
Stainless expands and distorts more than mild steel. Use clamps, sequencing, and sometimes heat sinks. Proper settings reduce the black scale you have to clean later.
In multi-pass welds, clean thoroughly between passes. Slag or oxide inclusions become defects.
Reflection on Getting It Right Every Time
After years of burning rods and fixing other people’s mistakes, the pattern is clear: the black residue—whether from the factory or the torch—is a signal. It tells you the surface isn’t ready or the process needs tweaking. Clean thoroughly, weld with control, and treat the surface after.
You’re now equipped to handle stainless confidently. You know what that black stuff is, why it forms, and exactly how to deal with it so your welds hold up and look professional.
Here’s the pro-level tip I give every trainee before they touch stainless: “Clean like your paycheck depends on it—because in this trade, it does. A shiny weld that rusts is just expensive scrap. Do it right the first time.”
FAQ: Black Residue on Stainless Steel
Is the black residue on new stainless steel toxic?
Not in normal amounts—it’s mostly metal particles and oxides already in the alloy. Still, wash your hands after handling and don’t let it get into food prep surfaces without proper cleaning. For welding, the bigger issue is weld quality, not acute toxicity.
How do I remove black heat tint after TIG welding stainless?
Wire brush first, then apply pickling paste per instructions (usually 10-30 minutes), rinse thoroughly, and neutralize. For lighter tint, vinegar or citric acid solutions work in a pinch, but paste is more reliable for full restoration.
Can I just grind the black scale off and call it good?
Grinding helps appearance but leaves smeared metal and the chromium-depleted layer. Always follow with pickling or passivation for corrosion-critical work. Mechanical only is okay for non-exposed structural pieces.
Why does my stainless weld turn black even with good gas flow?
Usually excessive heat input, travel speed too slow, or dirty material. Dial back amperage, increase travel speed, and double-check cleaning. Tungsten contamination or wrong cup size can also contribute.
What’s the best way to prevent black residue issues on future jobs?
Start with clean material, dedicated stainless tools, proper settings, good shielding, and post-weld treatment. It becomes second nature after a few projects.


