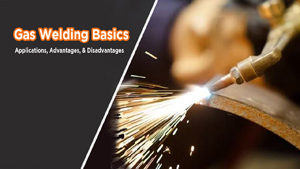
Standing in a busy shop with sparks bouncing off the floor, I remember gripping the torch a little tighter than usual. The flame didn’t behave the way I expected, and that sharp pop was enough to make me pause and rethink what I was doing.
Learning how to start an acetylene torch properly wasn’t something I mastered from a manual—it came from trial, error, and a healthy respect for what can go wrong.
That experience showed me why this step matters so much. A rushed or incorrect start can waste gas, damage your torch, or create a serious safety risk. When you understand the process and the reasons behind it, you get cleaner cuts, steadier flames, and far more confidence at the bench.
If you’ve ever felt unsure lighting the torch or wondered why the flame doesn’t sound right, you’re in the right place. Let me walk you through the method that actually works, step by step, just like I use in the shop.
Image by eventbrite
What Gear Do You Really Need for Oxy-Acetylene Work?
Before we even think about cracking open a valve, let’s talk equipment. You can’t just grab any old torch and expect reliable results. In my experience, skimping here leads to frustration and downtime. Start with the basics: oxygen and acetylene cylinders.
Oxygen comes in green tanks, pressurized up to 2,200 psi, while acetylene is in red ones, stabilized with acetone to prevent explosions—never go above 15 psi on that regulator, or you’re asking for trouble.
You’ll need regulators for each gas. These screw onto the cylinder valves and let you dial in precise pressures. I prefer two-stage regulators for steady flow, especially on long jobs where single-stage ones might drift.
Hoses are next—green for oxygen, red for acetylene, with left-hand threads on the fuel side to avoid mix-ups. Get T-grade hoses if you’re using propane sometimes; they’re versatile and hold up better in rough shops.
The torch handle is your control center. For versatility, go with a setup that accepts both welding and cutting tips. Welding tips are sized from 000 (tiny) to 10 (big jobs), while cutting tips range from 00 for thin sheet to 6 for thick plate.
Don’t forget flashback arrestors—they’re non-negotiable in my book, stopping flames from racing back into the hoses. Add a striker for ignition (never use a lighter; I’ve seen eyebrows singed that way), heavy leather gloves, shade 5 goggles, and a fire extinguisher rated for flammable gases.
In a typical US shop, you’ll find Victor or Harris brands dominating—they’re built tough and meet OSHA standards. If you’re a DIYer, check local suppliers like Airgas for rentals; pros might invest in a full kit for $300–$500.
Material-wise, ensure your setup matches your job: mild steel cuts easy with standard tips, but stainless needs special flux or tips to avoid oxidation issues.
Early on, I cheaped out on hoses and ended up with a leak that wasted half a tank. Now, I inspect everything before setup. It takes two minutes but saves hours.
Why Prioritizing Safety Feels Like Overkill Until It Saves Your Skin
Safety isn’t optional—it’s the foundation. Oxy-acetylene mixes are explosive if mishandled, and I’ve witnessed close calls that could’ve been disasters. Flashbacks happen when flames travel back through hoses, often from clogged tips or low pressures.
They can rupture regulators or worse. Always install flashback arrestors at the torch and regulators; test them yearly as per manufacturer specs.
PPE is your first line: Flame-resistant clothing, no synthetics that melt onto skin. Leather aprons protect from sparks, and closed-toe boots prevent hot slag burns. Goggles with the right shade block infrared rays—I’ve treated arc flash from ignoring this, and it’s no joke.
Work in ventilated areas; acetylene displaces oxygen, leading to asphyxiation in confined spaces. Follow OSHA’s 29 CFR 1910.253 for gas handling.
Chain cylinders upright to walls or carts—never lay acetylene flat, as it destabilizes the acetone mix. Keep them 20 feet from open flames or use barriers. Inspect for leaks with soapy water, not flames. If you smell garlic (acetylene’s odor), shut everything down and ventilate.
A real-world tip: On a repair job once, a newbie skipped the leak check and sparked a small fire. We extinguished it quick, but it reinforced why I always purge lines before lighting. Safety builds confidence, letting you focus on the weld quality.
Setting Up Your System: Avoiding the Headache of Leaky Connections
Setup is where most issues start, so let’s break it down. First, secure cylinders vertically. Crack the oxygen valve briefly to blow out dust—do this away from your face. For acetylene, open just 1/4 to 1/2 turn; it’s enough for flow and quick shutdown in emergencies.
Attach regulators: Oxygen on the green tank, acetylene on red. Hand-tighten first, then wrench snug—brass fittings strip easy. Back out pressure screws fully before opening cylinders to avoid surging.
Connect hoses: Green to oxygen regulator, red to acetylene. Ensure fittings match—acetylene’s notched nut prevents swaps. Run hoses straight, no kinks, and away from traffic.
Now, pressurize. Open oxygen cylinder fully (it’s double-seated, so crank it). Adjust regulator to 10–40 psi depending on tip. For acetylene, open cylinder slightly, set regulator to 5–10 psi—never exceed 15 psi to avoid acetone draw-out.
Purge lines: Open torch oxygen valve briefly (3–5 seconds per 25 feet of hose), then close. Repeat for acetylene. This clears air, preventing pops on ignition.
Leak test: Brush soapy water on all connections. Bubbles mean tighten or replace. I do this every setup; caught a faulty O-ring once that could’ve been bad.
For US machines like Smith or Goss, follow their charts—pressures vary by tip size. A table helps here:
| Tip Size (Cutting) | Oxygen PSI | Acetylene PSI | Steel Thickness |
|---|---|---|---|
| 00 | 20-25 | 3-5 | Up to 1/4″ |
| 1 | 25-35 | 3-6 | 1/4″ to 1/2″ |
| 2 | 30-40 | 4-7 | 1/2″ to 1″ |
| 3 | 35-45 | 5-8 | 1″ to 2″ |
| 4 | 40-50 | 6-9 | 2″ to 3″ |
Adjust for welding tips similarly, but lower pressures for finer control.
How Do You Actually Light the Thing Without a Bang?
Lighting is straightforward if setup’s solid. Stand to the side, not in front of regulators. Close both torch valves. Open acetylene valve 1/8 turn—hear the hiss? Strike the flint in front of the tip. A yellow, sooty flame appears; adjust acetylene until it’s 8–10 inches long, no smoke jumping off.
Now, crack the oxygen valve slowly. The flame turns blue with a white inner cone. Keep adding oxygen until the cone sharpens—no feather edges. That’s your neutral flame, ideal for most work: equal parts oxidizing and reducing.
For cutting, depress the lever to add cutting oxygen. Preheat metal to cherry red, then hit the lever for a clean shower of sparks.
Pro tip: If it pops on lighting, your tip’s dirty or pressures low. Clean with a tip cleaner—wire sets sized to tips prevent enlarging holes.
I lit my first torch in trade school, hands shaking, but practice makes it second nature. Always use a striker; matches invite burns.
Getting the Flame Right: Neutral, Carburizing, or Oxidizing?
Flame adjustment separates good welds from junk. Neutral is king—sharp blue cone, no hiss or feather. It heats without adding carbon or burning metal, perfect for welding mild steel or cutting.
Carburizing (acetylene-rich) has a feathery outer flame, adds carbon for harder welds like cast iron. Too much soot clogs tips.
Oxidizing (oxygen-rich) shortens the cone, hisses loud—great for brass brazing but burns steel, causing porosity.
To adjust: Start acetylene-only, add oxygen gradually. Watch the inner cone; for welding, match rod size (e.g., 1/8″ rod needs 1/8″ cone). Cutting? Cone length slightly over material thickness.
On a pipe repair, I dialed oxidizing by mistake—welds cracked under pressure. Switched to neutral, problem solved. Test on scrap always.
What Joint Prep and Material Tips Make Starting Easier?
Clean joints win. Remove rust, paint, scale with a grinder or wire brush—contaminants cause spatter and weak bonds. Bevel edges on thick stock (over 1/4″) for better penetration; 30–45 degrees works.
Material matters: Mild steel loves neutral flames, aluminum needs special flux and lower heat to avoid melting. Stainless? Use backing gas or flux to prevent sugaring.
Filler rods: Match base metal—E6010 for DC SMAW on dirty steel, but for oxy-acetylene, RG45 gas rods for mild steel. Diameter: 1/16″ for thin, 1/8″ for general.
Prep tip: Preheat thick pieces to reduce distortion. I’ve warped frames rushing this—slow heat evens it out.
Common Screw-Ups and How to Fix Them on the Fly
Beginners overpressure acetylene, risking flashbacks. Fix: Drop to 5 psi, relight. Pros forget purging, causing uneven flames—always vent.
Dirty tips pop; clean regularly. Wrong flame type? Oxidizing pits metal—grind out, reweld neutral.
Bad welds from poor start: Porosity means contaminated gas; check cylinders. Cracks? Too fast cooling—peen or post-heat.
I once had a flame die mid-cut—hose kink. Now, I route hoses clear. Learn from mistakes; they build expertise.
When Should You Fire Up the Acetylene Torch Over Other Options?
Oxy-acetylene shines for portability—no power needed. Great for field repairs, cutting thick steel, or heating bends.
Pros: Versatile (cut, weld, braze), cheap setup, precise heat control.
Cons: Slower than plasma for cutting, higher fire risk, gases cost more long-term.
Vs. MIG: Oxy’s better for thin or non-ferrous; MIG faster for production.
Use it for auto body, farm fixes, or art—I’ve bent rebar for sculptures with it.
Maintaining Your Setup: Keeping It Running Smooth
Inspect hoses monthly for cracks; replace every 5 years. Clean tips with proper files—oversize ruins patterns.
Store cylinders capped, upright. Drain regulators post-use to prevent corrosion.
Tip: Back out screws after shutdown—preserves diaphragms.
Advanced Tricks for Pro-Level Results
For rosesbud tips (heating), use higher acetylene for soft flames. Multi-torch setups speed production.
In cold shops, warm tanks slightly—cold gases flow poorly.
I’ve used it for shrink-fitting bearings—controlled heat beats hammers.
Wrapping Up
Mastering the start opens doors to efficient, safe work. You’ve got the complete guide to avoid pitfalls I learned the hard way. Remember, practice on scrap builds muscle memory. Always shut acetylene first on cooldown—prevents carbon buildup in tips.
FAQ
What If My Torch Pops or Backfires on Startup?
Pops usually mean a dirty tip or low acetylene pressure. Shut down, clean the tip with the right-sized wire, check pressures (5–7 psi acetylene), and relight. If it persists, inspect for leaks or replace flashback arrestors—they wear out.
How Much Pressure Do I Need for Cutting 1/2-Inch Steel?
For 1/2-inch mild steel, set acetylene at 4–6 psi and oxygen at 30–35 psi with a size 1 tip. Preheat thoroughly, then engage the cutting lever slowly. Too high oxygen scatters slag; too low stalls the cut.
Can I Use the Same Setup for Welding and Cutting?
Absolutely—swap tips on the handle. For welding, drop pressures (3–5 psi each gas) and use a neutral flame. Cutting needs higher oxygen for the jet. Just purge lines between switches to clear residue.
Why Does My Flame Look Sooty and Uneven?
Soot means too much acetylene or a clogged tip. Reduce acetylene flow until the flame cleans up, then add oxygen for neutral. Clean tips daily in heavy use—prevents carbon buildup that ruins your setup.
Is Oxy-Acetylene Safe for Beginners in a Home Garage?
Yes, with proper setup and respect. Ventilate well, keep flammables away, and start small. Follow steps religiously—I’ve trained dozens safely. If unsure, take a community college class; hands-on beats theory.