
If you’ve ever stared at a dripping water pipe and wondered how to weld a leaking water pipe to fix it for good, you’re in the right place. I’ve been in that spot—whether it’s a busted copper line in a basement or a steel pipe in an industrial setup—and welding can be a lifesaver. It’s not just about patching a hole; it’s about creating a strong, leak-proof repair that lasts.
Whether you’re a DIYer tackling a home plumbing issue, a hobbyist fixing farm equipment, or a pro handling commercial repairs, knowing how to weld a leaking water pipe can save you time, money, and a whole lot of frustration. Why does this matter? A leaking pipe can cause water loss, property damage, or even health hazards from mold or contamination.
Welding offers a permanent fix compared to temporary patches, but it’s tricky—water and welding don’t mix well, and the wrong approach can weaken the pipe or create new leaks. Safety, material compatibility, and weld integrity are critical to getting it right. I’ll walk you through the process, tools, and techniques I’ve used in shops and job sites across the USA, plus some hard-earned tips to avoid common mistakes. Let’s get that pipe sealed tight.
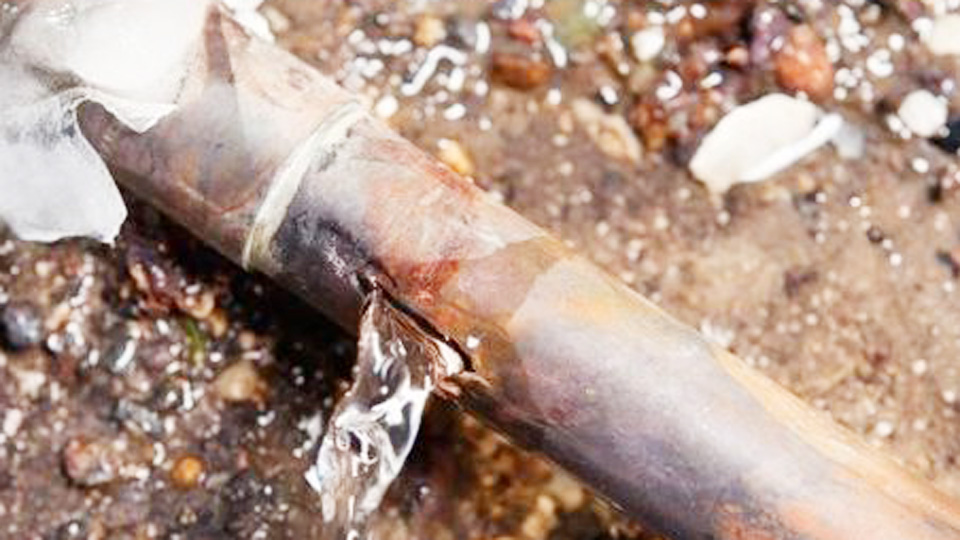
Image by cactusplumbingandair
Why Welding a Leaking Water Pipe Matters
A leaking water pipe isn’t just an annoyance—it can lead to skyrocketing water bills, structural damage, or even system failures in industrial settings. Welding a leaking pipe creates a durable, leak-proof repair that can handle pressure, temperature changes, and corrosion.
It’s especially important for pipes carrying potable water, where temporary fixes like tape or epoxy might not meet health and safety codes like those from ASME or NSF.
I once helped a buddy fix a leaking copper water line in his house. The patch held for years, saving him from ripping out walls for a full replacement. But welding pipes, especially those carrying water, comes with challenges—moisture can cause porosity, and improper prep can lead to weak welds.
Choosing the right welding process and materials ensures safety, longevity, and compliance with US plumbing standards.
Understanding Pipe Materials and Welding Challenges
Before diving into how to weld a leaking water pipe, you need to know what you’re working with. Common water pipe materials in the USA include copper, galvanized steel, stainless steel, and sometimes plastic (like PVC or CPVC). Each has unique properties that affect your welding approach.
- Copper: Common in residential plumbing, copper is soft, conducts heat quickly, and requires low-temperature welding to avoid burning through.
- Galvanized Steel: Found in older homes or industrial systems, it’s tougher but prone to zinc fumes, which are toxic if inhaled.
- Stainless Steel: Used in commercial or high-purity systems, it resists corrosion but needs precise heat control to maintain its properties.
- Plastic: PVC or CPVC pipes require solvent or hot gas welding, not traditional metal welding.
The biggest challenge? Water. Even a small amount of moisture inside or around the pipe can cause steam, leading to porous or brittle welds. I learned this the hard way when I tried welding a steel pipe without fully draining it—spatter and holes everywhere. Proper prep and the right welding method are key to overcoming this.
Best Welding Processes for Leaking Water Pipes
Several welding processes work for repairing leaking water pipes, but the best ones depend on the material and job conditions. Here’s a breakdown of the top methods I’ve used.
TIG Welding (GTAW)
TIG (Gas Tungsten Arc Welding) is my go-to for most water pipe repairs, especially copper and stainless steel. It’s precise, produces clean welds, and allows excellent control over heat input, which is critical for thin pipes.
How It Works: A non-consumable tungsten electrode creates an arc, shielded by argon gas, to melt the base metal and a filler rod (if needed). The welder controls the heat with a foot pedal, making it ideal for delicate work.
When to Use It: Best for copper and stainless steel pipes in residential or commercial plumbing. I’ve used TIG to repair a stainless steel water line in a brewery, where cleanliness and corrosion resistance were non-negotiable.
Practical Tips:
Prep Work: Clean the pipe with a wire brush or emery cloth to remove oxides and dirt. For copper, I use a dedicated stainless steel brush to avoid contamination.
Machine Settings: For 1/8” copper pipe, set your TIG welder to 50-80 amps (AC for copper, DCEN for stainless). Use a 1/16” tungsten electrode and pure argon shielding gas.
Common Mistake: Don’t skip drying the pipe. Even a drop of water can cause porosity. Use a torch or heat gun to dry the area before welding.
Equipment: A TIG welder like a Lincoln Square Wave or Miller Syncrowave, plus filler rods (e.g., ER70S-2 for steel, ERCu for copper).
Stick Welding (SMAW)
Stick welding, or Shielded Metal Arc Welding, is rugged and portable, making it great for outdoor or industrial repairs on steel pipes. It’s less precise than TIG but works well for thicker galvanized or mild steel pipes.
How It Works: An electrode (stick) coated in flux creates an arc that melts the rod and base metal, forming a weld. The flux shields the weld from air, but it produces slag that needs to be chipped off.
When to Use It: Ideal for galvanized steel or mild steel pipes in industrial settings or outdoor repairs, like fixing a leaking irrigation line. I’ve used stick welding to patch a steel water main on a farm, where portability was key.
Practical Tips:
Electrode Choice: Use E6011 or E7018 rods for steel pipes (3/32” or 1/8” diameter). E7018 is great for low-hydrogen welds on thicker pipes.
Machine Settings: Set your welder to 80-120 amps for a 1/8” rod on 1/4” steel pipe. Use DC reverse polarity (DCEP) for better penetration.
Mistake to Avoid: Watch out for zinc fumes from galvanized pipes—they’re toxic (metal fume fever). Weld in a well-ventilated area or use a fume extractor.
Equipment: A stick welder like a Hobart Stickmate or Lincoln Electric AC-225, plus a chipping hammer and wire brush.
Solvent Welding for Plastic Pipes
For plastic pipes like PVC or CPVC, solvent welding is the go-to method. It’s not traditional welding but chemically bonds the plastic for a leak-proof joint.
How It Works: A solvent (like MEK or THF) softens the plastic surfaces, which are pressed together to fuse as the solvent evaporates. It’s quick and doesn’t require heat.
When to Use It: Perfect for residential plumbing repairs, like fixing a leaking PVC water line under a sink. I fixed a cracked PVC pipe in my garage with solvent welding, and it’s held up for years.
Practical Tips:
- Prep Work: Sand the pipe and fitting lightly with 120-grit sandpaper and clean with alcohol. This ensures a strong bond.
- Application: Apply a thin layer of solvent with a brush, press the parts together, and hold for 30 seconds. Let it cure for 24 hours.
- Common Mistake: Don’t use too much solvent—it can weaken the plastic or create a messy joint.
Equipment: Solvent cement, applicator brush, and sandpaper—total cost under $20.
Comparing Welding Processes for Leaking Pipes
Here’s a table to help you choose the right method for your pipe repair, based on my experience.
| Welding Process | Best For | Pros | Cons | Cost |
|---|---|---|---|---|
| TIG (GTAW) | Copper, stainless steel | Precise, clean welds, great for thin pipes | Requires skill, expensive equipment | $500-$2,000 (welder) |
| Stick (SMAW) | Galvanized steel, mild steel | Portable, works on thicker pipes | Less precise, slag cleanup needed | $200-$800 (welder) |
| Solvent Welding | PVC, CPVC | Cheap, no heat required, easy for DIY | Limited to plastics, slower curing | Under $20 |
When to Choose Each: Use TIG for copper or stainless steel pipes requiring precision and hygiene. Stick welding is best for rugged steel pipe repairs in tough environments. Solvent welding is the go-to for plastic pipes in plumbing.
Step-by-Step Guide to Welding a Leaking Water Pipe
Here’s a detailed guide for TIG welding a copper water pipe, the most common scenario for residential repairs. Adjust for stick or solvent welding based on your material.
Step 1: Assess and Shut Off the Water
First, identify the pipe material (copper, steel, or plastic) and locate the leak. Turn off the water supply and drain the pipe completely. I once tried welding a copper pipe with a trickle of water still inside—big mistake. Steam caused porosity, and I had to start over.
Step 2: Prep the Pipe
Clean the area around the leak with a wire brush or emery cloth to remove dirt, oxides, or corrosion. For copper, polish until it’s shiny. If the leak is a pinhole, widen it slightly with a drill or file to ensure good filler penetration. For cracks, grind a V-groove along the crack for better weld strength.
Pro Tip: Dry the pipe inside and out with a heat gun or torch to eliminate moisture. Even a small amount can ruin your weld.
Step 3: Set Up Your Welder
For TIG welding copper, set your welder to AC mode (50-80 amps for 1/8” pipe) and use a 1/16” or 3/32” tungsten electrode (2% thoriated or lanthanated). Select a copper filler rod like ERCu, matching the pipe’s alloy. Use pure argon shielding gas at 15-20 CFH. Test your settings on a scrap piece of copper to ensure a smooth arc.
Step 4: Weld the Leak
Strike the arc by tapping the tungsten against the pipe, then hold a short arc length (about 1/16”). Use your foot pedal to control heat, starting low to avoid burning through. Feed the filler rod into the molten pool, moving steadily along the leak or crack. For pinholes, use a circular motion to fill the hole; for cracks, weave slightly to cover the groove.
Mistake to Avoid: Don’t overheat the pipe. Copper conducts heat fast, so too much heat can warp or burn through thin walls. If the metal turns dark red, ease off the pedal.
Step 5: Inspect and Test
Let the weld cool naturally—don’t quench with water, as it can cause cracks. Check the weld for smoothness, no porosity, and full coverage of the leak. Pressure-test the pipe by turning the water back on gradually and checking for drips. If it’s a potable water line, flush the system to remove any welding residue.
Pro Tip: For stainless steel, use DCEN polarity and ER308L or ER316L filler rods. For galvanized steel with stick welding, chip off slag and brush the weld clean before testing.
Practical Tips for Success
Here are some tips I’ve learned from years of pipe repairs:
- Drain Completely: Use compressed air or a shop vac to remove residual water from the pipe. Moisture is your enemy.
- Use Backing Gas: For stainless steel pipes, purge the inside with argon to prevent oxidation and ensure a clean weld.
- Test on Scrap: Practice your settings and technique on a similar piece of pipe to avoid ruining the actual repair.
- Check Codes: For potable water pipes, ensure your materials and process meet NSF/ANSI 61 standards. Copper and stainless welds usually comply, but check local codes.
- Repair vs. Replace: If the pipe is heavily corroded or has multiple leaks, consider replacing the section instead of welding. I’ve seen DIYers waste time patching a pipe that was beyond saving.
Safety Considerations
Welding a water pipe comes with risks, especially when water and heat are involved:
Ventilation: Weld in a well-ventilated area or use a fume extractor, especially for galvanized steel (zinc fumes are toxic) or solvent welding (chemical fumes).
PPE: Wear a welding helmet (shade 10-12 for TIG/stick), flame-resistant gloves, and a leather jacket. For solvent welding, use a mask and gloves to avoid chemical exposure.
Fire Safety: Keep a fire extinguisher nearby. Wet pipes can still have flammable debris or nearby materials that can ignite. I had a close call when a spark hit some dry rags—never again.
Electrical Safety: Ensure your welder is grounded, and avoid welding on wet surfaces to prevent shocks.
Pressure Safety: Double-check that the water is off and the pipe is depressurized before starting. A pressurized pipe can spray hot water or burst during welding.
Real-World Applications in the USA
Welding leaking water pipes is common across various settings:
Residential Plumbing: Fixing copper or PVC water lines in homes, like under sinks or in basements.
Industrial Systems: Repairing stainless steel pipes in breweries, food processing plants, or chemical facilities where hygiene and corrosion resistance are critical.
Agriculture: Patching galvanized steel irrigation pipes on farms or ranches, where portability and durability matter.
DIY Projects: Restoring old plumbing in workshops or fixing plastic pipes in sprinkler systems.
Commercial Buildings: Maintaining water lines in offices or hospitals, often requiring ASME-compliant welds.
For students, mastering pipe welding opens doors to plumbing, HVAC, or industrial maintenance careers, where AWS D1.1 or ASME Section IX certifications are often required.
Conclusion
Knowing how to weld a leaking water pipe equips you to tackle everything from a dripping copper line in your home to a steel water main on a job site. With TIG for precision, stick for rugged repairs, or solvent welding for plastics, you’ve got options to match the material and situation.
You now understand how to prep the pipe, choose the right process, set up your equipment, and avoid pitfalls like moisture or overheating. Whether you’re a DIYer saving on repair costs, a hobbyist fixing farm equipment, or a pro meeting code standards, you’re ready to create strong, leak-proof welds.
My final pro tip? Always keep a small propane torch or heat gun handy to dry out pipes before welding—it’s a small step that prevents big problems.
FAQ
Can you weld a water pipe with water in it?
No, welding a pipe with water inside is nearly impossible due to steam causing porosity or explosions. Drain the pipe completely and dry it with a heat gun or compressed air before welding.
What’s the best welding method for copper water pipes?
TIG welding is best for copper water pipes due to its precision and low heat input, which prevents burn-through. Use AC polarity, a copper filler rod (ERCu), and argon shielding gas.
Can you weld galvanized steel water pipes?
Yes, stick welding with E6011 or E7018 rods works well for galvanized steel pipes. Be cautious of zinc fumes—weld in a ventilated area or use a fume extractor to avoid metal fume fever.
Is solvent welding safe for potable water pipes?
Yes, if you use NSF/ANSI 61-approved solvent cement for PVC or CPVC pipes. Ensure proper curing (24 hours) and flush the system to remove any residue before use.
How do I know if I should weld or replace a leaking pipe?
Weld small leaks or cracks in otherwise sound pipes. If the pipe is heavily corroded or has multiple leaks, replace the section to avoid repeated repairs. Check for thinning or pitting around the leak.


