
I still remember the first time I rushed a paint job on a welded bracket—skipped proper prep, slapped on some primer, and a week later, the paint was flaking like old rust. That’s when I learned: if you don’t choose the right sandpaper for metal before painting, you’re just setting yourself up for rework. Whether you’re cleaning up a TIG-welded stainless panel, prepping mild steel after MIG welding, or smoothing out edges before applying filler rods, proper surface prep is key.
Too coarse, and you’ll gouge the metal; too fine, and the paint won’t stick. And when you’re working with different metal thicknesses, joint types, or managing arc control for a clean weld, finishing the job right means knowing how to treat that surface. In this guide, I’ll walk you through what grit to use, when to use it, and how to get a pro-level finish every time—so your paint lasts as long as your welds.
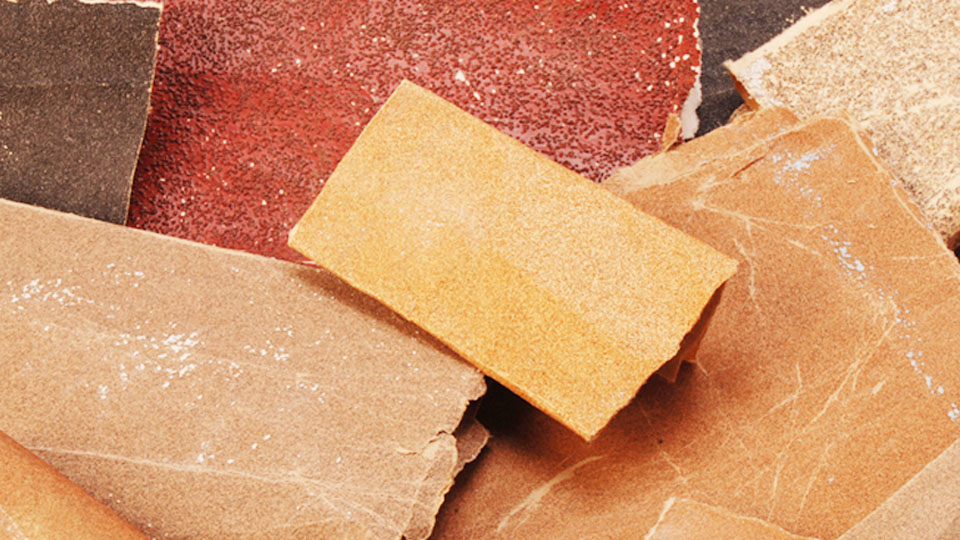
Image by inspirationspaint
Why Sanding Metal Before Painting Matters
Sanding metal before painting is critical for a durable, professional finish. It removes rust, mill scale, and contaminants that prevent paint from sticking. It also creates a slightly rough surface for better paint adhesion, which is especially important for welded projects where slag or spatter can ruin the finish. In industries like automotive or marine, proper prep ensures corrosion resistance, while for DIYers, it saves money by avoiding repaints.
I learned this lesson early on when I rushed a paint job on a welded steel gate. I skipped proper sanding, and the paint peeled within months due to rust under the surface. Proper sanding would’ve saved me hours of rework. Plus, for projects meeting AWS or ASTM standards, surface prep is often a requirement to ensure durability and safety.
Understanding Sandpaper Types for Metal
Sandpaper isn’t just sand on paper—it’s a tool with specific materials and grits designed for different jobs. For metal, you need sandpaper that can handle tough surfaces like steel, aluminum, or stainless without clogging or wearing out. Here’s what I’ve found works best.
Aluminum Oxide Sandpaper
Aluminum oxide is the workhorse for metal prep. It’s durable, affordable, and cuts through steel, aluminum, and other metals effectively. It’s great for removing rust, smoothing welds, and prepping for paint.
When to Use It: Ideal for general-purpose sanding on steel or aluminum, like prepping a car panel or a welded frame. I’ve used it to smooth out MIG welds on a trailer hitch, and it holds up well.
Practical Tip: Choose open-coat aluminum oxide for heavy rust or mill scale—it resists clogging better than closed-coat.
Silicon Carbide Sandpaper
Silicon carbide is sharper and harder than aluminum oxide, making it great for finishing or working on harder metals like stainless steel or titanium. It’s often used wet to reduce dust and achieve a smoother finish.
When to Use It: Best for final prep on stainless or aluminum where a polished look is needed before painting. I used wet silicon carbide paper to prep a stainless exhaust before a high-temp paint job, and the finish was mirror-smooth.
Practical Tip: Use wet/dry silicon carbide sheets with water or oil to keep dust down and extend the paper’s life.
Zirconia Alumina Sandpaper
Zirconia alumina is tougher and longer-lasting than aluminum oxide, designed for aggressive material removal. It’s great for grinding down heavy welds or thick rust on steel.
When to Use It: Perfect for heavy-duty prep on welded steel structures, like farm equipment or industrial tanks. I’ve used zirconia belts on a grinder to clean up thick MIG welds before painting.
Practical Tip: Pair zirconia with a belt sander or angle grinder for faster material removal on large surfaces.
Ceramic Sandpaper
Ceramic sandpaper is premium, with self-sharpening grains that last longer and cut faster. It’s pricier but worth it for high-volume or professional jobs.
When to Use It: Great for large-scale projects or hard metals like stainless steel. I used ceramic discs to prep a batch of steel brackets for a construction job, and they outlasted aluminum oxide by a mile.
Practical Tip: Save ceramic for power tools like orbital sanders—it’s overkill for hand sanding small projects.
Choosing the Right Grit for Metal Prep
Grit size determines how coarse or fine the sandpaper is, and picking the right one depends on the job. Here’s my go-to guide for metal prep before painting, based on years of trial and error.
Coarse Grits (40-80): Use for removing heavy rust, mill scale, or rough welds. I start with 60-grit aluminum oxide to strip rust off old steel pipes before painting.
Medium Grits (120-180): Ideal for smoothing welds or removing light rust. I used 120-grit to prep a welded aluminum boat hull, creating a good surface for primer.
Fine Grits (220-400): Perfect for final prep, creating a smooth surface for paint adhesion. I use 320-grit silicon carbide (wet) for stainless steel to get a clean, polished finish.
Very Fine Grits (600+): Rarely needed for painting but useful for ultra-smooth finishes on decorative pieces. I’ve used 600-grit wet for aluminum panels before a clear coat.
Common Mistake: Don’t jump from coarse to fine grits too quickly. Skipping steps (like going from 80 to 320) leaves scratches that show through the paint. Progress gradually for a flawless finish.
Tools for Sanding Metal
The right tools make sanding faster and easier. Here’s what I keep in my shop:
- Hand Sanding: Sanding blocks or sheets for small areas or intricate welds. Use a block to keep pressure even and avoid uneven surfaces.
- Orbital Sander: Great for flat surfaces like steel plates. I use a 5” orbital sander with 120-220 grit discs for quick prep.
- Angle Grinder: Perfect for heavy material removal with zirconia or flap discs. I’ve used a 4.5” grinder with 60-grit zirconia to clean up thick welds.
- Belt Sander: Ideal for large, flat surfaces like steel beams. Pair with zirconia belts for aggressive sanding.
- Wire Brush: Removes loose rust or slag before sanding. I use a stainless steel brush for aluminum or stainless to avoid contamination.
Mistake to Avoid: Don’t use a steel wire brush on aluminum—it leaves particles that cause galvanic corrosion. Always match the brush to the metal.
Step-by-Step Guide to Sanding Metal Before Painting
Here’s how I prep metal for painting, based on countless projects in the shop. This guide focuses on steel, but I’ll note adjustments for aluminum or stainless.
Step 1: Assess the Surface
Check the metal for rust, mill scale, welds, or old paint. For heavy rust or scale, start with coarse sandpaper or a wire brush. For smooth surfaces, you can start with a medium grit. I once tried painting a steel toolbox without checking for mill scale—the paint peeled in weeks. Always inspect first.
Step 2: Clean the Metal
Remove dirt, grease, or oil with a degreaser or isopropyl alcohol. I use a shop rag with acetone to clean steel before sanding—it ensures the sandpaper doesn’t clog. For aluminum or stainless, avoid harsh chemicals that can etch the surface; soap and water work fine.
Step 3: Remove Rust or Scale
For heavy rust or mill scale, use a 40-60 grit aluminum oxide or zirconia disc on an angle grinder. Work in small sections, keeping the grinder moving to avoid gouging. I used a 60-grit flap disc to strip rust off a steel gate, and it cut through like butter.
Pro Tip: For light rust, a wire brush on a drill can save time before sanding. Just don’t overdo it on soft metals like aluminum.
Step 4: Smooth Welds or Imperfections
If the metal has welds or rough spots, use 80-120 grit aluminum oxide on an orbital sander or by hand. For heavy welds, start with a 60-grit zirconia flap disc on a grinder. I smoothed MIG welds on a steel trailer frame with 80-grit, then moved to 120-grit for a uniform surface.
Mistake to Avoid: Don’t sand too aggressively on thin metal—it can weaken the structure. Use light pressure and check your progress often.
Step 5: Final Prep for Painting
Finish with 220-320 grit aluminum oxide or silicon carbide (wet for stainless or aluminum) to create a smooth, paint-ready surface. Sand in a circular motion by hand or with an orbital sander to avoid linear scratches. I use 320-grit wet on aluminum panels for a glass-smooth finish before primer.
Pro Tip: Wipe the surface with a tack cloth after sanding to remove dust. Any leftover particles can ruin your paint job.
Step 6: Inspect and Clean Again
Check the surface for missed spots or scratches. It should feel smooth and look uniform, with no shiny or rusty patches. Clean with alcohol or a degreaser to remove sanding dust. I once painted a steel bracket without a final wipe, and dust specks showed through the topcoat—lesson learned.
Step 7: Apply Primer
Apply a metal-specific primer (like self-etching primer for aluminum or rust-inhibitive primer for steel) immediately after sanding to prevent flash rust. I use a spray primer for even coverage, followed by light sanding with 400-grit if needed before the topcoat.
Comparing Sandpaper Types for Metal Prep
Here’s a table to help you choose the right sandpaper, based on my experience.
| Sandpaper Type | Best For | Pros | Cons | Cost |
|---|---|---|---|---|
| Aluminum Oxide | Steel, aluminum, general prep | Durable, affordable, versatile | Clogs on heavy rust | $5-$10/pack |
| Silicon Carbide | Stainless, aluminum, final prep | Sharp, great for wet sanding | Less durable for heavy work | $6-$12/pack |
| Zirconia Alumina | Heavy welds, thick steel | Long-lasting, aggressive | Overkill for light prep | $10-$20/pack |
| Ceramic | Stainless, high-volume jobs | Fast-cutting, self-sharpening | Expensive | $15-$30/pack |
When to Choose Each: Aluminum oxide is your go-to for most steel or aluminum projects. Silicon carbide shines for final prep on stainless or aluminum. Zirconia and ceramic are best for heavy-duty or professional jobs where speed and durability matter.
Practical Tips for Success
Here are some tips I’ve learned from years of sanding metal:
Match the Metal: Use stainless steel brushes or non-ferrous sandpaper for aluminum to avoid corrosion. I once used a steel brush on aluminum, and rust spots appeared weeks later.
Work Progressively: Start coarse (40-80 grit) and move to finer grits (120-320) to avoid scratches. Skipping grits saves time but ruins the finish.
Control Dust: Wet sand with silicon carbide for stainless or aluminum to reduce dust and improve finish. Wear a mask for dry sanding steel.
Check Your Work: Run your hand over the surface to feel for rough spots. A smooth surface ensures better paint adhesion.
Store Sandpaper Properly: Keep sandpaper in a dry, sealed container to prevent moisture damage, especially for wet/dry sheets.
Safety Considerations
Sanding metal is straightforward but has risks:
- Dust Protection: Wear a dust mask or respirator, especially when dry sanding steel. Metal dust can irritate lungs, and I’ve coughed up a storm after skipping this.
- Eye Protection: Use safety glasses to protect against flying particles. A stray rust fleck once got in my eye—not fun.
- Gloves: Wear work gloves to avoid cuts from sharp metal edges or sandpaper. I’ve nicked my hands on jagged welds before.
- Fire Safety: Sanding near flammable materials can create sparks, especially with a grinder. Keep a fire extinguisher nearby and clear the area.
- Tool Safety: Ensure power tools are grounded, and check sandpaper discs for wear to avoid them flying off during use.
Real-World Applications in the USA
Sanding metal before painting is critical across various projects:
- Automotive: Prepping car panels or motorcycle tanks for paint after welding. I sanded a steel fender with 120-320 grit for a custom paint job.
- Industrial: Preparing welded steel structures like railings or tanks for rust-resistant coatings, often to meet ASTM standards.
- Marine: Sanding aluminum or stainless boat parts to prevent corrosion before painting. I prepped a stainless railing with wet 320-grit for a marine-grade finish.
- DIY: Restoring old tools, furniture, or farm equipment. I sanded a rusty steel toolbox with 60-220 grit for a fresh coat of spray paint.
- Fabrication: Prepping welded sculptures or custom metalwork for decorative finishes, common in hobbyist shops.
For students, mastering surface prep is a key skill for welding certifications like AWS D1.1, where paint adhesion and corrosion resistance are inspected.
Conclusion
Knowing what sandpaper to use on metal before painting sets you up for a professional, long-lasting finish. With aluminum oxide for general prep, silicon carbide for fine finishing, or zirconia for heavy welds, you’ve got options to match any metal or project.
You now understand how to choose the right grit, prep the surface, and avoid mistakes like skipping grits or poor cleaning. Whether you’re a DIYer painting a welded gate, a hobbyist restoring a car, or a pro meeting industry standards, you’re ready to sand like a pro and make that paint job shine.
FAQ
What grit sandpaper is best for metal before painting?
Start with 40-80 grit for rust or welds, move to 120-180 grit for smoothing, and finish with 220-320 grit for paint adhesion. Progress gradually to avoid scratches.
Can I use regular sandpaper on metal?
Yes, but aluminum oxide or silicon carbide sandpaper is best for metal. Regular sandpaper (like garnet) wears out quickly and clogs on tough surfaces.
Should I wet sand metal before painting?
Wet sanding with 220-400 grit silicon carbide is great for stainless steel or aluminum to reduce dust and get a smooth finish. Dry sanding works fine for steel.
How do I remove rust before painting metal?
Use 40-60 grit aluminum oxide or zirconia sandpaper with a grinder or wire brush for heavy rust. Follow with 120-220 grit for a smooth, paint-ready surface.
Do I need to prime metal after sanding?
Yes, apply a metal-specific primer (self-etching for aluminum, rust-inhibitive for steel) right after sanding to prevent flash rust and improve paint adhesion.


