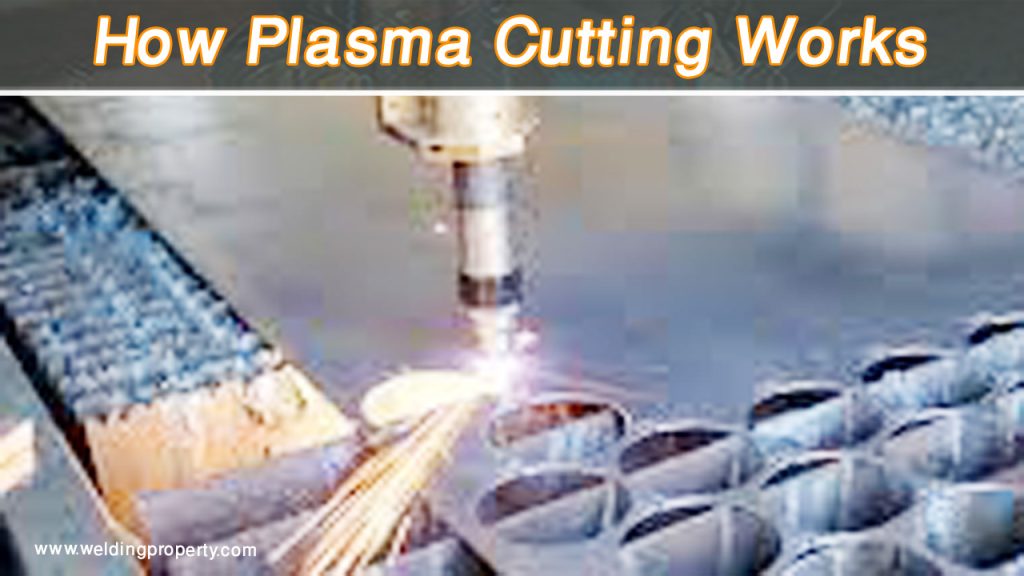
I’ve burned through my fair share of scrap metal trying to get clean, repeatable cuts with my plasma cutter. At first, every piece looked a little off—one curve too wide, another too sharp, and somehow the parts never fit quite right.
That’s when I realized the secret wasn’t more practice; it was having the right patterns for plasma cutter work. Once I started using proper templates and learning how to design my own, my cuts got cleaner, faster, and way more consistent.
If you’ve ever fought with jagged edges or uneven designs, you know how frustrating it can be to waste good sheet metal. The right pattern saves you time, reduces mistakes, and makes even complex shapes look professional.
In this guide, I’ll share the exact steps and tips I’ve learned to create reliable plasma cutter patterns — from choosing materials to laying out clean lines. Let’s fire up the torch and cut smarter, not harder.

Image by txrxlabs
What Are Patterns for Plasma Cutter and Why Bother?
You’re prepping a mild steel plate for a custom bracket, but instead of straight edges, you want curves or cutouts that fit perfectly. That’s plasma cutter patterns in action—essentially templates or guides that direct your torch along a predefined path.
They can be as simple as a cardboard outline or as complex as digital DXF files loaded into CNC software. The plasma arc follows the pattern, melting through the metal with pinpoint accuracy, leaving you with clean edges ready for welding or finishing.
In my early days as a fab apprentice in a Texas shop, I wasted half a day freehanding a logo for a ranch gate. The lines wobbled, dross built up everywhere, and the boss wasn’t thrilled. Switching to patterns? Night and day. They work by providing a physical or visual barrier—think stencils clamped to your workpiece—that your torch tip rides along.
The “why” is straightforward: precision. Without them, you’re gambling on even cuts, especially on thicker stock where heat buildup warps things fast. For hobbyists, patterns turn basic plasma work into art; for pros, they boost productivity on repetitive jobs like ornamental railings.
The Basics of Plasma Cutting Patterns
At their core, these patterns are just outlines transferred to your metal. You sketch or print a design, stick it down with tape or magnets, and let the plasma do the rest.
Common materials? Cardboard for quick jobs, plywood or phenolic for reusable stencils that handle the heat better. The key is accounting for your torch tip’s radius—always offset the pattern outward by that amount so your final cut matches the design.
I’ve seen guys overlook this and end up with undersized holes that don’t fit their bolts.
Pro tip: Measure your tip diameter (usually 1/16 to 1/8 inch) and add twice that to curves in your pattern. It’s a small tweak that saves big headaches.
Benefits for Welders, From Garage to Jobsite
For DIY welders like you fixing up an old trailer, patterns cut material waste by 20-30%—no more jagged scraps piling up. Hobbyists love how they enable intricate stuff like personalized nameplates without a steady hand. Students in welding programs? Patterns build confidence fast, teaching torch control before you go rogue.
And industry workers? Think repeatable parts for structural fab—gates, grilles, even HVAC ducting flanges. Cost efficiency shines here: Less consumable wear, fewer rejects, and welds that hold under AWS codes because your prep is spot-on.
One time, on a rush job for a local brewery, patterns let us knock out 50 identical tap handles in half the time. No bevels, no blowback—just clean kerf widths ready for TIG filler. It’s that edge that keeps clients coming back.
Choosing the Right Plasma Cutter for Pattern Work
Not all plasma rigs are created equal, especially when you’re chasing those crisp pattern lines. I’ve burned through a few cheap imports that sputtered on anything over 1/4-inch steel, but investing in a solid machine pays off quick.
Look for output amps that match your typical stock—20-40 amps for thin sheet, 60+ for beefier plates. Cut rating (clean cut at 10 IPM) is your benchmark; for patterns, prioritize pierce capacity to start cuts cleanly without edge starts.
Handheld units like the Hypertherm Powermax or Miller Spectrum series are gold for us non-CNC folks. They’re portable, dual-voltage for job sites, and have pilot arcs that ignite without touching down—huge for tight pattern curves.
Key Features to Look For in a Plasma Cutter
Duty cycle matters more than you think; at 40% on 30 amps, you won’t overheat mid-project. Standoff controls or drag shields keep your tip consistent, preventing double-arcing that chews consumables. Air flow? Non-touch pilot start is a must for patterns—less contact means smoother rides along stencils.
Common mistake: Underrating your compressor. Plasma guzzles CFM—aim for 4-5 at 90 PSI. I once dragged a 2-gallon pancake to a remote site; it starved the torch every 10 minutes. Fix? Upgrade to a 60-gallon shop beast.
Recommended Machines for US Shops and Garages
| Machine | Amps | Max Cut Thickness | Best For | Pros | Cons |
|---|---|---|---|---|---|
| Miller Spectrum 375 X-TREME | 30 | 3/8″ clean | Beginners/DIY | Lightweight (19 lbs), wind-resistant arc, affordable consumables | Limited on thick plate |
| Hypertherm Powermax 45 | 45 | 1/2″ clean | Hobbyists/Pros | Fast cuts, easy torch swap, CNC-ready | Higher upfront cost |
| Lincoln Electric Tomahawk 1000 | 60 | 5/8″ clean | Heavy fab | Multi-process (stick too), rugged build | Bulkier for mobile work |
These are battle-tested in American shops—Miller for portability, Hypertherm for speed. Start with the 375 if you’re under 1/4-inch most days; it’ll handle 90% of pattern jobs without breaking a sweat.
Essential Tools and Materials Beyond the Cutter
Your plasma’s only as good as your setup. Beyond the basics (compressor, leads), grab clamps—C-style for securing stencils—and a magnetic straight edge for guides. Markers? Soapstone for heat resistance; it vanishes under the arc but shows true lines.
For patterns, phenolic sheets (1/4-inch thick) are reusable gold—cut one, and it’s good for dozens of runs. Safety gear: Leather sleeves, auto-darkening hood (shade 10+), and gloves rated for plasma flash. Don’t skimp; I’ve got a scar from a stray spark ignoring that.
Prep work tip: Clean your metal with a grinder or acetone—paint or oil causes erratic arcs. And always test on scrap; dial in amps and speed for your pattern’s detail level.
How to Design and Transfer Patterns to Your Metal
Designing patterns starts simple: Sketch on paper, scan, and tweak in free software like Inkscape. For transfers, tape your printout and trace with carbon paper—old-school but foolproof. I do this for quick yard art; it’s faster than digital for one-offs.
Digital? Export as DXF for CNC if you upgrade, but for handheld, print at scale. Scale tip: 1:1 on plotter paper, then offset for tip radius.
Simple Hand-Drawn Methods for Quick Projects
Grab cardboard, draw your shape with a utility knife, and pin it down. For curves, use string and pins like a compass. Built a kid’s treehouse fort with leaf patterns this way—rough but charming, and zero software fuss.
Mistake to avoid: Flimsy templates slip. Beef ’em up with hot glue edges for torch guidance.
Using Software for Custom Designs
Inkscape or Fusion 360 let you nest patterns to minimize waste. Export SVG or DXF, print, and transfer via vinyl stickers for intricate stuff. Pro know-how: Layer paths for multi-thickness cuts—outer rough, inner fine.
One shop hack: Use laser-cut acrylic stencils for high-volume; they last seasons outdoors.
Top Beginner-Friendly Patterns for Plasma Cutter
These starters build your skills without overwhelming. I’ll walk you through each, with a simple diagram to visualize. Scale ’em up on your printer, and remember: Start slow, 10-15 IPM, 20-30 amps on 16-gauge steel.
Cutting Perfect Circles with Plasma Patterns
Circles are your gateway drug—wheels, holes, medallions. Why use? Uniform cuts for brackets or art rounds. How: Draw oversized (add tip diameter x2), clamp template, pierce outside, roll in perpendicular.
Settings: 25 amps, 3/4-inch standoff. Tip: Use a circle guide attachment; it spins your torch like a protractor. Mistake: Rushing the pierce—angle in slow to avoid blowout.
Common fix: If edges bevel, grind post-cut with a flap disc at 45 degrees.
Here’s a basic circle pattern to trace:
In practice, I cut dozens for a wagon wheel gate—clean as glass after a quick wire brush.
Star Patterns: Adding Flair to Your Cuts
Stars scream “custom”—think holiday decor or truck emblems. They work because straight lines forgive minor wobbles, but points need steady hands. When: For accents on furniture or signs. Prep: Five-point template from poster board, trace, cut inward from points.
Settings: 30 amps, drag shield on. Why: Shields protect tip on stops/starts. First star I cut for a vet memorial was lopsided—lesson learned: Rehearse motion without arc.
Pro tip: Stitch cut points (short bursts) to cool metal, preventing warp on thin stock.
Visualize this classic five-point star:
Nailed it on a bar sign once; customers still rave.
Heart Shapes: Romantic and Functional Designs
Hearts aren’t just Valentine’s—think valve covers or jewelry blanks. How it works: Curved path tests your curve control; use a flexible template for smooth arcs. Why: Adds personality to gifts or shop swag. Transfer: Vinyl cutout for precision.
Settings: 20 amps low-speed for detail. Mistake: Overheating lobes—pause and air-blast cool.
Fix: Post-cut anneal with heat gun if warping. Personal story: Cut a heart plaque for my wife’s anniversary; sandblasted it matte—still hangs in the kitchen.
Simple heart outline:
Easy win for beginners.
Basic Animal Silhouettes: Like a Simple Eagle
Eagles symbolize strength—perfect for patriotic signs or rifle racks. Start simple: Blocky outline reduces fine lines. When: Outdoor art or shop logos. Prep: Print large, foam-board template for rigidity.
Settings: 35 amps, perpendicular torch. Tip: Cut wings last to avoid distortion. Common error: Fuzzy feathers—sharpen with Dremel post-cut.
I etched an eagle on a tailgate insert; took two tries, but the detail popped after grinding.
Here’s a basic eagle wingspan sketch (simplified triangle base for body):
Scale it for bigger projects.
Custom Lettering Patterns for Personalized Touches
Letters for names, quotes—endless. Why: Makes generics unique. How: Font templates from Cricut cuts, trace bold sans-serif for ease.
Settings: 25 amps, slow on serifs. Botched a “WELD ON” sign with thin strokes—now I thicken ’em 20%.
Tip: Kern letters (space evenly) pre-cut.
Example ‘A’:
A
Great for mailbox toppers.
Advanced Patterns and Project Ideas for Plasma Enthusiasts
Once basics click, level up to elk heads for cabin decor or gear motifs for mechanic shops. Projects? Yard art like bear clocks (cut face, weld hands), gates with intertwined vines, or furniture legs with hoof prints. Pros: Scalable, weldable accents. Cons: More dross on details—budget grinder time.
Comparison: Handheld patterns vs. CNC—hand for one-offs (cheap, creative), CNC for batches (precise, but $5k+ setup).
Idea: Plasma-cut elk silhouette clock—pattern nests four per sheet, minimizing waste. I built one for a hunting buddy; ticks like a dream.
Step-by-Step Guide: Cutting Patterns with Your Plasma Cutter
Setting Up Your Workspace for Success
Clear a ventilated bench—fumes kill. Clamp stock elevated on angle iron for drop clearance. Ground clean, compressor primed. Template down, double-check offset.
Mastering Cutting Techniques for Clean Lines
Pierce angled outside, roll perp, trace steady. Speed: Match material—faster thin, slower thick. Brace hand, exhale relaxed.
Finishing and Welding Your Pattern Cuts
Knock dross with chipping hammer, grind bevels. For welding, match filler to base (ER70S-6 for mild). Prep bevels if stacking.
Common Mistakes in Plasma Pattern Cutting and How to Fix Them
Wobbly lines? Grip fatigue—take breaks. Excessive dross? Too low amps—bump 5-10. Warped parts? Stitch cuts, cool between.
My fix-all: Scrap practice sheet before prime time.
Safety First: Protecting Yourself and Your Shop
Gloves, sleeves, glasses—non-negotiable. Fire extinguisher nearby; plasma sparks fly. Ground faults? Test leads weekly.
In 20 years, one close call with fumes taught me: Shop vac with HEPA for cleanup.
Wrapping It Up: Cut Confidently with Plasma Patterns
From circle basics to eagle epics, patterns for plasma cutter transform your rig from tool to artist. You’re now armed with setups, fixes, and ideas to tackle any project, saving time and scrap while cranking out pro-level work.
Whether DIY-ing a heart fire pit or fabbing elk gates, trust the pattern, steady your hand, and watch the magic. You’re more prepared than ever to create metal that turns heads and holds strong. Always cut a test on the same batch metal—variations sneak up.
FAQs
What Are the Easiest Patterns for a Beginner Plasma Cutter User?
Start with straight lines and circles—use cardboard templates and a 20-amp setting on 16-gauge steel. Practice on scrap to build torch control before curves.
How Do I Transfer a Pattern to Metal for Plasma Cutting?
Print or draw your design, offset for tip radius, tape or clamp a sturdy template (cardboard or phenolic), and trace with soapstone if needed. Simple and effective for handheld work.
Can I Use Free DXF Files for Handheld Plasma Cutting?
Absolutely—download from sites like CNC shops, print at scale, and cut manually. They’re great for inspiration, but adjust for your tip size to avoid undersized results.
What’s the Best Thickness for Plasma Pattern Projects?
1/8 to 1/4-inch mild steel hits the sweet spot for clean cuts without excessive heat. Thicker needs higher amps and slower speeds; test always.
How Do I Avoid Beveled Edges When Cutting Patterns?
Keep your torch perpendicular to the plate, use a standoff guide, and cut in one pass. If bevels appear, grind them flat before welding for strong joints.