Choosing between stick welding and MIG isn’t always as simple as grabbing the machine that’s closest. I’ve been on jobs where MIG made everything fast and clean, and others where the only thing that would burn through rust, wind, or thick steel was a trusty stick rod. After bouncing between both processes for years, I learned that each one shines in completely different situations.
Stick brings rugged reliability, deep penetration, and the ability to weld almost anywhere. MIG gives smoother beads, faster production, and far less cleanup. The trick is knowing which advantages matter most for the metal, the environment, and the kind of weld you need.
Let’s walk through the scenarios where stick welding is the better choice—and the moments where MIG absolutely takes the win.
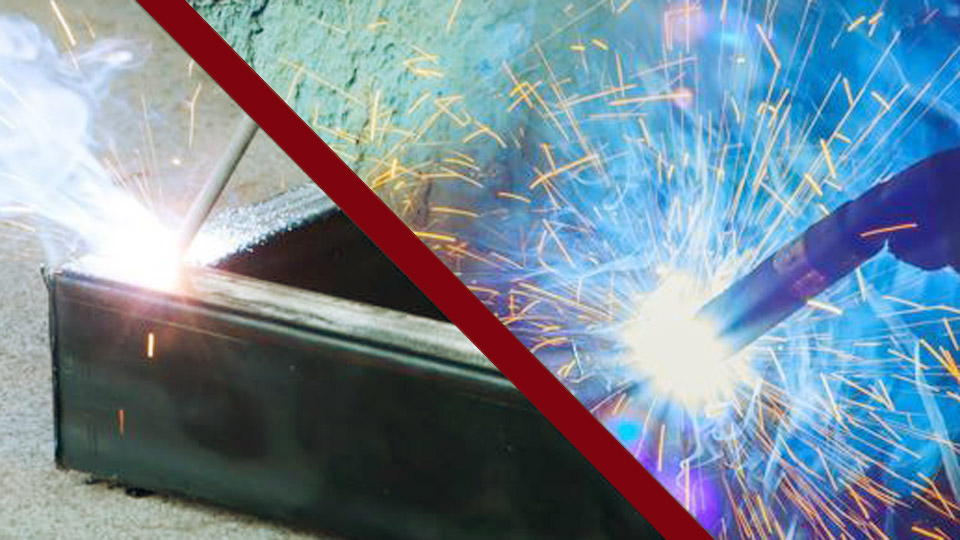
Image by basicwelding
Understanding Stick Welding Basics
Stick welding is that reliable old friend in the welding world – simple, tough, and ready for just about any rough job. It’s a manual arc welding process where you use a consumable electrode coated in flux to create the weld. The electrode melts into the joint, and the flux creates a shielding gas to protect the weld pool from contaminants like oxygen and nitrogen in the air.
I remember my first time using stick on a rusty gate repair out in the field. No power outlets nearby, just a generator humming away. That’s where stick shines – it’s portable and doesn’t need a separate gas cylinder. You strike an arc by touching the electrode to the metal, then maintain a short arc length as it burns down.
For beginners, it takes practice to avoid sticking the rod or creating slag inclusions, but once you get the hang of it, it’s forgiving on dirty or painted surfaces.
When deciding on stick, think about outdoor work or thick materials. It’s ideal for carbon steel, stainless, and even cast iron up to about 1/2 inch thick. Set your machine to DC positive for deeper penetration or AC for less blow-through on thinner stuff. Always chip away the slag after each pass to inspect your bead – that’s a tip that saved me from redoing a whole pipeline section once.
What Makes MIG Welding Stand Out
MIG welding feels like the smooth operator compared to stick – faster, cleaner, and easier on the eyes with less spatter. It uses a continuous wire electrode fed through a gun, along with a shielding gas like argon or CO2 to protect the weld. The gun has a trigger that controls the wire feed and gas flow, making it semi-automatic and great for long runs without stopping.
Picture this: I was in a fabrication shop building truck frames, and MIG let me lay down beads quickly without constantly changing rods. It’s perfect for thin sheet metal, aluminum, or stainless where you need a neat appearance. The process works by creating an arc between the wire and the workpiece, melting both to form the joint. No slag to clean up afterward, which speeds things up on production lines.
For hobbyists or pros, MIG’s versatility comes from adjustable settings. Crank up the voltage for more heat on thicker stock, or dial back the wire speed to avoid burning through gauge metal. One common pitfall is poor gas coverage leading to porosity – always check your flow rate at around 20-25 CFH for indoor work. It’s why I always recommend starting with a good regulator and keeping your nozzle clean.
Key Differences Between Stick and MIG Welding
Diving deeper, the core differences boil down to equipment, technique, and application. Stick requires just a power source and electrodes, making it cheaper to start with – think under $300 for a basic setup. MIG needs a wire feeder, gas tank, and more accessories, pushing costs up to $500 or more, but it pays off in speed.
Technique-wise, stick demands a steady hand for arc control, while MIG’s gun does half the work with its continuous feed. I’ve switched mid-project from stick to MIG when dealing with clean indoor steel, just to cut my time in half.
Stick handles wind and contaminants better since the flux provides its own shield, whereas MIG’s gas can blow away outdoors, causing defects.
Material compatibility is huge too. Stick excels on rusty or thick ferrous metals, but MIG handles non-ferrous like aluminum with the right wire and gas mix. For weld quality, MIG gives smoother beads with less cleanup, ideal for visible joints, while stick’s penetration suits structural work. Always match your polarity: DCEP for MIG on most metals, and it varies for stick.
When Should You Choose Stick Welding
Stick welding steps up when conditions are less than ideal – think construction sites, repairs in the rain, or working with heavy plate. If you’re fixing a fence post on a windy farm, stick’s flux coating means no gas to disrupt, keeping your arc stable. It’s my go-to for outdoor structural steel or pipeline work where portability matters.
For thicker materials over 1/8 inch, stick provides deep penetration without needing multiple passes. I’ve used it on cast iron engine blocks, where the nickel rods prevent cracking. Beginners might struggle with arc strikes, but practice on scrap to get that drag angle right – about 15-20 degrees.
Cost efficiency is another win. Electrodes are cheap, around $10 per pound, and you don’t buy gas. In shop settings, it’s great for vertical or overhead positions since the slag supports the pool. Just remember to preheat thicker metals to avoid hydrogen cracking, a mistake I learned the hard way on a cold winter job.
Best Applications for MIG Welding
MIG welding is your best bet for speed and cleanliness in controlled environments like auto body shops or home garages. If you’re fabricating thin sheet metal for a custom exhaust, MIG’s low heat input prevents warping. I once built a entire trailer frame with MIG, finishing in half the time stick would take.
It’s unbeatable for aluminum or stainless projects, using pure argon or mixes for optimal shielding. Hobbyists love it for its ease – set wire speed to 300-400 IPM for 0.035 wire on mild steel, and you’re golden. Indoor fabrication, like furniture or brackets, benefits from the minimal spatter and no slag chipping.
When precision matters, like in aerospace or food-grade equipment, MIG’s clean welds reduce post-weld grinding. Avoid it outdoors unless you have wind shields, as I’ve seen porosity ruin a whole panel from a slight breeze. For pros, it’s scalable with push-pull feeders for longer runs.
Pros and Cons of Stick Welding
Stick welding’s biggest pro is its ruggedness – it works anywhere with minimal gear. Portability means you can haul a small inverter welder to remote sites, and it handles contaminated surfaces without extra prep. Cost-wise, it’s entry-level friendly, with electrodes lasting through tough jobs.
On the flip side, it’s slower due to rod changes every few inches, and the slag cleanup adds time. Spatter can be messy, and it’s harder to learn, with more smoke and fumes requiring good ventilation. I’ve coughed through sessions without proper masks, so always prioritize that.
For integrity, stick’s deep penetration ensures strong joints in load-bearing applications, but it’s not ideal for thin metals where burn-through is a risk. Overall, it’s a workhorse for heavy-duty tasks but demands patience.
Pros and Cons of MIG Welding
MIG’s top advantage is speed – continuous wire means non-stop welding on long seams. Cleaner beads with less cleanup make it perfect for aesthetic work, and it’s beginner-friendly with adjustable controls. Versatility across metals, from steel to exotics, expands your project options.
Drawbacks include higher setup costs for gas and equipment, plus sensitivity to wind and dirt. Porosity from poor gas flow is a common issue; I’ve scrapped parts over tiny holes. It requires a steady power supply, so generators must be clean-rated.
In efficiency, MIG reduces fatigue on repetitive jobs, but maintenance like liner changes is key. It’s a favorite for production but less so for fieldwork.
Stick Welding vs MIG: A Side-by-Side Comparison
To make this clearer, here’s a quick table breaking down the key factors:
| Aspect | Stick Welding (SMAW) | MIG Welding (GMAW) |
|---|---|---|
| Equipment Needed | Power source, electrodes | Power source, wire feeder, gas tank |
| Cost to Start | Low ($200-400) | Higher ($400-800) |
| Best For | Thick metals, outdoors, dirty surfaces | Thin metals, indoors, clean work |
| Speed | Slower, rod changes | Faster, continuous feed |
| Learning Curve | Steeper, manual arc control | Easier, semi-automatic |
| Weld Appearance | Rougher, slag to remove | Smoother, minimal cleanup |
| Portability | High, no gas needed | Lower, requires gas cylinder |
| Material Versatility | Ferrous metals mainly | Ferrous and non-ferrous |
This table has helped me decide on jobs countless times – glance at it next time you’re unsure.
Step-by-Step Guide to Setting Up Stick Welding
Let’s walk through stick welding like I’m showing you in the shop. First, select your electrode – 6010 for deep penetration on dirty steel, or 7018 for cleaner, stronger welds. Set your machine: For 1/8-inch rod, amp it to 90-120 amps on DC positive.
Prep your joint: Clean rust with a grinder, bevel edges on thick plates for better fusion. Strike the arc by scratching like a match, then hold a 1/8-inch gap. Drag the rod at 10-15 degrees, weaving slightly for wider beads.
After the pass, chip slag with a hammer and brush – inspect for cracks. Multi-pass on thick joints: Root with 6010, fill with 7018. Cool slowly to avoid brittleness. Practice on scrap; I burned through dozens before nailing it.
Step-by-Step Guide to MIG Welding Basics
For MIG, start with wire choice – ER70S-6 for mild steel, 0.030 diameter for thin stuff. Set voltage to 18-22V, wire speed 250-350 IPM. Gas mix: 75/25 argon/CO2 for steel.
Clean your metal thoroughly – oil or paint causes defects. Hold the gun at 10-15 degrees push angle, 1/2-inch stickout. Pull the trigger for gas purge, then weld with a steady travel speed.
Monitor for birdnesting in the drive rolls – keep tension right. For aluminum, switch to pure argon and spool gun. End with nozzle dip in anti-spatter. It’s straightforward, but dial in settings per material thickness.
Common Mistakes When Switching Between Stick and MIG
One big error is ignoring prep work. With stick, you can skip some cleaning, but MIG demands spotless surfaces or you’ll get porous welds. I’ve seen hobbyists burn through thin panels by using stick settings on MIG – always adjust heat down.
Another is arc length: Too long in stick causes spatter, too short in MIG pops the wire. Forgetting polarity switches can ruin your day – MIG is usually DCEP, stick varies. Overheating joints leads to distortion; use tack welds to hold alignment.
Fixes are simple: Test on scrap, watch your puddle, and log settings for repeats. Personal story – I once MIG’d a rusty frame thinking it was clean enough, ended up grinding out bubbles. Lesson learned: Prep is king.
Safety Tips for Both Welding Processes
Safety isn’t optional in welding – it’s your lifeline. Always wear a helmet with proper shade (10-13 for both), gloves, and flame-resistant clothing. Stick produces more fumes, so use exhaust fans or respirators in tight spaces.
For MIG, watch for gas leaks; CO2 can displace oxygen. Eye protection against UV rays is crucial – I’ve treated flash burns, and they’re no joke. Ground your work properly to avoid shocks, especially on wet sites.
Keep fire extinguishers handy for spatter fires. In US shops, follow OSHA guidelines: Ventilate, use PPE, and train on hazards. A quick check before starting saves lives.
Choosing the Right Equipment for Your Needs
In the US, brands like Lincoln or Miller offer solid machines. For stick, grab an inverter like the Lincoln 225 – portable and dual-voltage. MIG setups: Miller Millermatic 211 for versatility, handles 120/240V.
Accessories matter: Good cables, clamps, and helmets with auto-darkening. For hobbyists, start budget-friendly but upgrade for reliability. I’ve relied on Hobart wire for MIG – consistent feed without jams.
Consider your power: Home garages might limit to 110V machines. Rent before buying to test.
Material Compatibility and Filler Choices
Matching fillers is key for integrity. Stick rods: 6013 for light-duty steel, 308L for stainless. MIG wires: ER308 for stainless, with matching gas.
For aluminum, MIG uses 4043 wire with argon. Avoid mixing processes without testing – stick on alum is tricky. Thickness guides choice: Under 16 gauge, MIG; over, stick.
Pre-heat high-carbon steels to prevent cracks. Semantic matches like alloy composition ensure compatibility.
Advanced Techniques for Better Welds
Push your skills with weaves: Stringer beads for strength, circles for fill. In stick, backstep to reduce distortion. MIG pulsing modes on advanced machines cut heat input.
Overhead welding: Stick’s slag helps, but practice posture. For pros, certify under AWS codes – D1.1 for structural. I’ve passed tests by focusing on consistent travel.
Incorporate NDT like visual inspections post-weld.
Cost Considerations in Welding Projects
Budgeting wisely: Stick’s low entry but higher consumable use per inch. MIG saves time, offsetting gas costs at $20-30 per tank refill.
For DIY, calculate per project: A gate repair might cost $50 in stick rods vs $30 in MIG wire plus gas. Factor electricity – inverters are efficient.
Long-term, MIG wins for volume, stick for occasional fixes.
Troubleshooting Weld Defects
Porosity in MIG? Check gas flow or clean metal. Stick undercut? Slow travel speed. Cracks mean wrong filler or cooling too fast – interpass temps help.
Spatter excess: Adjust voltage. I’ve troubleshot by filming my arc – reveals issues fast. Always document fixes for next time.
Integrating Welding into Your Workflow
For fabricators, plan processes early. Sketch joints, choose based on access. In shops, dedicate stations for each.
Hobbyists: Start small, build confidence. Join forums for tips – real welders share gold.
Final Word
With all this under your belt, you’re way more equipped to tackle that next project without second-guessing. Whether it’s a quick repair or a full build, picking stick for rugged outdoor jobs or MIG for speedy indoor work will boost your efficiency and weld quality.
Remember, practice trumps theory every time – grab some scrap and experiment. One pro tip: Always keep a logbook of your settings and outcomes; it’ll turn you into a welding wizard faster than you think.
FAQS
Can I use stick welding on thin metal?
Absolutely, but it’s trickier than MIG. Use smaller rods like 1/16-inch at lower amps (50-70) and AC polarity to minimize burn-through. Quick tacks and short beads help control heat.
Is MIG welding better for beginners?
Yes, its semi-automatic nature makes it forgiving. Start with mild steel and practice wire feed adjustments. Stick requires more arc control skill, so MIG builds confidence quicker.
What gas do I need for MIG welding aluminum?
Pure argon is best for aluminum to prevent oxidation. A 100% argon tank ensures clean welds; mixes with CO2 are for steel only.
How do I switch from stick to MIG on the same machine?
Many multi-process welders allow it – swap leads, attach the MIG gun, and change settings. Ensure polarity is DCEP for MIG, and purge lines before starting.
What’s the main safety difference between stick and MIG?
Stick has more slag and fumes, needing better ventilation. MIG involves gas cylinders, so secure them to avoid tipping hazards. Both require full PPE, but MIG’s cleaner arc reduces spatter burns.