Stainless steel stick welding settings can be a little tricky, especially if you’re used to working on mild steel or just starting out in DIY welding projects. Homeowners, renters, and hobbyists often ask: What amperage should I use? Which rod works best? How do I avoid messy welds or overheating? Just like keeping a spotless kitchen sink or removing stubborn stains in your bathroom, dialing in the right welding settings is all about precision and technique.
The right combination of amperage, electrode type, and arc control not only makes your welds stronger but also keeps your stainless steel cleaner, smoother, and easier to maintain over time. With a few simple adjustments and the right approach, you can minimize spatter, reduce cleanup, and enjoy long-lasting, polished results—saving you time, frustration, and costly rework.

Image by shengenfab
What Is Stick Welding Stainless Steel and Why Bother?
You’re out in the yard, wind whipping around, no fancy MIG setup with gas bottles to haul. That’s stick welding—SMAW if you’re feeling fancy—at its core. It’s just you, your rod, and the arc, melting filler into the base metal. For stainless steel, it’s a beast of its own because stainless doesn’t play nice like mild steel. It conducts heat poorly, expands like it’s got a grudge, and loves to crack if you don’t treat it right.
Why bother with stick on stainless? Portability, for one. I’ve dragged my rig to remote fab jobs where TIG was a pipe dream—think offshore platforms or farm repairs. It’s forgiving for beginners, too; no shielding gas means less fuss. And cost? Electrodes are cheap compared to spool wire.
But the real kicker is weld integrity. Done right, you get that mirror-like corrosion resistance back, crucial for food-grade tanks or exhaust systems that see the elements. Mess it up, though, and you’re looking at porosity or sensitization, where the steel loses its mojo against rust. In the US, shops following AWS D1.6 codes swear by it for structural stuff because it’s proven.
Bottom line: If you’re a DIYer fixing a trailer or a pro chasing code compliance, stick welding stainless saves time and headaches when mobility matters.
Challenges of Stick Welding Stainless Steel
Stainless steel sounds tough, right? It’s the superhero of metals—rust-proof, heat-resistant. But when you strike an arc, it throws curveballs. Austenitic grades like 304 or 316, the workhorses, have high thermal expansion—up to twice that of carbon steel. That means your workpiece warps faster than a bad breakup story. Low thermal conductivity piles on: Heat builds up in a tiny zone, risking distortion or even hot cracking right after you quench it.
Then there’s the chemistry. Stainless gets its power from chromium and nickel, but excessive heat can form carbides that eat away at corrosion resistance—hello, intergranular corrosion. I’ve seen it firsthand on a brewery tank: Guy ran hot, and months later, leaks everywhere. Cracking’s another beast, especially in martensitic grades like 410, which harden on cooling and snap like brittle candy.
For hobbyists, the arc’s just finicky—slag sticks harder, spatter flies more. Pros deal with codes mandating low heat input to keep ductility. The fix? Mind your settings from the jump. It’s not about fighting the metal; it’s about respecting it. Clean prep and controlled amps turn challenges into “no big deal.”
How to Choose the Right Electrode for Stainless Steel Stick Welding
Picking wrong is like wearing flip-flops to a kickboxing match. For stainless, we’re talking E308L, E316L, E309L, mostly. The “L” means low carbon, key to dodging that carbide mess I mentioned.
Start with your base metal. 304 or 304L? Grab E308L—it’s the all-star for general austenitic work, like railings or sinks. Welding 316 for marine or chemical gigs? E316L, with extra molybdenum for pitting resistance. Dissimilar metals, say stainless to mild steel? E309L bridges the gap, higher nickel to match expansion rates.
Diameter matters too. Thinner rods (3/32-inch) for sheet metal under 1/8-inch; 1/8-inch for beefier stuff. Coatings? Rutile (E308L-16) for easy slag pop-off and AC compatibility if your machine’s old-school. Lime (E308L-15) for deeper penetration but stickier slag—great for root passes.
I’ve burned through stacks on a food processor frame: Switched from 308 to 316 when specs called for it, and the weld went from “meh” to bulletproof. Pro tip: Always check AWS classification on the box. And store ’em dry—moisture turns your arc into a fireworks show nobody wants.
Here’s a quick comparison to keep it straight:
| Electrode Type | Best For | Key Benefits | Drawbacks | Typical Diameter |
|---|---|---|---|---|
| E308L-16 | 304/304L stainless | Easy arc start, low spatter, AC/DC | Shallower penetration | 3/32″ – 5/32″ |
| E316L-16 | 316/316L stainless | Superior corrosion resistance | Slightly higher cost | 3/32″ – 1/8″ |
| E309L-15/16 | Dissimilar (stainless to carbon) | Excellent ductility, crack resistance | More slag to chip | 1/8″ – 5/32″ |
Match it to your project, and you’re golden.
Essential Preparation Steps for Stick Welding Stainless Steel
Prep’s where pros separate from “hope for the best” folks. Stainless hates contamination—grind marks from carbon steel tools? Instant rust magnet. I learned this the hard way on a pharma hopper: Cross-grit from a dirty wheel, and the whole thing failed inspection.
Step one: Clean like your paycheck depends on it. Degrease with acetone or citrus cleaner—no soap residue. Wire brush dedicated to stainless only, stainless bristles if you can swing it. For heavy oxide, pickle with nitric acid mix, but ventilate—fumes’ll knock you flat.
Joint prep: Bevel thick edges 30-37 degrees for V-grooves, per AWS. Tack with low amps to avoid gaps. Copper backing bars chill the root, cutting distortion—clamped ’em on a heat exchanger once, saved a warp headache.
Electrode oven? Non-negotiable. Bake at 250°F for an hour if they’ve been humid. Ground clamp tight, within 12 inches of the joint—stray current arcs chew metal.
Short para for the shop phone-scrollers: Skip prep, invite defects. Nail it, and your settings sing.
Optimal Amperage and Polarity Settings for Stainless Steel Stick Welding
Settings—ah, the heart of “stainless steel stick welding settings.” Too high, you melt holes; too low, no fusion. Stainless runs cooler than mild steel—drop 10-20% amps from carbon charts.
Polarity first: DCEN (electrode negative) for low heat input, ideal for thin stuff to fight distortion. DCEP for penetration on thicker joints. AC works but sputters more—fine for hobby rigs.
Amperage? Base it on rod diameter and thickness. For 1/8-inch E308L on 1/4-inch plate: 80-100 amps DCEN. Thinner sheet? 60-80 for 3/32-inch rod. Travel speed faster to dump less heat—aim 8-12 ipm.
My rule: Strike on scrap, watch the puddle. If it digs too deep, dial back 5 amps. Rod stub glowing cherry red by the end? You’re hot—cool it down. Machines like my old Hobart vary, so test.
Here’s a starter chart—tweak for your setup:
| Rod Diameter | Material Thickness | Amperage (DCEN) | Polarity Recommendation | Heat Input Tip |
|---|---|---|---|---|
| 3/32″ | 1/16″ – 1/8″ | 50-70 | DCEN | Short arcs, fast travel |
| 1/8″ | 1/8″ – 1/4″ | 70-100 | DCEN/DCEP | Weave lightly for flat bead |
| 5/32″ | 1/4″ + | 100-140 | DCEP | Stringer beads, interpass cool to 200°F |
These keep chromium intact, welds ductile. Safety note: Gloves rated for 1000°F—stainless spits like a cat in a bath.
Step-by-Step Guide to Stick Welding Stainless Steel
Let’s walk through it, like I’m spotting you in the booth. Gear up: Leather jacket, hood with #10 shade (drops to #8 for low amps), gloves. Machine on, ground secure.
- Strike the arc: Drag like a match, short arc—1/16-inch gap. If it sticks, tap and pull. Hear that sizzle? Good.
- Build the bead: Stringers first, not weaves—less heat. Drag at 15-20 degrees push for flat/horizontal. Puddle should flow like thick syrup, not lava.
- Multi-pass: Chip slag clean between—wire brush it. Cool interpass to 150°F; temp stick if you’re fancy.
- Finish the run: Back-step into craters to fill ’em soft. Quench? Air cool slow—no fans blasting.
I did a vertical up on 316 pipe once: Whipped like E6010, but slower. Took practice, but that joint passed hydro at 1500 psi. For DIYers: Start flat, graduate positions. Students: Log your amps—patterns emerge.
Techniques for Welding Stainless Steel in Different Positions
Flat’s a breeze—drag steady, watch the ripple. Horizontal? Slight side-to-side weave, keep the rod perpendicular. The real test: Vertical.
Uphill on stainless? Whip or triangle weave with rutile rods—lime types drag straight. Push angle 5-10 degrees, amps 10% lower than flat. I’ve uphill’d exhaust stacks; key’s pausing at toes for tie-in, or slag traps.
Overhead? Rare for stainless—too drippy—but if must, low amps, quick passes. Downhill for thin sheets: High amps, fast travel—zipper-like.
First overhead fillet on a tank baffle? Slag everywhere, like modern art gone wrong. Fixed by flatter beads, less weave. For fab hobbyists: Practice on angle iron. Workers: Position affects code quals—know your WPS.
Common Mistakes When Stick Welding Stainless Steel and How to Fix Them
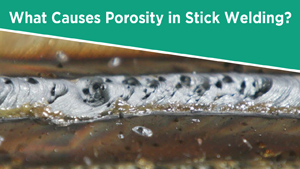
We all botch it sometime. Biggest? Overheating—puddle boils, edges curl. Fix: Drop amps 10, speed up. Or that porosity pox? Blame dirty metal or damp rods. Scrub harder, oven ’em.
Cracking’s sneaky—hot short from sulfur, or cold from fast cool. Preheat to 200°F for thick stuff, peen lightly post-weld. I cracked a valve body once; buttered the edge with 309, then filled. Saved the part.
Spatter city? Long arc or wrong polarity—shorten it, go DCEN. Undercut from fast travel? Slow your roll, fill the groove.
For newbies: Don’t chase the slag—let it ride ahead. Pros: Audit your ground—loose ones arc elsewhere. These fixes turn lemons to welds.
Welding Stainless Steel to Mild Steel Using Stick Electrodes
Hybrid jobs pop up everywhere—trailer frames, sculptures. Stainless to carbon? Expansion mismatch screams crack, but E309L or E312 saves the day. Higher alloy content absorbs the delta.
Prep both sides clean. Butter the carbon edge with 309 root—low amps, multi-layer. Then fill with 309 or even 308 over. Polarity DCEP for bite.
Real talk: Did a gate with 304 skin on mild frame. Butter pass key—joint flexed without weep. Codes like D1.1 allow it with quals. Hobbyists: Test bend it. Students: Note the dilution—too much carbon side weakens corrosion.
Pros: Strong, dissimilar bonds without exotics.
Post-Weld Cleanup and Inspection for Stainless Steel Stick Welds
Weld’s down—don’t slack now. Slag chips easy with rutile, hammer/chisel for lime. Stainless brush right after, stainless wool to avoid embedment.
Discoloration? That straw hue means heat tint—grind or pickle off for full corrosion shield. Pickling paste’s my go-to; gloves and rinse well.
Inspect: Visual for uniformity, dye pen for cracks, maybe UT if code-bound. I’ve passed NDT on tanks by grinding smooth—no excuses.
Quick tip: Mirror polish for food apps, but 120-grit suffices for most. Clean work lasts.
Why Mastering Stainless Steel Stick Welding Settings Boosts Your Skills
Low amps, clean prep, right electrode keep stainless happy, delivering welds that resist the rust and hold the load. You’re not just fusing metal; you’re building stuff that endures—trailers that tow, pipes that pump, art that weathers storms. Now you’re geared to tweak those dials without second-guessing. Grab scrap, strike arcs, iterate. That confidence? It’s what turns trainees into tradesmen. Log every weld—amps, speed, outcome. Patterns reveal your machine’s quirks faster than any chart.
What Amperage Should I Use for 1/8-Inch 308L Rod on 1/4-Inch Stainless Plate?
Aim for 70-90 amps DCEN. Start low, strike on test plate—puddle should wet out without digging holes. Adjust up if fusion’s shallow.
Can I Stick Weld Stainless Steel with an AC Machine?
Yes, but expect more spatter and cleaning. Rutile-coated rods like E308L-16 handle AC best. For clean work, DC’s king if available.
How Do I Prevent Cracking in Stainless Steel Stick Welds?
Control heat input: Stringer beads, interpass temps under 200°F, fill craters. Preheat thick sections to 150°F. E309L helps on edges.
What’s the Best Technique for Vertical Stick Welding Stainless?
Uphill drag with a slight whip for rutile rods—keep arc short, weave narrow. Amps 10% below flat. Practice on tee joints.
Why Is My Stainless Stick Weld Porous?
Likely contamination or moisture. Degrease thoroughly, bake rods at 250°F. Short arc reduces air entrapment—check your ground too.