
Thin sheet metal is where welding mistakes show up fast. I’ve clamped pieces together thinking everything was ready, only to watch the metal warp, burn through, or pull apart as soon as the arc hit.
On thin material, there’s no room for sloppy prep, and skipping steps almost always leads to frustration. That’s why knowing how to prepare thin sheet metal for welding makes such a difference.
I’ve learned through hands-on work that prep is more important than machine power on thin steel. Clean surfaces, tight fit-up, and proper edge preparation control heat and help prevent burn-through and distortion. Rush it, and you’ll spend more time fixing holes than welding.
If you want cleaner beads and flatter panels on thin sheet metal, the work starts before you strike an arc. Let me walk you through the exact preparation steps that make thin metal easier to weld—step by step.
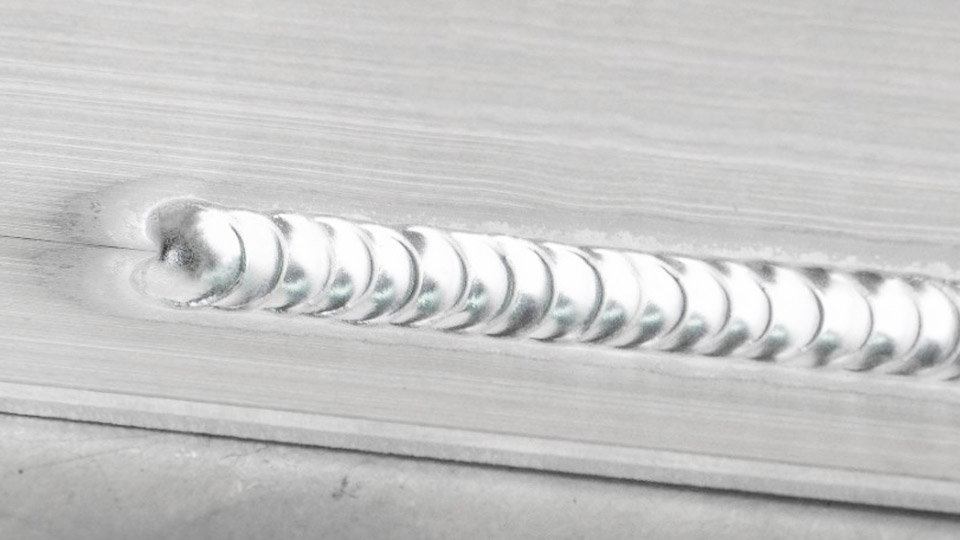
Image by megmeet-welding
Understanding the Challenges of Welding Thin Sheet Metal
Thin sheet metal is tricky because it doesn’t forgive heat like thicker stock does. Heat it too much, and you’ll get distortion—where the metal warps as it expands and contracts unevenly.
Burn-through happens when the arc punches right through, leaving holes that ruin your work. And if your prep is off, you might end up with poor fusion, where the weld doesn’t bond properly, leading to cracks down the line.
This matters in everyday jobs. Take a fabrication hobbyist patching a trailer floor: bad prep means weak spots that could fail on the road, risking safety and costly fixes. For pros in a shop, it’s about efficiency—less time grinding out mistakes means more jobs done right.
Students learning the trade often overlook how material thickness affects everything from electrode choice to joint design. I’ve trained a few apprentices who thought high amps would speed things up, only to watch their panels buckle.
The key is controlling heat input from the start. That means clean surfaces for better arc stability, tight fits to minimize gaps, and techniques that spread out the heat. When you prep well, you reduce the heat-affected zone (HAZ), that area around the weld where the metal’s properties change, making it brittle or prone to corrosion.
Choosing the Right Welding Process for Your Thin Sheets
Not every process is ideal for thin metal. I’ve burned through plenty of sheets trying the wrong one, so let’s break it down.
MIG Welding: Versatile and Forgiving for Beginners
MIG (Metal Inert Gas) welding shines for thin sheets because it’s fast and gives you good control over the puddle. It works by feeding a continuous wire electrode through a gun, shielded by gas like argon-CO2 mixes.
Use it when you’re working on mild steel panels or auto body repairs—jobs where speed matters but you need decent penetration without blowing holes. Why? The short-arc mode keeps heat low, and you can pulse the current to alternate high and low amps, reducing distortion.
In practice, set your machine to electrode positive (reverse polarity) for better puddle wetting. For sheets under 18 gauge, go with .023-inch wire like ER70S-6—it melts at lower heat than thicker stuff. I’ve used this on exhaust repairs, tacking first then stitching beads to keep things flat.
Pros: Quick setup, less skill needed for clean beads. Cons: Gas setup adds cost, and without pulsing, you risk spatter on thin edges.
TIG Welding: Precision for the Finicky Jobs
TIG (Tungsten Inert Gas) is my go-to for ultra-thin sheets, like 24 gauge stainless or aluminum, because you control the heat with a foot pedal. It uses a non-consumable tungsten electrode and inert gas, often with a filler rod added manually.
This process excels in situations needing high-quality, aesthetic welds—think custom motorcycle tanks or food-grade equipment. It prevents piercing by letting you dial amps down to 5 or less, and the arc is tight for spot-on control.
Prep-wise, sharpen your tungsten to a point for a focused arc. Use ceriated or thoriated electrodes in .020 to 1/16-inch sizes. For aluminum, pure argon gas is key to avoid contamination. I’ve fixed thin HVAC ducts this way, pulling the torch toward me at a 15-degree angle for better visibility.
Pros: Minimal distortion, beautiful finishes. Cons: Slower, requires more practice to avoid tungsten contamination.
Stick Welding: When It Works (and When to Skip It)
Stick (SMAW) welding uses coated electrodes that create their own shielding, no gas needed. It’s rugged for outdoor repairs but tough on thin metal due to high heat.
Only use it for minor fixes on sheets over 1/16 inch, like patching farm equipment. Electrodes like E6013 penetrate shallow at 20-30 amps. I’ve gotten away with it on rusty gates, but it’s spattery and prone to burn-through.
Pros: Portable, no gas hassle. Cons: High heat input warps thin stuff easily—avoid for anything under 18 gauge unless you’re desperate.
| Process | Best for Thickness | Amperage Range | Pros | Cons |
|---|---|---|---|---|
| MIG | 18-24 gauge | 20-80 amps | Fast, user-friendly | Needs gas, potential spatter |
| TIG | Under 20 gauge | 5-50 amps | Precise, low distortion | Slow, skill-intensive |
| Stick | Over 16 gauge | 20-60 amps | Portable | High heat, messy |
Essential Tools and Safety Gear You Can’t Skip
Before touching the metal, gear up. I’ve seen burns from skipping gloves—don’t be that guy.
Start with PPE: Auto-darkening helmet (shade 9-13 for thin work), leather gloves, long-sleeve jacket, and respirator for fumes. In a shop, ventilation is non-negotiable; use a fume extractor for indoor jobs.
Tools-wise, you’ll need an angle grinder with flap discs for cleaning, wire brushes (steel for steel, avoid cross-contamination), clamps for fit-up, and a plasma cutter for precise cuts on thicker edges. For heat control, grab copper backing bars—they sink heat like a champ.
Safety tip: Always ground your welder properly to avoid shocks, and keep a fire extinguisher handy. Thin metal heats fast, so watch for sparks igniting nearby rags.
Step-by-Step: Cleaning Your Thin Sheet Metal Properly
Cleaning is where most jobs go wrong. Dirt, oil, or rust creates porosity—those pesky holes in your weld that weaken everything.
First, assess the surface. For mild rust, hit it with a wire brush. Scrub in circles to lift flakes without gouging the thin metal.
Next, for paint or coatings, use an angle grinder with a 60-grit flap disc. Go light—thin sheets dent easily. I’ve ruined panels by grinding too hard, so feather the edges.
Then, wipe with acetone or a degreaser on a lint-free rag. This removes oils that cause arc instability. For aluminum, avoid steel brushes; use dedicated ones to prevent embedding particles that lead to corrosion.
If it’s heavily rusted, abrasive blasting works, but follow with acetone. Don’t blast aluminum—it traps contaminants.
Finally, let it dry completely. Weld on damp metal, and you’ll get hydrogen cracking.
This step ensures better arc starts and stronger bonds. Skip it, and you’re fighting the machine the whole way.
Joint Preparation: Getting the Fit Just Right
A tight joint is crucial for thin metal—gaps over 1/32 inch invite burn-through.
Start by cutting edges square with shears or a plasma cutter. For butt joints, bevel slightly (30 degrees) on thicker edges for better penetration.
Fit pieces flush; use magnets or clamps to hold them. Tack every 1-2 inches with tiny dots at low amps to lock alignment without warping.
For lap joints, overlap 1/2 inch minimum. This adds strength and heat dissipation.
In shop practice, I’ve used C-clamps on edges and weighted the center for flat panels. Check for gaps with a feeler gauge—if light shines through, adjust.
This prep minimizes filler needed and evens heat distribution.
Setting Up Your Welder: Amperage, Wire, and Gas Essentials
Wrong settings? Hello, distortion. Get this right for clean runs.
For MIG on 20-gauge steel, start at 30-50 amps with .023-inch ER70S-6 wire. Wire speed around 150-200 IPM, voltage 15-17V. Use 75/25 argon/CO2 gas at 15-20 CFH—higher argon cools the arc.
TIG setup: 20-40 amps for thin stainless, pure argon at 10-15 CFH. Filler like ER308 for stainless, diameter matching metal thickness.
Stick: Low amps (25-40) with 1/16-inch E6013 rods, but only if necessary.
Test on scrap first. I always dial in by welding a bead and checking for good wetting—no undercutting or excessive spatter.
| Metal Thickness (Gauge) | MIG Amps | TIG Amps | Wire/Electrode Diameter |
|---|---|---|---|
| 24 gauge (0.024″) | 20-40 | 5-30 | .023″ / .020″ |
| 20 gauge (0.036″) | 30-60 | 15-40 | .023″ / .040″ |
| 18 gauge (0.048″) | 40-80 | 20-50 | .024″ / 1/16″ |
Filler compatibility: Match to base metal—ER70S for mild steel, 4043 for aluminum. Wrong match? Brittle welds.
Welding Techniques to Prevent Warping and Burn-Through
Heat control is king here. Use skip welding: Lay 1-inch beads, skip 3 inches, then fill gaps after cooling. This spreads heat.
Or stitch: Short pulses (under 1 second), pause to cool. For MIG, push the gun to stay on the cool edge.
Backstep: Weld backward segments to counter distortion.
Use backing bars—clamp copper behind the joint to suck heat away. I’ve saved panels this way on auto restores.
Step-by-step for a butt joint:
- Tack every 2 inches.
- Start at one end, weld 1-inch bead at low amps.
- Skip ahead, weld another, letting previous cool.
- Fill skips, alternating sides.
- Hammer lightly if warping starts.
Travel fast—dwell too long, and burn-through happens.
Common Mistakes I’ve Seen (and How to Fix Them)
Beginners often crank amps too high, thinking it’ll penetrate better. Result? Holes everywhere. Fix: Drop amps 20% and test.
Pros sometimes forget cleaning, leading to porosity. Scrub and degrease again.
Warped panels from continuous beads? Use a hammer and dolly to straighten while warm, or cut and reweld sections.
Bad rod burn-off in stick? Switch to thinner electrodes and lower heat.
I’ve fixed botched jobs by grinding out bad welds, reclamping, and restitching slowly.
Real Shop Anecdotes: Lessons from the Floor
Back in my early days at a fab shop in Texas, we had a rush job on thin aluminum enclosures. The new guy skipped tacks and went full bead—warped the whole batch. We spent hours straightening with heat torches. Lesson: Always tack first.
Another time, on a stainless exhaust, I used too thick a filler and got cracking. Switched to silicon bronze—smoother, less heat, perfect fix.
These stories remind me: Thin metal tests your patience, but prep pays off.
I’ve also helped hobbyists with garage setups. One friend burned through his Jeep panel; we redid it with TIG at 15 amps, pulsing—came out flawless.
Wrapping Up
Grinding and tweaking, it’s clear that mastering thin sheet metal prep turns frustrating jobs into satisfying ones. You’ve got the tools now to avoid the pitfalls I learned the hard way—clean thoroughly, fit tight, control that heat.
With these steps, your welds will be stronger, your panels flatter, and you’ll spend less time fixing mistakes. Remember, the best welders aren’t the fastest; they’re the ones who prep like pros.
Always preheat aluminum sheets slightly with a torch before TIG welding—it evens the heat and cuts down on cracking in cold shops.
FAQ
What amperage should I use for welding 22-gauge steel?
Keep it low—20-40 amps for MIG or TIG to avoid burn-through. Test on scrap, aiming for a puddle that wets without sagging.
How do I prevent distortion when welding thin aluminum sheets?
Use skip welding, backing bars, and pure argon gas. Tack liberally and let cool between beads; hammer gently if needed.
Can I use flux-core wire for thin metal?
Avoid it—too hot and spattery. Stick to solid wire with gas for better control on sheets under 18 gauge.
What’s the best way to clean rust off thin sheet metal before welding?
Wire brush first, then flap disc on a grinder, finish with acetone. Don’t over-grind or you’ll thin it further.
Why do my welds have holes on thin metal?
Likely gaps or high heat. Ensure tight fit-up, lower amps, and use stitch technique to let heat dissipate.


