Welding stainless steel to mild steel isn’t something you want to rush into—I learned that the hard way while repairing a bracket on an old machine frame. The bead looked fine at first, but the joint cracked after cooling because I didn’t use the right rod or technique. That mistake taught me just how different these two metals behave under heat.
Joining stainless to mild steel takes the right electrode, controlled heat input, and a little patience. Get it right, and you’ll end up with a strong, reliable joint that holds up under real-world stress.
In this guide, I’ll walk you through stick welding stainless steel to mild steel the way I do it in the shop, so you can avoid the common pitfalls and get solid results the first time.

Image by tooliom
Understanding the Basics of Dissimilar Metal Welding
When you’re dealing with stainless steel and mild steel, you’re welding two metals with different personalities. Stainless is alloyed with chromium and nickel for that rust-proof shine, making it tougher against oxidation but also more prone to heat distortion.
Mild steel, on the other hand, is your everyday carbon steel—cheaper, easier to shape, but it rusts if not protected. The key here is bridging that gap without creating a brittle zone.
Why bother welding them together? In real-world scenarios, like automotive repairs or food processing equipment, you might need stainless’s hygiene on one side and mild steel’s strength on the other. It’s cost-efficient too—using full stainless everywhere jacks up expenses.
But get it wrong, and thermal expansion differences can cause warping during cooling. I’ve had jobs where a simple bracket twisted because I didn’t account for that, forcing me to grind it out and start over.
From a practical standpoint, stick welding (or SMAW, shielded metal arc welding) shines for this because it’s portable and doesn’t require shielding gas like MIG or TIG. You can do it outdoors or in tight spots with basic equipment. Just remember, stainless conducts heat poorly, so it stays hot longer, increasing burn-through risks on thin sections.
Choosing the Right Welding Rod for the Job
Picking the electrode is where most folks trip up when stick welding stainless steel to mild steel. You can’t just grab your go-to 6013 for mild steel— that won’t cut it here. Instead, opt for austenitic stainless rods like 309L or 312. These are designed for dissimilar joins, providing the nickel and chromium boost to prevent cracking and ensure a sound weld.
In my shop, I swear by 309L for most applications. It’s got about 23% chromium and 13% nickel, which compensates for the dilution from the mild steel side. If you’re welding something that needs extra toughness, like high-stress parts, 312 steps up with higher tensile strength. Avoid using straight mild steel rods on stainless; they’ll corrode faster and weaken the joint over time.
Here’s a quick comparison to help you decide:
| Rod Type | Best For | Pros | Cons |
|---|---|---|---|
| 309L | General dissimilar welding | Excellent crack resistance, good corrosion protection | Slightly more expensive than mild steel rods |
| 312 | High-strength needs | Superior tensile strength, handles dilution well | Can be brittle if overheated |
| 308L | Stainless-to-stainless, but okay for mild if low stress | Smooth arc, easy to use | Not ideal for heavy dilution, risks cracking |
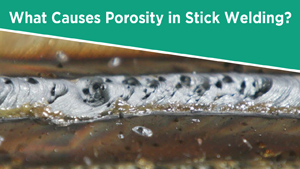
When to use each? For a DIY gate repair mixing stainless hinges with mild frames, 309L is your friend. Pro tip: Store rods in a dry oven at 250°F to avoid moisture pickup—I’ve ruined batches by leaving them out, leading to porous welds full of pinholes.
Preparing Your Materials and Workspace
Prep work is non-negotiable. Start by cleaning both metals thoroughly. Stainless often has a passivation layer that resists welding, so grind it off with a flap disc or wire brush dedicated to stainless—don’t cross-contaminate with carbon steel tools, or you’ll embed particles that cause rust.
For mild steel, remove mill scale, rust, or paint with a grinder. Bevel edges on thicker pieces (over 1/4 inch) for better penetration—a 30-degree angle works well. Fit-up is crucial; aim for a tight joint to minimize gaps that could lead to incomplete fusion.
Safety first: Wear leather gloves, a full-face shield, and a respirator—fumes from stainless can contain hexavalent chromium, which isn’t something you want inhaling. Set up in a ventilated area or use exhaust fans. I’ve learned the hard way after a long day in a stuffy garage; headaches aren’t worth skipping ventilation.
Machine settings? For a basic AC/DC stick welder like a Lincoln or Miller (common in US shops), start with DC electrode positive (DCEP) for deeper penetration.
Amps depend on rod size: 1/8-inch 309L at 90-120 amps for 1/4-inch material. Test on scrap first—too hot, and you’ll burn through; too low, and the arc sputters.
Step-by-Step Guide to Stick Welding the Joint
I’ll walk you through like I’m spotting you on your first try.
First, clamp your pieces securely—stainless expands more, so use anti-distortion techniques like tack welds every few inches. Strike your arc on the mild steel side to avoid overheating the stainless early.
Maintain a short arc length, about the rod’s diameter, and weave slightly for wider coverage. Focus heat more on the mild steel since it melts at a lower temperature (around 2,500°F vs. stainless’s 2,700°F). Drag the rod at a 10-15 degree angle toward the direction of travel.
For a butt joint: Lay a root pass, then fill with subsequent layers. Watch for slag inclusion—chip it off between passes with a chipping hammer. If you’re doing a fillet, build it up evenly to avoid undercutting the stainless.
Common mistake? Rushing the cool-down. Let it air cool slowly to reduce stress—I’ve cracked welds by quenching them in water. If distortion happens, peen the weld lightly with a hammer to relieve tension.
On thin gauge (under 1/8 inch), drop amps to 70-90 and use smaller rods to prevent warping. Practice on scraps mimicking your project; I once botched a custom exhaust by skipping this, costing me hours in fixes.
Common Challenges and How to Overcome Them
No weld is perfect, especially with dissimilar metals. Cracking is a big one—hot cracks from high heat or cold cracks from rapid cooling. Fix it by preheating mild steel to 200-300°F if thick, and use low-hydrogen rods.
Distortion? Stainless’s high expansion coefficient (about 50% more than mild) means it pulls during cooling. Tack strategically and weld in short segments, alternating sides.
Corrosion at the joint? The heat-affected zone (HAZ) can lose chromium, making it susceptible. Post-weld passivation with nitric acid paste restores it—wear gloves and rinse well.
I’ve had a fence project where the weld rusted because I didn’t clean properly; lesson learned—always inspect and touch up with primer on the mild side.
For machine tweaks: If your arc is unstable, check polarity or rod condition. Spatter? Lower amps or use anti-spatter spray sparingly.
Tools and Equipment Recommendations for US Welders
You don’t need fancy gear, but quality matters. A reliable stick welder like the Hobart Handler or Everlast PowerArc handles this well—look for ones with at least 200 amps for versatility.
Electrodes: Buy AWS-certified 309L from suppliers like Airgas or Welding Supply—1/8-inch diameter for most jobs. Grinders with stainless discs, clamps, and a chipping set are essentials.
For codes, follow AWS D1.6 for structural stainless in the US—ensures compliance for pro work. In shops, I keep a welding cart stocked; it saves time hunting tools mid-job.
Real-World Applications and Case Studies
Think automotive: Welding stainless exhaust tips to mild pipes for rust resistance. Or fabrication: Stainless guards on mild steel machinery frames.
In one job, I fixed a brewery tank—stainless liner to mild base. Used 309L at 110 amps, beveled edges, and it held under pressure. Another time, a hobbyist trailer: Stainless rails to mild chassis. Avoided cracks by slow cooling.
These show why technique trumps speed—strong welds mean safe, long-lasting builds.
Advanced Tips for Better Weld Quality
Once basics are down, refine: Use stringer beads for strength, weaves for appearance. Post-weld, grind flush and polish stainless for aesthetics.
Test welds: Bend or etch to check fusion. If porous, dry rods better.
For outdoor work, wind shields prevent arc blow. I’ve adapted by using tarps on windy days.
Mixing processes? Stick for root, TIG for cap if you have both—hybrids offer best of worlds.
Pros and Cons of Stick Welding This Combination
Pros: Portable, low-cost setup, strong joints for heavy-duty use.
Cons: More slag cleanup, higher skill needed for clean beads, potential for more distortion than TIG.
Weighs out favorably for field repairs over shop precision.
Maintaining Your Welds Long-Term
Inspect regularly for cracks or corrosion. Coat mild steel with paint; leave stainless bare or passivate.
In harsh environments, like coastal areas, use higher-alloy rods for extra protection.
I’ve seen welds last decades with proper care—it’s about upfront effort.
Conclusion
You’ve now got the toolkit to confidently stick weld stainless steel to mild steel. From rod selection to troubleshooting, these steps ensure welds that are safe, strong, and efficient. You’re better equipped to pick the right filler, prep properly, and avoid pitfalls that waste time and materials.
Always weld a test piece first—it saves headaches and builds your confidence. Grab your gear and get sparking; the results will speak for themselves.
Can You Use Mild Steel Rods for Welding Stainless to Mild Steel?
No, stick to stainless rods like 309L. Mild steel fillers corrode quickly and weaken the joint—I’ve tried it in a pinch and regretted the rust spots later.
What Amperage Settings Work Best for 1/8-Inch Rods?
Aim for 90-120 amps on DCEP, adjusting based on thickness. Start low to avoid burn-through on stainless; test on scrap to dial it in perfectly.
How Do You Prevent Cracking in Dissimilar Welds?
Preheat mild steel, use low-heat techniques, and cool slowly. Proper rod choice like 312 helps too—cracks often stem from stress, so manage heat input carefully.
Is Stick Welding Better Than MIG for This?
It depends—stick is great for portability and thick materials, but MIG offers cleaner beads with less cleanup. For beginners, stick builds skills without gas hassles.
What Safety Gear Is Essential?
Full leather protection, respirator for fumes, and eye shield. Stainless welding produces harmful vapors, so ventilation is key—don’t skimp here for long-term health.