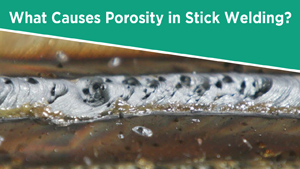
Stick welding stainless steel can test your patience, especially when the rod wants to stick, the puddle won’t behave, and the bead doesn’t look anything like mild steel. I’ve burned plenty of electrodes learning that stainless has its own personality and punishes bad habits fast. That experience is what taught me how to stick weld stainless steel the right way instead of fighting the weld.
Stainless reacts differently to heat, contamination, and travel speed, and mistakes show up quickly as cracking, porosity, or ugly discoloration.
I’ve learned through real job-site practice that rod choice, amperage, and arc control make or break the weld. Getting it right means stronger joints, better corrosion resistance, and fewer failed passes.
If you’ve struggled with stainless sticking, spatter, or inconsistent beads, don’t give up yet. I’ll walk you through the proven techniques that actually work, step by step, so you can lay down clean, reliable stainless welds with confidence.
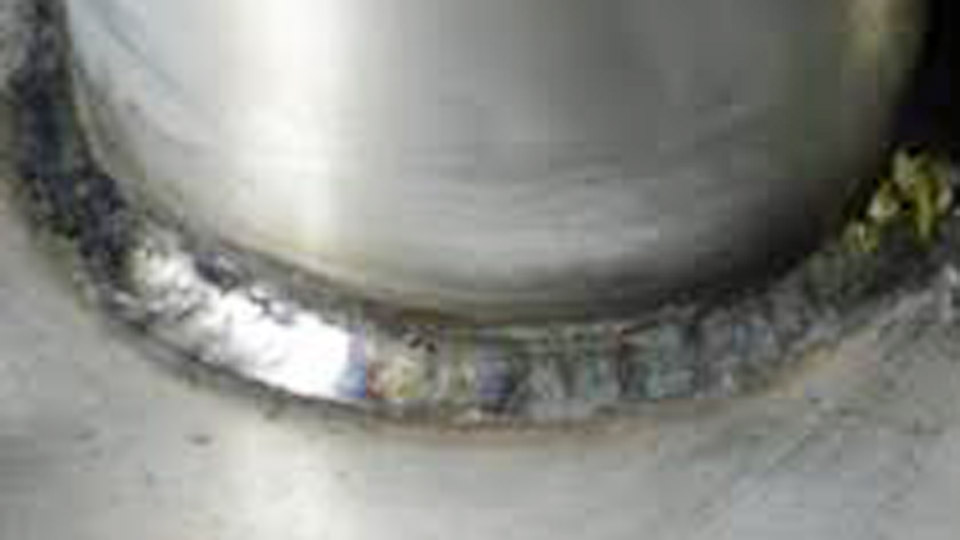
Image by gowelding
Why Choose Stick Welding for Stainless Steel Projects
Let me walk you through why I often reach for my stick welder when stainless is on the table. Unlike TIG, which requires a steady hand and clean shop conditions, or MIG, which needs consistent gas flow, stick welding is rugged and forgiving for field work.
It’s self-shielding, meaning the flux on the electrode creates its own protective atmosphere, so you don’t worry about drafts ruining your puddle. In my experience, this makes it ideal for repairs on farms, construction sites, or even backyard barbecues where you’re patching up a stainless grill.
But it’s not all sunshine—stainless steel demands respect. Its low thermal conductivity means heat builds up fast in one spot, which can warp thin sheets or deplete the chromium that gives it that shiny, rust-proof edge. I’ve had jobs where excessive heat turned a beautiful weld into a brittle mess, prone to cracking under stress.
That’s why understanding when to use stick welding matters: opt for it on thicker materials, like 1/4-inch plates for structural frames, or when portability trumps precision. For hobbyists, it’s a budget-friendly entry point—no need for expensive torches or wire feeders.
Pros love it for quick fixes on pipelines or equipment where downtime costs big bucks. And students? This is where you build fundamentals, learning arc control that translates to other processes.
One lesson I learned the hard way early on was overlooking wind resistance. I was out on a job site welding stainless handrails for a coastal building, and a sudden gust would’ve wrecked a MIG weld. Stick saved the day, but only because I prepped right.
If you’re weighing options, consider your setup: if you’ve got a basic inverter welder and some rods, you’re good to go. Just remember, while stick excels in versatility, it produces more slag and spatter, so factor in cleanup time for those polished finishes.
Understanding Stainless Steel Types and Their Welding Challenges
Before you strike an arc, you’ve got to know your material inside out. Stainless steel isn’t a one-size-fits-all deal—it’s grouped into families based on microstructure, and each behaves differently under the rod. I’ve welded everything from kitchen sinks to exhaust systems, and picking the wrong type can turn a simple job into a nightmare.
Austenitic Stainless Steel: The Workhorse for Most Jobs
Austenitic grades, like 304 and 316, are my staples in the shop. They’re non-magnetic, loaded with chromium and nickel for top-notch corrosion resistance, and pretty weldable. Think food-grade equipment or architectural pieces—these hold up in wet, salty environments without rusting.
But here’s the catch: they expand a lot when heated, so distortion is a real risk on thin gauges. I’ve had panels buckle because I didn’t use enough clamps or skipped chilling bars. When stick welding these, keep heat input low to preserve that protective oxide layer.
Practical tip: if you’re fabricating a brewery tank, go with 316 for its molybdenum boost against pitting.
Ferritic Stainless Steel: Tough but Magnetic
Ferritic types, such as 409 or 430, are magnetic and cheaper, often used in automotive exhausts or appliances. They resist cracking better than austenitics but can get brittle if overheated. In my garage days, I welded a muffler with ferritic stainless and learned to watch for grain growth—too much heat enlarges the crystals, weakening the joint.
Stick welding works well here for flat positions, but verticals need precise amperage to avoid undercut. Why use them? Cost efficiency for non-critical parts, and they machine nicely if you’re adding threads post-weld.
Martensitic Stainless Steel: For High-Strength Applications
Martensitic grades like 410 or 420 are hardenables, perfect for tools or cutlery where you need edge retention. They’re magnetic and strong, but welding them is tricky due to high carbon content, which can lead to hard, crack-prone zones.
I’ve used them on knife repairs, preheating to 400°F to temper the brittleness. Stick welding demands post-weld heat treatment to relieve stresses—skip it, and you’ll see fractures. This family’s great for wear-resistant parts in mining equipment, but always match your electrode to avoid dilution issues.
Across all types, common challenges include sensitization, where chromium carbides form at high temps, robbing corrosion resistance. I always advise welders to use low-hydrogen rods and control interpass temps below 300°F.
Semantic terms like “heat-affected zone” (HAZ) come into play here—keep it minimal for integrity. In US shops, we follow AWS codes like D1.6 for structural stainless, ensuring welds meet tensile specs.
Selecting the Right Electrode for Stick Welding Stainless Steel
Picking the electrode is where the magic starts. I’ve burned through countless boxes, and let me tell you, the right one makes your weld sing. For stainless, we use AWS-classified rods like E308L or E316L, designed to match the base metal’s chemistry.
Start with compatibility: for 304 austenitic, grab E308L-16— the “L” means low carbon to fight carbide precipitation. If you’re joining to mild steel, E309L is your friend, over-alloyed to handle dilution.
For 316 with its molybdenum, E316L prevents pitting in chloride environments. Diameter matters too: 3/32-inch for thin stuff under 1/8-inch to avoid burn-through, 1/8-inch for general work.
Coatings affect performance. Lime-coated (-15) rods are DC-only, great for overhead with fast-freezing slag. Titania (-16) offers easy starts on AC or DC, ideal for flat beads. Silica-titania (-17) minimizes spatter for clean verticals. I prefer -16 for most jobs—stable arc, easy slag peel.
Here’s a quick comparison table to help you choose:
| Electrode | Best For | Pros | Cons | Typical Amps (1/8″) |
|---|---|---|---|---|
| E308L-16 | 304/308 grades | Good corrosion resistance, easy slag removal | Limited to flat/horizontal | 75-110 |
| E309L-16 | Dissimilar metals | High crack resistance, versatile | Higher cost | 80-120 |
| E316L-16 | 316 grades, marine | Excellent pitting resistance | Sensitive to moisture | 70-100 |
| E312-16 | High-strength repairs | Extreme crack resistance | Harder to weld smoothly | 90-130 |
Personal story: On a job welding stainless brackets to carbon frames, I switched to E309L after E308 cracked—saved the project and taught me about over-alloying. Store rods dry in an oven at 250°F; humidity ruins flux, causing porosity. For hobbyists, buy small packs to avoid waste.
Preparing Your Materials and Equipment for Success
Prep work is non-negotiable—I’ve seen more welds fail from skimping here than anywhere else. Start with cleaning: stainless hates contaminants. Use a dedicated stainless wire brush to remove oxides, then wipe with acetone for oils. Avoid carbon steel tools; they’ll embed particles, causing rust spots.
Joint Preparation Techniques
For butt joints on thick plate, bevel edges to 60 degrees with a 1/16-inch land. Thin sheets? Square edges and tight fit-up. Use copper backing bars to sink heat and protect the root. I’ve clamped setups with C-clamps or magnets (if ferritic) to hold alignment.
Electrode Handling and Machine Setup
Inspect rods for cracks—discard damaged ones. Set your welder to DCEP for most stainless rods; it gives deeper penetration.
Test on scrap: strike an arc, adjust amps until the puddle flows without splatter. For a 1/8-inch rod, start at 90 amps and tweak.
Safety gear: leather gloves, helmet with shade 10 lens, respirator for fumes—chromium hexavalent is no joke. In my shop, I always ventilate well, following OSHA guidelines for US welders.
Step-by-Step Guide to Stick Welding Stainless Steel
Let’s get to the meat—here’s how I do it, step by step, like I’m showing a new trainee.
- Gather your gear: Welder, electrodes, chipping hammer, wire brush, clamps, and PPE. Ensure your machine’s clean and grounded.
- Clean the workpiece: Brush and degrease both sides. For joints, grind bevels if needed.
- Set up the joint: Clamp securely, use backing if thin. Preheat martensitic to 400°F if over 1/4-inch.
- Select and prep electrode: Clip to length, strike a test arc on scrap to dial amps—aim for steady hiss without sticking.
- Strike the arc: Tap or scratch method, hold short—1/8-inch gap. Let flux ignite.
- Lay the bead: Use stringers for low heat; drag at 10-15 degrees. Travel slow for penetration, but not too slow to overheat.
- Maintain technique: Short arc, slight weave if vertical. Fill craters by backstepping.
- Clean between passes: Chip slag completely—it’s stubborn on stainless. Brush shiny.
- Complete multi-passes: Keep interpass under 300°F. Overlap 50% for strength.
- Inspect: Look for undercut, porosity. Grind if needed.
I once welded a stainless tank this way, and skipping crater fill led to a leak—lesson learned. For verticals, go uphill with triangle weave for control.
Essential Tips and Techniques for Better Welds
Keep that arc tight—long arcs cause spatter and oxidation. Low amps prevent distortion; I run 20% lower than mild steel. Stringer beads over weaves for heat control. For overhead, use -15 rods for fast freeze.
Anecdote: Repairing a food conveyor, I used chilling bars—copper plates clamped behind—to draw heat, preventing warp on 16-gauge sheet.
Vertical tip: Drag downhill for thin, weave up for thick. Practice on scrap—I’ve burned hours perfecting.
Common Mistakes and How to Fix Them
Biggest blunder? Dirty metal—leads to porosity. Fix: Dedicate tools. Too high amps melt rods fast, crowning beads—drop 10 amps, watch stub color (not cherry red).
Not filling craters? Cracks ensue—always backfill. Cross-contamination: Use color-coded brushes.
Overheating depletes chromium—use pulse-like pauses. I’ve fixed many by grinding out and rewelding cooler.
Post-Weld Cleanup and Finishing Touches
Chip slag hot with a stainless hammer—wait too long, it’s glued. Wire brush vigorously, then pickle with acid paste for passivation if needed. For shine, electropolish or grind with flap discs.
In shop practice, I inspect with dye penetrant for cracks, ensuring code compliance.
Joining Stainless Steel to Other Metals
Dissimilar welding? Butter the carbon side with E309L, then match stainless. Prevents cracking from differences. I’ve done this on hybrid frames—strong as heck.
Recommended Machine Settings for Various Scenarios
Settings vary by thickness and position. Here’s a chart based on my experience:
| Material Thickness | Electrode Size | Amperage Range | Polarity | Position |
|---|---|---|---|---|
| 1/16-inch | 3/32-inch | 50-80 | DCEP | Flat |
| 1/8-inch | 1/8-inch | 70-100 | DCEP | Vertical |
| 1/4-inch | 5/32-inch | 100-140 | DCEP | Overhead |
| 1/2-inch | 3/16-inch | 120-160 | DCEP | All |
Adjust for your machine—test always. For AC welders, use -16 rods.
Conclusion
You’ve got the right guide to tackle how to stick weld stainless steel with confidence, from picking rods to finishing touches. You’re better prepared because you understand the why behind each step—material properties, heat management, and practical fixes that keep welds strong and safe.
Always weld a test coupon first; it’ll reveal issues before they hit your project. Keep practicing, and soon you’ll be the go-to guy in your shop.
Can you stick weld stainless steel to mild steel?
Absolutely, and it’s common in mixed-material fabrications like frames or repairs. Use an E309L electrode to bridge the alloy gap—it prevents cracking from carbon migration. Butter the mild steel side first with a layer of stainless filler, then complete the joint. I’ve done this on truck beds, and it holds up great under load—just keep heat low and clean thoroughly.
What are the best settings for stick welding thin stainless steel?
For gauges under 1/8-inch, drop amps to 50-80 on a 3/32-inch rod, using DCEP. Short arc, fast travel to avoid burn-through. Use copper chill bars to dissipate heat. In my experience, practicing on scrap prevents holes—start low and inch up until the puddle flows smooth without sagging.
Why does my stainless steel weld crack?
Cracking often stems from high heat causing carbide precipitation or residual stresses. Fix it by using low-carbon “L” rods, controlling interpass temps under 300°F, and filling craters. For martensitic, preheat and post-heat. I’ve salvaged cracked welds by grinding out and rewelding cooler—patience pays off.
Is stick welding stainless steel harder than mild steel?
It can be, due to stainless’s thermal quirks and sensitivity to contamination. But with practice, it’s manageable. Mild steel forgives more, but stainless rewards precision with superior durability. I find it satisfying for the clean results—just dedicate tools and dial in lower amps.
What safety precautions should I take when stick welding stainless?
Fumes from chromium are hazardous, so use a respirator and good ventilation—exhaust fans or outdoors. Full PPE: helmet, gloves, flame-resistant jacket. Follow OSHA for hexavalent chrome exposure. In my shop, I monitor air quality and take breaks—health first, always.