If you’ve ever struggled to keep your welds clean, smooth, and strong while working in a vertical position, don’t worry—many DIY welders and professionals face this challenge. Knowing the right 0.045 flux core vertical settings is just as important as using the right cleaning tips when tackling tough household messes, like bathroom cleaning, stain removal, or disinfecting surfaces.
The wrong settings can lead to messy spatter, weak joints, and extra cleanup, while the right ones ensure a solid weld that looks as good as it performs.
I’ll break down the best techniques, power adjustments, and simple tweaks to help you achieve cleaner, more consistent results. Whether you’re repairing, fabricating, or just learning, understanding these settings will save time, reduce frustration, and keep your projects strong and reliable.
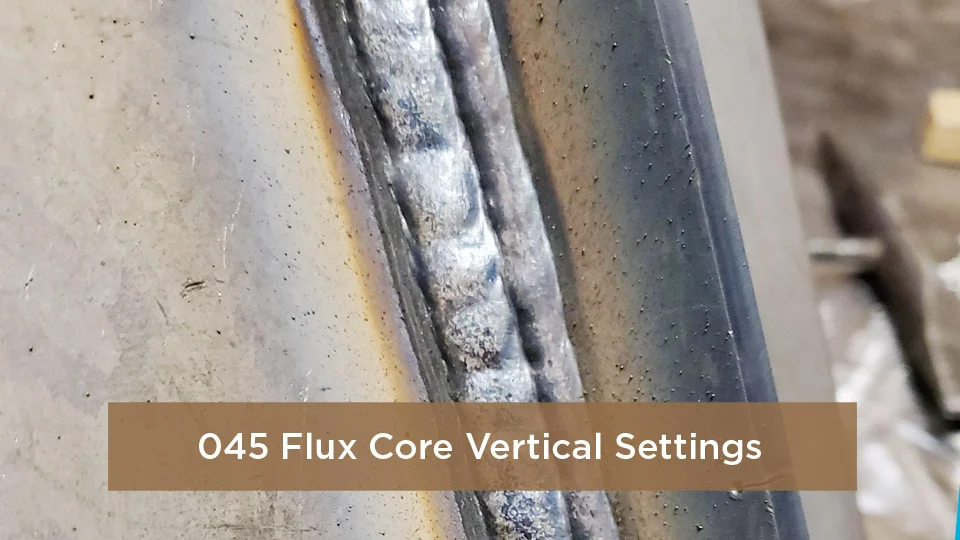
Image by reddit
What Is Flux Core Welding and Why Vertical Up Matters
Flux core welding, or FCAW, is a MIG-style process where the wire has a flux-filled core that acts like its own shielding agent. No need for a bulky gas bottle if you’re running self-shielded—perfect for windy outdoor gigs or tight fab spaces. The flux melts, creates a gas shield, and forms slag that protects the puddle as it cools.
Vertical up welding? That’s when you’re building that bead from the bottom, fighting gravity the whole way. It’s tougher than flat or horizontal because the molten pool wants to sag and run down. But here’s the beauty: done right, vertical up gives killer penetration and fusion, especially on thicker steel like the A36 plates common in US structural work.
Why bother? In real jobs, like erecting I-beams or repairing trailers, vertical joints are everywhere. Skip the up technique, and you’re risking shallow throats or lack of fusion that violates AWS D1.1 codes.
From my experience, switching to vertical up saved my bacon on a rusted-out grain bin repair last summer. The wind was howling off the plains, and gas-shielded MIG would’ve been a nightmare. Flux core let me stack passes without babysitting a bottle, and the vertical build kept the heat controlled for that 1/4-inch plate.
Self-Shielded vs. Gas-Shielded Flux Core for Vertical Work
You’ve got two flavors here, and picking the right one depends on your setup and site. Self-shielded flux core—no gas needed—relies on the wire’s core to generate its own protection. It’s rugged for field work, like pipeline repairs or farm equipment fixes, but it spits more slag and can worm-track if you’re not careful.
Gas-shielded, or dual-shield, pairs the flux core with 75/25 argon/CO2 mix. This combo smooths out the arc, reduces spatter, and gives a cleaner bead—ideal for shop welds where appearance counts. For vertical up, I lean gas-shielded on anything over 3/16-inch thick; the extra shielding helps control the puddle without excessive voltage.
Pro tip from the trenches: If you’re new, start with gas-shielded. It forgives minor angle slips better. I once ran self-shielded on a vertical tee joint in a breeze—ended up with porosity like Swiss cheese. Switched gases, and it was night and day.
Choosing the Right 0.045 Flux Core Wire for Your Project
Wire diameter is your foundation, and 0.045-inch is a sweet spot for vertical work on mild steel from 1/8 to 1/2 inch thick. It’s beefy enough for penetration without the burn-through risk of thinner .030 or .035. Common classifications? E71T-1 for gas-shielded all-position work, or E71T-8 for self-shielded toughness. These meet AWS specs for 70 ksi tensile strength, perfect for structural fab under D1.1.
Why 0.045 specifically? It feeds stable at higher amps, letting you stack vertical passes faster than skinnier wire. I’ve used Hobart’s Fabshield or Lincoln’s Innershield on everything from trailer hitches to pressure vessel repairs—reliable every time.
When selecting, match to your base metal. For galvanized or dirty steel common in US recycling yards, go for a wire with manganese additives to deoxidize. Avoid cheap imports; they cast funny and lead to arc wander. Store it dry—moisture in the flux means hydrogen cracks waiting to happen.
Matching Wire to Material Thickness and Joint Type
Thickness drives everything. On 1/4-inch plate, 0.045 shines for single or two-pass vertical fillets. For 3/8-inch, plan three passes: root, fill, cap. Joint prep is key—bevel edges 30 degrees for groove welds, or feather mill scale on fillets.
Personal story: Early on, I mismatched .045 on thin 1/8-inch tubing for a gate frame. Blew right through. Lesson learned—test on scrap. Always.
Essential Equipment for Flux Core Vertical Welding
You don’t need a million-dollar rig, but the right setup matters. A constant-voltage power source like a Miller Multimatic or Lincoln Power MIG 210 handles the arc’s fluctuations best. Aim for 200-300 amps output—plenty for 0.045 verticals.
Gun choice: A 250-amp air-cooled with a U-shaped liner for flux wire. V-knurl drive rolls grip without mashing the soft core. Contact tip? Recess it 1/8 inch to avoid burn-back.
Safety gear is non-negotiable. Leather sleeves, FR jacket, and a good auto-darkening hood with side shields. Flux core slag flies hot—I’ve got scars from skipping gloves on a vertical up. And don’t forget ventilation; the fumes from flux burning off manganese are no joke in enclosed shops.
For US codes, ensure your machine’s calibrated—annual checks keep you compliant with OSHA and AWS.
Prep Your Workspace Like a Pro
Cleanliness is next to godliness here. Grind off rust, oil, or paint 1 inch back from the joint. On verticals, clamp pieces square—warped fit-up leads to undercut. Preheat thick sections over 1/2 inch to 150°F if it’s low-carbon steel; prevents cracking.
I’ve skipped prep on “quick fixes” and paid with porosity. Now, I hit it with a wire brush every time—takes two minutes, saves hours.
Step-by-Step Guide to Setting Up 045 Flux Core for Vertical Up
Fire up your miller or lincoln, spool in fresh 0.045 E71T-1, and follow this. We’re assuming gas-shielded for starters—adjust down 2-3 volts for self-shielded.
Step 1: Calculate base amps. Rule of thumb: 1 amp per .001 inch thickness. For 1/4-inch (0.250), start at 250 amps.
Step 2: Set wire feed speed (WFS). For 0.045, 250-350 IPM gets you there. Dial to 300 IPM—listen for a steady sizzle, not a popcorn pop.
Step 3: Voltage sweet spot. 23-26 volts for vertical. Too low (under 22), and you get a cold, convex bead; too high (over 27), and it’s spray mode with drips.
Step 4: Gas flow. 25-35 CFH on 75/25 mix. Purge the hose—stale gas means oxidation.
Step 5: Stickout and angle. 3/4 to 1 inch ESO (electrical stickout). Gun at 10-15 degrees drag, 90 degrees to the joint.
Test on scrap: Run a 6-inch vertical fillet. Adjust WFS up if penetration’s shallow; voltage down if spatter explodes.
I remember my first vertical cert—nerves had me at 20 volts. Puddle sagged like mud. Bumped to 24, and it stacked like butter.
Fine-Tuning for Your Machine
Every rig’s quirky. On my old Hobart 180, I add 50 IPM for vertical to compensate for voltage drop. Use a clamp meter to verify amps—don’t trust dials alone.
Recommended 045 Flux Core Vertical Settings Chart
Settings vary by wire brand and gas, but here’s a practical chart based on years of dialing in Miller and Lincoln machines. Use this for mild steel, vertical up fillets or grooves. Always test—your humidity or steel grade might tweak it.
| Material Thickness | Wire Feed Speed (IPM) | Voltage | Amps (Approx) | Gas Flow (CFH) | Passes Recommended |
|---|---|---|---|---|---|
| 1/8″ – 3/16″ | 200-250 | 22-24 | 150-200 | 25-30 | 1-2 |
| 1/4″ | 250-300 | 23-25 | 200-250 | 25-35 | 2 |
| 3/8″ | 300-350 | 24-26 | 250-300 | 30-35 | 2-3 |
| 1/2″ | 350-400 | 25-27 | 300-350 | 35 | 3-4 |
For self-shielded, drop voltage 2 points and WFS 50 IPM. On 100% CO2, add 1 volt for stability.
This chart’s my go-to cheat sheet—laminated in my toolbox. Saved me on a bridge repair in the rain.
Technique Tips for Nailing Vertical Up with 0.045 Flux Core
Technique’s where the magic happens—or the mess. Start with a 1/4-inch fillet to build confidence. Hold 3/4-inch stickout, drag at 10 degrees, and travel slow—4-6 IPM up the joint.
Stringer beads first: Straight up, no weave, letting the slag dam form. Watch the puddle’s leading edge; if it stacks convex, slow your travel. For wider joints, weave a gentle U: 1/8-inch side-to-side, pausing at toes to fill.
Gun angle: Perpendicular work lead, slight push on the vertical leg for better tie-in. Stand offset—lets you eye the nugget below without torch glare.
From the field: On a vertical tee for a conveyor frame, I wove too wide early on. Slag inclusions galore. Narrowed to stringers, chipped clean between passes—flawless X-ray.
Building Multi-Pass Verticals Like a Boss
Root pass: Low heat, 200 IPM, 22 volts—keyhole technique for fusion. Clean slag with a chipping hammer; wire brush the toe.
Fill passes: Crank to 300 IPM, 24 volts. Stack 1/8-inch layers, feathering edges.
Cap: Hotter, 26 volts, slight weave for reinforcement. Grind high spots if code calls for flush.
Pro insight: Interpass temp under 300°F prevents hydrogen issues. I use a temp stick—cheap insurance.
Common Mistakes with 045 Flux Core Vertical Settings and How to Fix Them
We all botch it sometimes. Biggest? Rushing the puddle. At 350 IPM on 1/4-inch, I once let it sag—hot metal on boots, lesson learned. Fix: Trust the wire; let slag build the dam before advancing.
Wrong voltage: Too high, worm tracks from gas escape. Dial back 0.5 volts, retest. Too low? Convex beads, poor fusion—bump 1 volt, check penetration on cut.
Birdnesting: Flux wire’s soft—over-tight drive rolls mash it. Loosen tension, use knurled rolls. Burnback? Short stickout; extend to 1 inch.
Porosity: Dirty metal or moist wire. Grind joints, bake wire at 250°F if suspect. I’ve chased pinholes from rainy storage—dry rod oven now standard.
Undercut: Fast travel or wrong angle. Slow to 5 IPM, drag steeper. On a shop column, undercut cost me a redo—now I pause at edges.
Spatter city? CO2 too high or voltage spike. Switch to 75/25, steady hand.
These fixes turned my “uh-oh” welds into keepers. Share yours in the comments—we learn from the oops.
Pros and Cons of Using 0.045 Flux Core for Vertical Welding
Pros
- Deep penetration: Ideal for structural T-joints or laps on A36 steel.
- All-position capability: Vertical up stacks easy with fast-freeze slag.
- Cost-efficient: High deposition (up to 5 lb/hour), less filler than stick.
- Wind-resistant: Self-shielded shines outdoors, no gas drift.
- Versatile: Works on rusty or painted stock with deoxidizers.
In my fab days, it cut project time 30% on verticals—boss loved that.
Cons
- Slag handling: Chipping between passes adds steps; messy for beginners.
- Spatter: More than solid MIG, eats tips faster.
- Fume city: Needs good ventilation; not for indoor without exhaust.
- Narrow parameter window: Off by 1 volt, and it’s trouble.
- Worm tracking risk: High voltage traps gas—watch settings.
Weigh these against your job. For quick field repairs, pros win; pristine shop aesthetics? Maybe solid wire.
Safety Considerations for Flux Core Vertical Welding
Safety first—always. Flux core arcs hot (over 6,000°F), and vertical means overhead risk if you slip. Full PPE: Hood at shade 10-12, gloves to elbows, steel-toe boots.
Fumes: Flux releases manganese and CO2—use a respirator in confined spaces, fresh air every hour. OSHA limits exposure; don’t ignore.
Electrical: Ground clamps tight, no wet floors. I’ve zapped myself on sloppy setups—hurts like hell.
Fire watch: Sparks fly up to 35 feet. Wet blankets nearby, extinguisher charged.
For verticals, ladder stability—harness up on scaffolds. US sites mandate fall protection over 6 feet.
Train your crew; complacency bites. My rule: Inspect gear pre-shift.
Real-World Applications: Where 045 Flux Core Verticals Shine
In US welding, this setup rules structural steel. Think erecting warehouses with vertical columns—deep fusion holds seismic loads per AISC codes.
Heavy equipment: Repairing dozer blades or excavator booms, where vertical laps take abuse. I’ve welded vertical stiffeners on a combine frame—held through harvest season.
DIY: Trailer frames or gate posts. Hobbyists love it for cost; pros for speed.
Shipyards: Vertical hull plates on barges, wind be damned.
One gig: Vertical up on a wind turbine base in Texas. 0.045 dual-shield, three passes—passed UT without a hitch.
Advanced Tips for Pro-Level Flux Core Vertical Welds
Once basics click, level up. Try CCO2 (20% CO2) for less spatter on stainless overlays.
Weave variations: J-motion for fillets—better toe wetting.
Post-weld: Hammer and heat treat thick verticals to relieve stress.
Experiment: Log settings per job—build your bible.
From mentoring apprentices: Practice 10 feet daily. Muscle memory trumps theory.
Conclusion: Dial In Your 045 Flux Core Verticals and Weld with Confidence
We’ve covered a lot—from wire picks to weave tricks, settings charts to slag pitfalls. Start with 23-26 volts and 250-350 IPM on 0.045 for most vertical ups, always test on scrap, and let the slag do its job. Clean prep and steady hands turn potential headaches into proud beads.
You’re now geared up to tackle those stubborn verticals, whether it’s a shop deadline or backyard build. No more sagging puddles or undercut regrets—you’ve got the know-how for welds that last. Grab your rod, fire up the machine, and lay down a beauty. Confident action starts with one pass. For killer fusion on thick verticals, preheat to 200°F and run a hot root pass—it’ll tie in like glue.
FAQ
What voltage and wire speed should I use for 045 flux core vertical up on 1/4-inch steel?
Aim for 23-25 volts and 250-300 IPM with 75/25 gas. This gives solid penetration without sagging. Test and tweak—if the bead’s convex, drop voltage half a point.
Can I weld vertical down with 045 flux core wire?
Sure, but it’s not ideal for strength. Vertical down works fast on thin stuff, but up gives deeper fusion. Use 20-22 volts, 200 IPM for down—great for laps, risky for load-bearing.
Why is my 045 flux core vertical weld poring or full of holes?
Likely dirty metal or moist wire. Grind joints clean and store wire dry. If it’s gas-shielded, check flow at 30 CFH. Bake suspect spools at 250°F for an hour.
How do I avoid undercut on vertical flux core fillets with 045 wire?
Slow your travel to 4-6 IPM and pause at the toes during weaves. Drag angle at 10-15 degrees helps wash in the edges. Good fit-up prevents it too—gap under 1/16 inch.
Is 045 flux core better than 035 for vertical structural welding?
Yes, for anything over 1/4 inch—deeper penetration and faster fill. 035 suits thin sheet; 045 handles amps better for multi-pass verticals without overheating. Match to thickness for best results.