Working around propane systems is one of those jobs where small wiring mistakes can create big safety problems. A loose connection, wrong voltage, or improperly installed shutoff valve can stop the system from reacting when it’s actually needed.
That’s why learning how to wire a propane electric safety shutoff valve is so important before starting any installation or repair work.
In real-world setups, these valves are designed to automatically stop propane flow during emergencies, power failures, or leak detection events. But getting them wired correctly takes more than matching a couple of wires together.
You need to understand the valve type, power source, control system, and basic electrical safety to avoid damaging the unit or creating a dangerous gas issue.
The good news is that the process becomes much easier once you understand how the system is supposed to work. I’ll walk through the wiring basics, common mistakes to avoid, and the practical steps that help ensure the shutoff valve operates safely and reliably when it matters most.
Image by Class C Vintage RV’s
The Core Mechanics: What a Propane Shutoff Valve Is and How It Operates
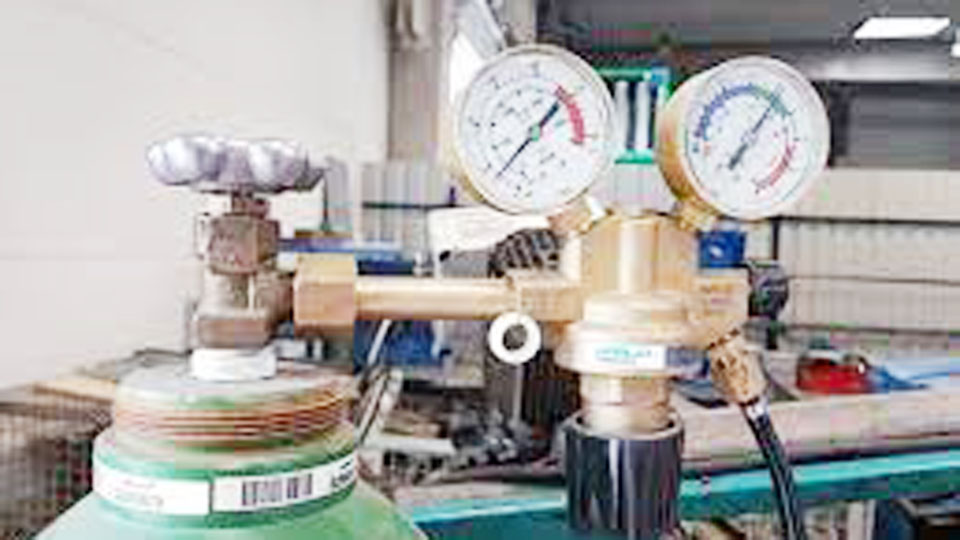
An electric propane safety shutoff valve—frequently referred to as a gas solenoid valve—is an electromechanical device designed to automatically control the flow of liquid or vaporized propane. In a professional welding or structural fabrication shop, these valves act as a defensive gatekeeper placed directly downstream of your primary gas regulator.
[Propane Tank] ---> [Regulator] ---> [Electric Shutoff Valve] ---> [Hose Reel / Torch]
                                               ^
                                      (12V DC / 120V AC Power)
How the Internals Work Under Pressure
The vast majority of shutoff valves used in industrial environments operate on a normally closed (NC) configuration. This is a deliberate, fail-safe engineering design.
Inside the valve body, a spring-loaded plunger or piston presses firmly down against the valve seat, mechanically blocking the passage of gas. Wrapped around the upper sleeve of this plunger is a coil of insulated copper wire (the solenoid).
When electrical current flows through this coil, it generates a magnetic field. This electromagnetic force pulls the plunger upward, compressing the internal return spring and clearing the passage so propane can flow smoothly through the valve.
The moment electricity is interrupted—whether you intentionally flip a switch, a circuit breaker trips, or a safety sensor detects a fault—the magnetic field collapses instantly. The heavy internal spring snaps the plunger back down into the valve seat, locking the fuel supply down hard before an uncontained fire can erupt.
Workshop Applications: When and Why You Need This Safeguard
Relying solely on manual brass needle valves at your torch manifold or tank regulator is a gamble. In a professional setting, an automated electric valve is deployed to eliminate human error and handle scenarios where manual intervention is impossible.
When to Integrate the System
Mobile Welding Rigs: If you run a service truck equipped with large propane heating tanks for field preheating, these valves are wired directly into the truck’s ignition switch or Power Take-Off (PTO) safety circuit. If the truck stalls or an emergency shutdown occurs, the fuel supply shuts down automatically at the bed.
Dedicated Thermal Cutting Stations: Fixed cutting tables or automated gantry systems benefit from interlocking the fuel gas valve with the main control panel.
Confined Space and Structural Repairs: When welding inside heavy machinery, tanks, or structural frameworks where the gas bottles remain outside, an inline electrical shutoff provides a way to kill the gas line instantly via a local pendant switch.
Why It Prevents Major Shop Catastrophes
The primary driving factor is preventing uncontrolled fuel release. Hot welding spatter from heavy E7018 structural sticks can easily burn through standard rubber fuel hoses if a protective blanket slips. If a line is breached downstream, an unmitigated stream of propane will feed an aggressive, high-temperature fire.
By interlocking the gas solenoid with your station’s primary safety circuit, hitting an E-stop button starves the fire at the source, preventing the flame from migrating back toward the bulk fuel storage cylinders.
Electrical Profiles: Choosing and Managing Voltage for Fabrication Systems
Before running wires through your workshop or mobile rig, you must match the electrical specifications of your valve coil to your environment. Selecting the wrong voltage or failing to properly ground the valve body can lead to coil burnout or severe electrical hazards.
Voltages Common to US Workshops
12V DC Solenoids: The standard choice for mobile welding trucks, field maintenance trailers, and engine-driven welding setups (such as Lincoln Classic or Miller Trailblazer rigs). These pull power directly from the equipment’s 12-volt battery and charging system.
120V AC Solenoids: Typically integrated into permanent, indoor shop bays, manufacturing cells, and stationary automated cutting tables. These plug into standard grid power panels and are controlled via machine relays.
Electrical and Amperage Demands
Industrial gas solenoids do not draw a massive amount of current, but their continuous draw must be accounted for. A standard 12V DC brass gas valve pulls between 1.2 to 2.5 Amps continuous while held open. A 120V AC valve typically draws between 0.15 to 0.40 Amps.
Because these coils remain energized for long stretches during preheating or production shifts, they will run warm to the touch. This heat is normal, but the wire gauge feeding them must be sufficient to prevent voltage drop, which causes the valve to chatter or drop out unexpectedly.
Step-by-Step Installation: Wiring a 12V DC Mobile Rig System
The following procedure outlines how to install and wire a 12V DC normally closed propane safety valve on a field welding truck or mobile fabrication rig. This configuration ensures the valve is only open when the system is actively armed and the equipment ignition is engaged.
Step 1: Pre-Installation Inspection and Grounding Prep
Ensure the fuel cylinder is closed tightly and the existing gas line is fully purged of pressure. Mount the valve securely to a solid bracket downstream of the regulator.
Look closely at the valve body for a cast arrow indicating direction of flow. Installing the valve backward will cause line pressure to force the seat open, rendering the mechanism useless.
Step 2: Running the Power and Ground Feeds
Locate the two primary lead wires extending from the potted solenoid coil. On standard 12V DC systems, these leads are typically color-coded or non-polarized, meaning either wire can act as positive or negative, provided the loop is clean.
Using high-quality 16 AWG stranded copper automotive wire, route a ground wire from one of the valve leads directly to a clean, unpainted spot on the truck chassis or machine frame. Crimp a ring terminal onto the wire, scrape back any rust or mill scale from the steel, and secure it down with a self-tapping screw and lock washer.
Step 3: Integrating the Arming Switch and Relay
Never wire a continuous-draw solenoid directly to your ignition switch, or you risk melting the switch contacts over time. Instead, use a standard 30-Amp automotive relay to carry the heavy lifting.
Wire the Relay Power Supply: Fused Source.
Run a dedicated 16 AWG hot wire from your battery positive terminal to Pin 30 of the relay. Install an inline 5-Amp fuse within 12 inches of the battery connection to protect the circuit.
Connect the Valve Load: Relay Output.
Route a wire from Pin 87 (Normally Open output) of the relay across the rig frame to the remaining positive lead wire on the propane solenoid valve. Use heat-shrink butt connectors to seal this joint from moisture and grease.
Establish Control Switch Input: Toggle Circuit.
Inside the cab or at the welder control panel, mount a heavy-duty toggle switch. Run a wire from a switched ignition circuit (power only active when the key is “ON”) to the input side of the switch.
Complete the Trigger Loop: Relay Coil Activation.
Run a wire from the output of your toggle switch to Pin 86 of the relay. Ground Pin 85 of the relay to the chassis. This setup means the toggle switch only works if the ignition key is on, activating the relay to open the gas valve.
Critical Machine Settings, Joint Prep, and Material Safety Notes
While wiring your safety valve ensures your shop doesn’t go up in smoke, your welding parameters determine if your work holds together. When performing structural fabrications or heavy component repairs that require extensive propane preheating, your thermal prep and mechanical settings must be precise.
Material Compatibility and Preheating Targets
When welding thick high-strength steels (like ASTM A572 Grade 50 or thick AISI 1045 carbon plates) common in heavy machinery repair, propane torches are used to bring the base metal up to temperature. This slow heat prevent cold cracking in the heat-affected zone (HAZ) and drives off ambient moisture that introduces hydrogen embrittlement.
[Thick Carbon Steel Plate] ---> Preheat to 250°F - 400°F via Propane Torch
                                ---> Prevents Hydrogen Cracking in HAZ
Always prepare your joints by grinding away mill scale, rust, and oils at least 1 inch back from the weld prep angle. Propane combustion releases a high volume of water vapor as a byproduct; if you do not get the steel uniformly past 212 degree F across its entire thickness, that moisture will condense on the cold steel, leading to instant porosity when you strike your arc.
Recommended Amperage and Rod Compatibility Matrix
Once your propane preheat system has safely brought the material up to the correct thermal threshold (verified via temperature-indicating crayons), select your welding parameters carefully based on process and material thickness.
| Process / Electrode | Diameter | Material Thickness | Recommended Amperage Range | Primary Application |
|---|---|---|---|---|
| SMAW / E6010 | 1/8″ | 3/16″ to 1/2″ | 80 – 125 Amps (DC+) | Root passes, deep penetration through scale |
| SMAW / E7018 | 1/8″ | 1/4″ and up | 110 – 165 Amps (DC+) | Structural fill, high-strength low-hydrogen caps |
| SMAW / E7018 | 5/32″ | 1/2″ and up | 140 – 220 Amps (DC+) | Heavy heavy-equipment repairs, high deposition |
| GMAW / ER70S-6 | 0.035″ | 1/8″ to 3/8″ | 160 – 210 Amps (21-24V) | General shop fabrication, clean production lines |
Comparison: Low-Voltage DC vs. Line-Voltage AC Solenoid Installations
Choosing between a low-voltage DC setup and a standard AC line-voltage setup depends heavily on whether your configuration is fixed or mobile. Both styles have distinct engineering trade-offs regarding safety, component cost, and installation complexity.
| Operational Feature | 12V / 24V DC Systems | 120V AC Systems |
|---|---|---|
| Primary Environment | Mobile welding trucks, field rigs, trailers | Permanent fabrication bays, automated lines |
| Shock Hazard Level | Extremely Low (Safe for wet/outdoor environments) | Medium to High (Requires rigid conduit and sealing) |
| Control Componentry | Standard automotive relays and toggles | Industrial control transformers and DIN relays |
| Wiring Requirements | Flexible stranded wire (16 AWG standard) | Solid or stranded THHN wire inside conduit panels |
| Failure Modes | High vulnerability to terminal corrosion | Coil overheating if line voltage fluctuates |
Visual Identification of Components
When sourcing components from industrial suppliers, clear visual identification prevents catastrophic mistakes, such as hooking a low-voltage DC coil directly to an AC shop line.
DC Valve Solenoids: Typically feature direct wire leads emerging from a completely smooth, epoxy-potted plastic or metal housing. The body size is compact, and electrical ratings are stamped directly into the metal plate on top of the coil cylinder.
AC Valve Solenoids: Frequently incorporate an integrated junction box, a three-prong DIN connector interface, or a threaded conduit hub (usually 1/2″ NPT) built directly into the top of the coil module to allow for armored cable attachment.
Pros and Cons of Integrating Automated Safety Shutoffs
Every layer of complexity you introduce into a workshop environment comes with a distinct balance of benefits and operational liabilities. Understanding these trade-offs helps you design a more resilient system.
Advantages
Instantaneous Failure Response: If a line ruptures or an operator drops a heavy piece of iron across a gas line, dropping power to the bay instantly kills the gas delivery.
Reduction in Human Oversight: Welders focused on completing a complex root pass can forget to turn off gas bottles during breaks. An automated master switch clears this liability.
Regulatory Compliance: Many industrial fire codes and insurance frameworks mandate a positive, automated means of fuel isolation for high-volume indoor gas operations.
Disadvantages
Introduction of Electrical Fail Points: If a relay burns out, a fuse pops, or a ground wire corrodes on a mobile rig chassis, your gas supply locks up completely. Troubleshooting electrical issues can stall a production shift.
Thermal Limitations: If mounted too close to a heavy preheating station or a fiery cutting table, ambient radiant heat can cook the insulation within the solenoid coil, causing premature short-circuit failure.
Common Shop Field Errors and How to Troubleshoot Them
Even seasoned industrial fabricators can run into frustrating issues when first integrating automated gas controls. Avoid these three common pitfalls when installing your system.
1. The Solenoid Buzzes but Never Opens
This classic symptom is almost always caused by a severe voltage drop or trying to feed an AC coil with DC power (or vice versa). If a 12V DC coil receives only 9 or 10 volts due to undersized supply lines or a corroded chassis ground, the magnetic field will be too weak to pull the plunger up against the internal spring.
The plunger will lift slightly, stall, and vibrate rapidly, creating a loud buzzing sound. Clean your grounds, check your line voltage right at the coil terminals with a multimeter while the circuit is under load, and verify your wire run isn’t undersized.
2. Wiring Control Lines Right Next to Gas Hoses
Never zip-tie your electrical control wires or relay feeds directly to your rubber propane or oxygen hoses. This is a severe fire hazard.
If a hot wire rubs against a sharp edge on the rig and shorts out, the wire can glow red-hot within seconds. If it melts through the adjacent rubber propane fuel hose, you have just combined an ignition source directly with an accelerating fuel supply.
Keep your electrical lines cleanly routed along chassis framing channels, protected by split-loom conduit, and completely isolated from gas lines.
3. Ignoring Debris Prep on New Lines
When plumbing a new brass valve into your shop manifold, clean the pipe threads carefully. If you use cheap Teflon tape and allow pieces of it to shred off inside the pipe fittings, those loose plastic fragments will travel down the line with the propane vapor.
The moment they hit the safety valve, they can get caught directly between the descending steel plunger and the precision rubber valve seat. Even if the power is cut, this tiny bit of debris will prevent a total seal, allowing gas to leak through the lines continuously.
Always use high-quality, gas-rated pipe dope instead of tape, and blow out your hard lines with compressed air before screwing the final valve assembly together.
Maintaining the Safety Loop
Integrating a normally closed safety shutoff valve transforms a simple propane setup into a resilient, industrial-grade fuel system. By managing your voltages correctly, leveraging heavy-duty relays to isolate your control circuits, and keeping your electrical feeds separated from your mechanical lines, you build a workshop that protects both your equipment and your team.
Whether you are configuring a mobile service truck to survive bumpy lease roads or upgrading a production bay for heavy structural welding, this installation eliminates one of the biggest single liabilities in gas handling. Take the time to map your circuits cleanly, use proper wire sizes, and perform a static pressure check every time you alter your fuel train.
The most valuable tip for running these automated shutoff configurations long-term comes down to preventive maintenance on your grounds: never rely on a simple friction ground on a painted mobile rig frame. Over months of field exposure, vibrations and ambient moisture will cause micro-corrosion beneath the washer, spiking your electrical resistance.
Take five minutes to grind the frame back to bright, shiny metal, apply a thin coat of conductive dielectric grease directly over your ring terminal, and bolt it down solid. Your solenoid will snap open crisply every single time you strike up your rig.
Troubleshooting Shop Gas Controls
Can I use a standard brass water or air solenoid valve for my propane line?
Absolutely not. Propane is an aggressive solvent that will degrade standard Buna-N or low-grade rubber seals found inside common water and air valves within weeks. Once those internal seals swell, soften, or dissolve, the valve will jam open or leak gas continuously out of the housing.
You must only source valves explicitly rated by the manufacturer for LPG, propane, or natural gas service, which typically utilize specialized Viton or HNBR sealing elements designed to withstand hydrocarbons.
Why does my propane safety valve run incredibly hot during long shifts?
Because a normally closed solenoid requires continuous electrical energy to hold the internal spring back and keep the valve open, the coil acts as a continuous heating element. It is completely normal for an industrial gas solenoid to reach temperatures up to 130 degree F to 150 degree F during extended operation.
To prevent premature failure, make sure the valve is mounted in a well-ventilated area where it isn’t subjected to additional ambient heat from preheating torches or engine exhausts.
How do I manually override the shutoff valve if my rig battery dies in the field?
You shouldn’t attempt to bypass a safety shutoff in the field unless your valve model features a dedicated, built-in mechanical override screw on the bottom of the casting. If it does not, never jam a screwdriver into the coil assembly or attempt to heat the body to crack it open.
If you face an absolute emergency and your battery charging system fails on a remote job site, you must manually replumb your gas hose directly to the regulator output fitting, bypassing the valve completely until you can repair the rig’s electrical system.