Hearing a sudden hiss from a CO2 regulator during setup can get your attention fast, especially when you’re not sure whether the pressure is normal or something’s about to fail. In welding and gas-handling work, small components often get ignored until they become a problem—and the safety valve is one of them.
That’s why understanding How to Use the Safety Valve on CO2 Regulator is more important than most beginners realize.
A CO2 regulator deals with high-pressure gas, and the safety valve is there to protect both the equipment and the operator if pressure builds beyond safe limits. But many people either misunderstand its purpose or accidentally misuse it while adjusting the regulator.
I’ve seen perfectly good regulators damaged simply because someone forced adjustments without understanding how the valve system worked.
Knowing how this safety feature operates can help prevent gas leaks, equipment failure, and dangerous pressure buildup.
I’ll walk through how the safety valve works, when it activates, and the practical steps for using and checking it safely during setup and operation.
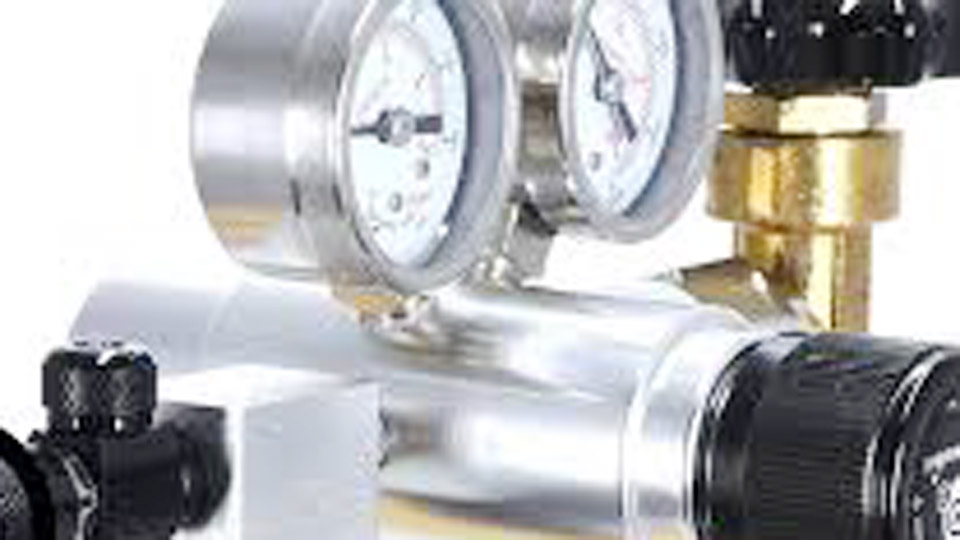
Image by co2supermarket
What Is the Safety Valve on a CO2 Regulator and Why Does It Matter?
The safety valve, often called a pressure relief valve (PRV) or relief valve, is a built-in fail-safe on most CO2 welding regulators. It automatically vents excess pressure to prevent damage to the regulator, hoses, or downstream components.
On the high-pressure side (cylinder pressure, often 800-2000+ psi depending on the bottle), there’s usually a burst disc or robust relief. On the low-pressure/output side (where you set your flow, typically 10-35 CFH), a spring-loaded valve pops open if pressure climbs too high—say, from a diaphragm failure or improper adjustment.
In real welding, this matters because CO2 behaves differently than argon mixes. It comes out cold as it expands from liquid to gas, which can cause freezing, pressure fluctuations, and icing on the regulator.
A functioning safety valve gives you a buffer. Without trusting it (or if it’s faulty), you might face sudden gas dumps, porosity in your welds, or dangerous over-pressurization.
I’ve seen beginners crank the adjustment knob too aggressively and hear that telltale hiss. That’s the valve doing its job—better than a diaphragm blowing out.
How Does the Safety Valve Actually Work?
It’s simple mechanics. Inside the valve sits a spring holding a seat or poppet closed under normal operating pressure. When downstream pressure exceeds the spring’s set point (often around 50-100 psi on the low side for welding regs, though it varies), the force pushes the seat open and gas vents safely, usually through a small port or vent hole.
Once pressure drops back to safe levels, the spring reseats it (on re-seating types common in welding). Some are one-time burst designs, but most welding CO2 regulators use adjustable or automatic reseating valves.
Key difference from cylinder valves: The cylinder itself has its own safety mechanisms. The regulator’s valve protects the low-pressure circuit that feeds your MIG gun.
In practice, with straight CO2, rapid gas withdrawal cools everything fast. If your regulator ices up, pressure can behave erratically, making the relief valve more likely to act up if there’s an underlying issue.
Step-by-Step: How to Safely Set Up and Use Your CO2 Regulator
Here’s the exact routine I use every time— no shortcuts.
Inspect everything first. Check the regulator for damage, corrosion, or old seals. Look at the safety valve port for any debris or signs of previous venting. Ensure the cylinder is secure, upright, and away from heat.
Attach the regulator. Use the proper CGA-320 fitting for CO2. Hand-tighten, then snug with a wrench—don’t gorilla it. No Teflon tape on these connections; it can contaminate or leak.
Back out the adjustment knob. Turn it counterclockwise fully to relieve any spring tension before opening the cylinder valve. This prevents “regulator slam.”
Crack the cylinder valve slowly. Stand to the side, open it just a quarter turn, listen for issues, then open fully. Watch the high-pressure gauge. The safety valve shouldn’t vent here if everything’s right.
Set your delivery pressure/flow. Slowly turn the knob clockwise to your target. For MIG with CO2, I start around 15-25 CFH depending on wire size, joint, and draft. Use the flowmeter (ball type) with the gun triggered for accurate reading.
Test for leaks. Spray soapy water on all connections, including around the safety valve area. Bubbles mean trouble—tighten or replace.
Monitor during welding. If you hear hissing from the relief valve while welding, stop. It could mean over-adjustment, internal failure, or freezing causing weird pressure buildup.
Always close the cylinder valve when done, then bleed the lines by triggering the gun or using any purge valve. This takes stress off the regulator and safety valve.
When and Why You Should Pay Attention to the Safety Valve
Use (or rather, respect) the safety valve every session. It activates when:
- You over-adjust the knob and spike low-side pressure.
- The main diaphragm ruptures, letting high pressure through.
- Freezing or contamination causes erratic behavior.
- There’s a blockage downstream.
Why care? In a busy shop, a failed regulator without a working relief can turn a $30 fix into a ruined hose, torch, or injury. With CO2, the cold expansion makes regulators more prone to issues than with pure argon. I’ve had regs freeze solid on long production runs, leading to fluctuating flow and the relief popping intermittently.
Common Mistakes Beginners (and Pros) Make with CO2 Regulators
- Cranking the knob with the cylinder open: This slams the diaphragm and can pop the relief or worse.
- Ignoring leaks: A constant small hiss from the safety area often means the valve is damaged or the seat is worn. Replace the regulator—don’t try to “fix” critical safety parts yourself.
- Using argon-only regs on CO2: Wrong fittings and mass can lead to freezing or improper relief settings.
- Storing with pressure on the regulator: Always bleed it down.
- High flow in cold shops: CO2 loves to freeze things; use a heater if running heavy duty cycles.
One pro tip: If the relief valve vents once or twice during normal use, it’s protecting you. If it chatters constantly, the regulator is toast.
MIG Settings and Tips When Running CO2
Straight CO2 gives great penetration but more spatter and a harsher arc than C25 (75% Ar/25% CO2). Adjust accordingly:
- Wire diameter 0.030″: 80-180A, higher voltage than mix (often +1-2V).
- Wire diameter 0.035″: 150-250A range common for thicker material.
- Flow rate: 15-25 CFH indoors; bump to 25-35 CFH in wind. Too much creates turbulence and sucks in air.
Joint prep is non-negotiable with CO2—clean metal, good fit-up, and sometimes preheat on thicker stuff to manage distortion. Use short-circuit or globular transfer; spray is tough with pure CO2.
Pros of CO2: Cheap, deep penetration, good for outdoor or heavy fab.
Cons: More spatter, harsher arc, regulator freezing risk, slightly more oxidation.
| Gas Type | Typical Flow (CFH) | Arc Characteristics | Spatter Level | Best For |
|---|---|---|---|---|
| 100% CO2 | 15-25 | Hotter, deeper pen | Higher | Thick mild steel, cost |
| C25 (Ar/CO2) | 20-35 | Smoother, stable | Lower | Thin to medium, appearance |
| Argon Mixes | Varies | Soft, clean | Lowest | Stainless, aluminum |
Maintaining Your Regulator and Safety Valve
Clean the inlet filter regularly. Avoid dropping the unit. In cold garages (common in the Midwest or Northeast), a regulator heater or even a trouble light under a jacket helps prevent freezing.
Test the safety function occasionally by slowly over-adjusting (with caution) in a safe area, but don’t make a habit of it. Replace regulators every few years or after heavy use— they’re inexpensive insurance.
Troubleshooting Safety Valve Issues
- Constant venting: Diaphragm failure or stuck seat. Replace regulator.
- No flow but valve open: Blockage or empty cylinder.
- Freezing and venting: Reduce flow, add heat, or switch to mix gas for lighter duty.
- Hiss only when triggered: Check hose and gun connections first.
Always err on the side of caution. Gas under pressure doesn’t forgive mistakes.
Final Thoughts
In the shop, getting comfortable with your CO2 setup—including that safety valve—means fewer surprises and better welds day in and day out. You’ve got the practical knowledge now to set up safely, dial in flow without drama, and recognize when something’s off before it costs you time or money.
Treat the regulator like the high-pressure bomb it contains. Slow, deliberate actions when opening cylinders will save more equipment than any fancy technique.
Keep your gear maintained, your settings dialed for the actual gas you’re using, and you’ll lay down consistent beads whether it’s a quick repair or a full fabrication job.
FAQ
Why is my CO2 regulator safety valve hissing?
Usually because the low-side pressure is too high from over-adjusting the knob, or the internal diaphragm is failing and letting cylinder pressure through. Back out the knob fully, close the cylinder, bleed lines, and test again. If it persists, replace the regulator.
Can I adjust or repair the safety valve myself?
Generally no. These are safety-critical components. Tampering can lead to incorrect relief pressure. Buy a new quality regulator suited for CO2 service.
Do I need a special regulator just for pure CO2?
You need the correct CGA-320 inlet fitting. CO2 regulators (or dual-gas capable) handle the colder temps better. Argon regs often freeze or perform poorly with straight CO2.
How do I prevent my CO2 regulator from freezing up?
Use lower flow rates when possible, add a heater, keep the shop warmer, or switch to C25 mix for most work. Avoid long continuous runs without breaks.
What’s the right gas flow rate for MIG with CO2?
Start at 15-20 CFH for indoor work with 0.030-0.035″ wire. Test by welding and checking for porosity or spatter. Adjust for drafts—never go excessively high.