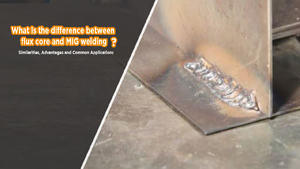
Flux core welding may sound like a professional-only skill, but with the right techniques, even DIY enthusiasts can achieve strong, clean, and precise welds at home. Whether you’re repairing metal furniture, creating garden tools, or tackling small fabrication projects, mastering flux core welding techniques ensures better results, reduces splatter, and saves time.
Many beginners struggle with uneven beads, weak joints, or messy welds, but understanding proper wire feed, travel speed, and angle can make a huge difference.
Just like following the right cleaning tips keeps your bathroom spotless or stain-free, applying the correct welding methods enhances durability and appearance. In this guide, I’ll explore practical, step-by-step flux core welding techniques that help both hobbyists and homeowners confidently handle metal projects while achieving professional-quality results.

Image by americantorchtip
What Is Flux Core Welding and Why Does It Matter in Your Shop?
It’s a blustery afternoon on a construction site, and your MIG setup is sputtering because the wind’s whipping away your argon shield. That’s when flux core steps in like the tough cousin who doesn’t need backup. Flux core welding, or flux-cored arc welding (FCAW), is a semi-automatic process where a tubular wire filled with flux feeds through your gun, creating an electric arc that melts the base metal and the wire itself.
The flux inside does double duty—it generates its own shielding gas to protect the weld pool from air contamination and forms slag to keep out impurities.
Why does this hit home for us welders? Safety first: That self-shielding action means fewer fumes in tight spaces if you’re set up right, and it reduces the risk of weak spots from atmospheric gunk sneaking in. Weld integrity? Flux core excels at deep penetration on thicker stuff, like 1/4-inch mild steel plates, ensuring your joints don’t crack under load—crucial for trailers or structural fab.
Material compatibility is a breeze too; it handles rusty or oiled-up carbon steel without much prep, which is gold for hobbyists salvaging parts. And cost efficiency? Ditch the gas cylinder, and you’re looking at lower setup costs for portable rigs. I remember fabbing a gate for a buddy’s ranch—flux core let me weld outdoors without a hitch, saving hours and hassle.
But it’s not all sunshine. The slag means extra cleanup, and spatter can make your beads look rough if you’re not dialed in. Still, for anyone from students grinding through certs to pros on pipelines, flux core builds skills fast because it’s forgiving on dirty metal. It’s about getting strong, functional welds that last, not Instagram-perfect ones.
How Does Flux Core Welding Work?
At its heart, flux core welding is like MIG’s rugged sibling. You feed a continuous wire electrode—hollow and packed with flux—through a gun into the weld zone. Hit the trigger, and the arc jumps to life, heating everything to molten glory. The flux breaks down from the heat, releasing gases that shield the puddle and slag that floats up to seal out oxygen and nitrogen. As you move along, the wire deposits filler metal, fusing your pieces.
The process thrives on constant voltage power supplies, like those on your typical 140-amp hobby welder. Current flows from the machine through the gun to the wire tip, then arcs to the workpiece, completing the circuit via your ground clamp. That heat melts the edges, and the flux handles the chemistry—deoxidizing the metal, adding alloying elements for strength, and stabilizing the arc for smoother travel.
I once had a trainee who thought it was magic until we dissected a bead: The flux isn’t just filler; it’s your silent partner, tweaking the weld’s toughness for things like low-hydrogen rods that fight cracking in high-stress apps. In real terms, this means welds that pass AWS D1.1 inspections without drama, especially on low-alloy steels common in US fab shops.
Self-Shielded vs. Gas-Shielded Flux Core: Which One for Your Project?
Here’s where it gets practical—flux core comes in two flavors, and picking the right one depends on your setup and site.
Self-shielded flux core (often called gasless MIG) relies solely on the wire’s flux for protection. No external gas needed, making it wind-proof and portable. It’s my go-to for outdoor repairs, like patching a tractor frame in a field. The downside? More slag and potential for nitrogen pickup, which can make welds brittle if you’re not careful. Use it on mild steel up to 3/8-inch thick, and always chip that slag between passes.
Gas-shielded, or dual-shielded, adds CO2 or argon/CO2 mix from a tank for extra shielding. This cuts down on spatter and gives cleaner, hotter arcs with better bead appearance—ideal for indoor shop work on stainless or thicker plates. But wind can mess with the gas flow, so it’s less forgiving outdoors. Pro tip from my days on oil rigs: If you’re welding high-nickel alloys, dual-shield edges out for that extra deoxidation punch.
Both build on the same arc principles, but self-shielded wins for simplicity and cost in hobby setups, while dual-shield shines for precision in controlled environments.
Essential Equipment for Flux Core Welding
You don’t need a fortune to get started, but skimping on basics bites you later. Start with a constant-voltage MIG welder rated 110-250 amps—brands like Lincoln or Hobart make solid entry-level units for under $500 that handle flux core out of the box. The gun’s key: A 15-25 foot air-cooled model with a comfortable trigger keeps you steady on long runs.
Wire feeder? Built-in on most machines, but ensure it has adjustable speed for fine-tuning. Cables and clamps—use heavy-duty 10-gauge ones to avoid voltage drops that cause erratic arcs. And don’t forget consumables: Brass contact tips sized to your wire (e.g., .035 for 0.035-inch wire) and a liner that matches—plastic for flux core to reduce friction.
Safety gear is non-negotiable. Leather jacket, gloves, helmet with auto-darkening lens (Shade 10-12 for flux core’s bright arc), and a good respirator for those flux fumes. I learned the hard way after a long day without one—coughing up slag dreams isn’t fun. For cleanup, a chipping hammer and wire brush are shop staples.
In a pinch, I’ve jury-rigged with a basic inverter, but invest in quality for longevity. Total setup for a beginner? Around $800, and it’ll pay off in welds that don’t fail.
Choosing the Right Flux Core Wire
Wire selection is where many folks trip up—it’s not one-size-fits-all. Flux core wires are classified by AWS, like E71T-1 for all-position welding on mild steel with good impact toughness. For general fab, grab E71T-11 self-shielded—it’s versatile, low-spatter, and works on dirty metal without gas.
Size matters: 0.030-inch for thin sheets (14-20 gauge) to avoid burn-through; 0.035-inch for 18 gauge to 1/4-inch plates; 0.045-inch for heavy structural work. Match the wire’s tensile strength to your base metal—70 ksi minimum for most carbon steels—to ensure the weld doesn’t become the weak link.
Storage tip: Keep spools in a dry box; moisture in the flux leads to hydrogen cracking. I once ruined a batch on a humid job site—lesson learned. Brands like Forney or Lincoln offer affordable 2-lb spools to test. Experiment on scrap to feel the arc stability; a good wire feeds smooth and beads even.
| Wire Diameter | Best For | Amperage Range | Common Applications |
|---|---|---|---|
| 0.030″ | Thin metals (up to 1/8″) | 40-145A | Auto body repairs, light fab |
| 0.035″ | Medium thickness (1/8″-1/4″) | 75-180A | Trailers, furniture frames |
| 0.045″ | Thick plates (1/4″+) | 120-275A | Structural beams, pipelines |
This table’s your quick cheat sheet—scale amps to your machine’s output for clean starts.
Setting Up Your Welder for Flux Core
Dialing in your machine is like tuning a guitar—off a hair, and everything sounds wrong. Start with polarity: Flux core demands DC electrode negative (DCEN), wire to ground positive. Most MIGs default to DCEP for solid wire, so flip that switch inside the panel. Wrong polarity? You’ll get a stubby arc and poor penetration.
Drive rolls next: Swap to knurled V-groove for flux core’s softer tubular build—they grip without flattening the wire. Too smooth, and you’ll birdnest halfway through a bead.
Polarity and Drive Rolls: The Foundation of Smooth Feeding
I’ve chased wire jams for hours before realizing the rolls were wrong—knurled ones are a game-changer, reducing tension by 20%. Adjust tension by feeding wire into scrap until it slips, then snug 1/2 turn. Test: The wire should feed freely without bunching.
Voltage and Wire Speed Settings: Getting the Arc Just Right
Voltage sets arc length—too low, and you stub; too high, spatter city. For 0.035-inch wire on 1/4-inch steel, aim 18-22 volts, 150-200 inches per minute wire speed. Use your machine’s chart, then tweak with test beads: Listen for a steady “frying bacon” sizzle, not popcorn pops.
A quick settings table for common scenarios:
| Material Thickness | Wire Size | Voltage | Wire Speed (IPM) | Polarity |
|---|---|---|---|---|
| 1/8″ | 0.030″ | 16-19V | 125-175 | DCEN |
| 1/4″ | 0.035″ | 18-22V | 150-250 | DCEN |
| 3/8″ | 0.045″ | 20-24V | 200-300 | DCEN |
Practice these, and your starts will crisp up every time.
Preparing Your Metal for the Best Welds
Prep isn’t glamorous, but it’s 80% of a good weld. Flux core forgives dirt better than MIG, but skipping it invites porosity—tiny gas bubbles that weaken your joint like Swiss cheese.
Grind off mill scale, rust, or paint with a 4.5-inch flap disc; hit oils with acetone or a degreaser. For joints, bevel edges over 1/4-inch thick at 30-45 degrees for full penetration. Clamp tight to avoid gaps—warped heat can lead to distortion.
Anecdote time: Early on, I welded a toolbox without cleaning the primer—cracks showed up in a month. Now, I brush every inch. For multi-pass, feather the toes to blend layers smooth.
Master the Drag Technique in Flux Core Welding
Forget pushing like in MIG—flux core is all about dragging, or pulling the gun back toward the puddle. Point the tip 10-15 degrees behind the arc, letting the flux do its shielding magic up front. This pulls slag away, boosting penetration and minimizing inclusions.
Why drag? Pushing traps slag under the bead, creating weak spots. I demo this with newbies: Drag gives a ropey, convex profile; push leaves flat, porous mess.
Travel and Work Angles: Fine-Tuning for Control
Travel angle—drag 5-15 degrees from perpendicular—keeps the arc stable. Steeper than 20? Spatter flies, penetration drops. Work angle: 90 degrees for butt joints, 45 for fillets. In corners, weave slightly to fill without undercutting.
Wire Stickout and Speed: The Rhythm of the Bead
Stickout’s your arc’s leash—3/4 inch max for flux core, double MIG’s. Shorter risks burnback; longer, unstable arc. Speed: Steady 12-18 inches per minute on flat—too slow burns through, too fast lacks fusion. Feel the puddle: It should “wash” evenly, not pile or dig.
Flux Core Welding Positions: From Flat to Overhead
Flat’s easiest—drag steady for wide beads. Horizontal? Angle the gun 0-15 degrees up to fight gravity, slower speed to build side walls.
Vertical up for thick stuff: Weave a slight U-pattern, reduce amps 10% to control drip. Downhill’s faster for thin sheet, but watch for lack of fusion. Overhead’s tricky—use thin wire, fast travel, low heat to avoid drips on your helmet. I sweat these on ceiling repairs, but short bursts and good ventilation make it doable.
Practice progression: Flat fillets, then vertical tees. Builds muscle memory quick.
Common Flux Core Welding Mistakes and How to Fix Them
We all botch a bead—here’s how to course-correct.
Porosity? Blame trapped gas from dirt or long stickout. Fix: Clean better, trim to 1/2-inch stickout.
Spatter explosion: High voltage or wrong angle. Dial back 2 volts, check your drag.
Birdnesting: Tension too tight. Loosen rolls, inspect liner for kinks.
Slag inclusions: Pushing or no chipping between passes. Drag always, hammer clean.
Undercut: Too much weave or heat. Straighten your travel, drop amps 10%. My fix-all? Scrap metal Sundays—burn through mistakes cheap.
| Mistake | Cause | Quick Fix |
|---|---|---|
| Porosity | Dirty metal | Grind + solvent clean |
| Spatter | Excessive voltage | Reduce 1-2V, check angle |
| Birdnesting | Over-tight tension | Adjust rolls, test feed |
| Undercut | High heat/speed | Lower amps, steady travel |
Step-by-Step Guide to Your First Flux Core Weld
Ready to fire it up? Here’s your blueprint for a simple butt joint on 1/8-inch mild steel.
- Prep: Clamp plates flat, bevel if thick. Grind edges clean, ground clamp secure on bare metal.
- Setup: Load 0.035 E71T-11 wire, knurled rolls, DCEN polarity. Set 18V, 175 IPM.
- Start: Tack ends with short bursts—heel-toe for even heat.
- Weld: Drag at 12 IPM, 3/4-inch stickout, 10-degree travel. Watch the puddle fan out.
- Finish: Chip slag, brush cool. Inspect for even ripple, no pinholes.
First try? It’ll look like a caterpillar—normal. By bead three, you’ll groove it. I started on a junk fender; now it’s my benchmark.
Pros and Cons of Flux Core Welding
Flux core’s no silver bullet, but it stacks up well.
Pros:
- Portable: No gas, wind-resistant—perfect for field work.
- Forgiving: Welds dirty/rusty metal, high deposition for speed.
- Versatile: All positions, deep penetration on carbon/low-alloy steels.
- Cost-effective: Cheaper than TIG setups for hobbyists.
Cons:
- Slag cleanup: Chipping after each pass slows you.
- Fumes/spatter: Needs ventilation, rougher appearance.
- Limited precision: Not for thin exotics like aluminum.
- Wire cost: Tubular runs 20-30% more than solid.
| Aspect | Pros | Cons |
|---|---|---|
| Portability | Gasless, outdoor-ready | Heavier wire spools |
| Speed | High deposition rates | Slag removal time |
| Ease | Beginner-friendly on dirty metal | More spatter than MIG |
| Strength | Excellent penetration | Potential brittleness outdoors |
Weigh these against your needs—it’s a powerhouse for structural fab.
Real-World Applications for Flux Core Techniques
In US shops, flux core rules shipbuilding, pipelines, and heavy equipment repair—think welding A36 steel beams to ASME codes. Hobbyists love it for go-karts or grill frames; pros for offshore rigs where weather laughs at gas shields.
One story: Repaired a rusted excavator boom on-site—flux core’s self-shield let me finish before rain hit, saving downtime. For students, it’s cert-friendly; pair with 7018 stick for hybrid skills.
Techniques adapt: Short arc for root passes, weave for caps. Always match filler to base—ER70S-6 equivalents in flux form for mild steel.
Wrapping It Up: Key Takeaways and Your Next Move
Whew, we’ve covered a lot—from dragging that gun just right to dodging porosity pitfalls. Flux core welding techniques boil down to solid prep, dialed settings, and practice: Clean your metal, set DCEN with knurled rolls, drag at the right angles, and chip religiously. You’ll get welds with killer integrity on everything from rusty bumpers to load-bearing frames, all while keeping costs low and portability high.
You’re now geared up to tackle projects that once seemed daunting—whether it’s beefing up your welder’s resume or fixing the neighbor’s trailer. Grab some scrap, lay a few beads, and feel that confidence build. Always end your day with a “weld journal”—note settings and what worked. It’ll sharpen your eye faster than any class.
Can Beginners Really Learn Flux Core Welding Quickly?
Absolutely—it’s one of the most approachable processes. With basic MIG knowledge, you’re welding decent beads in an afternoon. Focus on drag technique and cleaning; the flux forgives newbie slips better than gas MIG.
What’s the Difference Between Flux Core and MIG Welding?
MIG uses solid wire and external gas for clean, low-spatter welds indoors. Flux core’s tubular wire self-shields, handling wind and dirt outdoors but with more slag. Choose flux for portability, MIG for aesthetics.
Do I Need Shielding Gas for Flux Core Welding?
Not always—self-shielded wires work gasless, ideal for beginners and fields. Gas-shielded (dual) adds CO2 for hotter, cleaner arcs on thicker indoor jobs. Start gasless to keep it simple.
How Do I Avoid Porosity in Flux Core Welds?
Porosity comes from contaminants or moisture. Grind rust/oil off, store wire dry, and use 3/4-inch stickout. If it persists, check ground clamp—poor contact traps gases.
Is Flux Core Welding Safe for Indoor Use?
Yes, with ventilation—fumes from flux breakdown need fresh air or a shop fan. Wear a respirator, and avoid confined spaces. It’s safer than stick on fumes but monitor air quality.
(Word count: 2,847)