
A stainless steel part can look perfectly clean and polished on the outside, yet still be vulnerable to rust if the surface has been contaminated during fabrication. Grinding, welding, cutting, and handling can leave behind tiny particles that weaken the metal’s natural corrosion resistance.
That’s why many fabricators, welders, and manufacturers pay close attention to How Does Passivation Work and why it plays such an important role in metal finishing.
Passivation isn’t about adding a coating or changing the appearance of the metal. Instead, it helps restore and strengthen the protective oxide layer that allows stainless steel to resist corrosion in demanding environments.
When done correctly, it can significantly improve the lifespan and reliability of components used in everything from food-processing equipment to industrial machinery.
Understanding the process can help you avoid costly corrosion issues and make better decisions when working with stainless steel.
I’ll break down how passivation works, why it’s used after welding and fabrication, and what happens at the metal surface to create long-lasting protection.
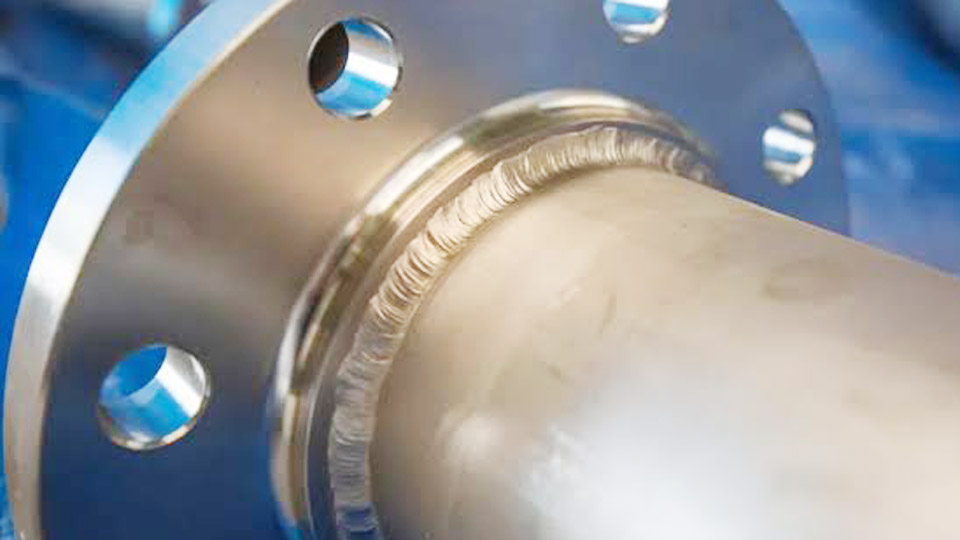
Image by leadrp
What Exactly Is Passivation in Stainless Steel?
Passivation is a chemical treatment that removes free iron and other surface contaminants from stainless steel while allowing a uniform, thin chromium-rich oxide layer to form. This layer, only a few atoms thick, acts as a barrier against oxygen, moisture, chlorides, and other corrosives.
Stainless steels like 304 or 316 already contain enough chromium (usually 16-18% or more) to self-passivate naturally when exposed to oxygen on a clean surface. But welding heat, grinding wheels, or even shop contaminants disrupt this.
The result is heat tint, embedded iron particles, and a chromium-depleted zone right under the surface. Passivation fixes that by selectively dissolving the iron without harming the base metal much, then letting the chromium re-oxidize into a stable passive film.
In my experience, people often confuse passivation with cleaning or polishing. It’s not just about making the weld look shiny—it’s about making it perform in service.
How Does the Passivation Process Actually Work?
The chemistry is straightforward but demands precision. You start with a clean surface, apply an acid solution (commonly nitric or citric acid), and let it do its job. The acid dissolves free iron and contaminants. This leaves the surface enriched with chromium.
Once rinsed and exposed to air (or sometimes oxygen-enriched environments), the chromium reacts to form the protective oxide layer, typically within 24-48 hours.
Nitric acid has been the traditional choice for decades in many U.S. shops. It’s effective but requires careful handling, ventilation, and waste disposal.
Citric acid-based solutions have gained popularity because they’re safer, more environmentally friendly, and often work well for food-grade or medical applications. Both remove the iron, but citric tends to be gentler on the base metal.
Electrochemical methods using specialized brushes or machines combine cleaning and passivation in one step. These are game-changers for on-site work or large fabrications where dipping the whole part isn’t practical.
Why Passivation Matters After Welding
Welding stainless steel—whether SMAW (stick), GTAW (TIG), or GMAW (MIG)—introduces heat that creates heat tint (discoloration ranging from straw to blue-black). Under that tint lies a layer depleted in chromium, making it vulnerable to pitting and crevice corrosion. Free iron from tools, wire brushes, or grinding can embed in the surface too.
In practical terms, this shows up fast in marine environments, chemical plants, or even outdoor railings. A properly passivated weld resists corrosion far better, meets code requirements (like those from ASME or AWS), and keeps customers happy. Skipping it might save an hour today but cost days of rework later.
Pickling vs. Passivation: Knowing the Difference
Many welders mix these up, but they serve different purposes. Pickling uses stronger acids (often nitric-hydrofluoric mixes) to remove heavy scale, oxides, and heat tint by dissolving a thin layer of the metal surface. It’s aggressive and necessary for heavily scaled welds.
Passivation follows pickling or thorough mechanical cleaning. It’s a milder treatment focused on removing free iron and promoting the oxide layer without significantly altering the surface. You can sometimes combine them, but treating them as the same process leads to incomplete protection or over-etching.
Quick Comparison Table:
| Aspect | Pickling | Passivation |
|---|---|---|
| Primary Goal | Remove scale and heavy oxides | Remove free iron, form oxide layer |
| Acid Strength | Stronger (often with HF) | Milder (nitric or citric) |
| Metal Removal | Yes, noticeable | Minimal |
| Surface Appearance | Can dull or matte | Preserves original finish |
| When to Use | After heavy welding/heat tint | After cleaning, for corrosion resistance |
| Typical Follow-Up | Neutralize, rinse, then passivate | Rinse thoroughly, air dry |
When Should You Passivate Your Welds?
Passivate after any operation that disturbs the surface: welding, grinding, cutting, machining, or even handling with contaminated gloves. It’s essential for:
- Food and beverage equipment (to prevent bacterial harboring)
- Pharmaceutical or medical devices
- Architectural or marine stainless exposed to weather
- Pressure vessels and piping systems
For indoor, non-critical applications with 304 stainless, natural passivation might suffice if the weld is thoroughly cleaned. But for 316 in chloride environments or any code job, don’t skip it. I’ve seen beautiful TIG welds on 316L tanks fail inspection because of missed passivation.
Step-by-Step Guide to Passivating Stainless Steel Welds
Here’s the practical workflow I use in the shop:
- Mechanical Cleaning: Remove slag, spatter, and heavy heat tint with dedicated stainless tools—never carbon steel brushes. Use flap discs or Scotch-Brite pads designed for stainless.
- Degreasing: Wipe down with acetone or a non-chlorinated solvent to remove oils and fingerprints.
- Pickling (if needed): Apply pickling paste or immerse for heavy scale. Follow manufacturer times closely—usually 10-30 minutes.
- Rinsing: Thoroughly rinse with clean water. Test pH to ensure neutrality.
- Passivation: Apply citric or nitric solution per spec (e.g., ASTM A967). Immersion for parts, paste or brush-on for welds. Typical dwell time: 20-60 minutes depending on alloy and solution.
- Final Rinse and Dry: Rinse multiple times with deionized water if possible. Air dry or use forced air. Avoid touching with bare hands.
- Verification: Use copper sulfate or ferroxyl tests to confirm no free iron remains. The part should pass without blue staining.
For TIG welds on thin material, electrochemical cleaners often handle cleaning and passivation efficiently in one go.
Material Compatibility and Alloy Considerations
Not all stainless behaves the same. Austenitic grades like 304 and 316 passivate well with standard processes. Duplex and super duplex alloys may need adjusted chemistry or longer times due to higher chromium and molybdenum.
Low-carbon variants (304L, 316L) are more forgiving for welding but still need proper surface treatment. Avoid passivating dissimilar metal welds without consulting specs—galvanic issues can arise.
Amperage, Joint Prep, and Welding Practices That Affect Passivation
Good passivation starts before the arc. Clean joint edges thoroughly—grind back any mill scale and degrease. Use back-purging with argon for TIG on pipes or tanks to minimize oxidation on the root side.
Stick to recommended amperage ranges:
- For 1/8″ 316L plate with 3/32″ ER316L filler: 80-120 amps DCEN for TIG.
- Adjust travel speed to avoid excessive heat input, which worsens heat tint.
Slower speeds or too much amperage create deeper chromium depletion, making passivation harder. Use stringer beads rather than weaving on stainless to control heat.
Common Mistakes Beginners and Pros Make
I’ve made most of these myself over the years:
- Using the same wire wheel or grinder for carbon and stainless—embeds iron instantly.
- Rushing the rinse step, leaving acid residue that causes etching or white haze.
- Applying passivation paste unevenly on vertical welds, leading to streaking.
- Assuming heat tint will “go away” or that grinding alone restores the passive layer (it doesn’t fully).
- Skipping testing—visual shine doesn’t guarantee passivation.
- Poor ventilation or improper PPE with nitric acid.
Pros sometimes cut corners on large jobs by only spot-treating visible welds, leaving hidden areas vulnerable.
Safety Considerations in the Shop
Passivation acids are hazardous. Always wear appropriate PPE: acid-resistant gloves, goggles, face shield, apron, and respirator if needed. Work in well-ventilated areas or outdoors.
Have neutralizing agents (like baking soda solution) and spill kits ready. Dispose of waste per local regulations—many shops now prefer citric systems to simplify compliance.
For DIYers, start with citric acid products formulated for stainless; they’re more forgiving for home shops.
Pros and Cons of Different Passivation Methods
Nitric Acid Immersion:
- Pros: Proven, effective for many alloys, deep penetration.
- Cons: Hazardous, generates more waste, stricter handling.
Citric Acid:
- Pros: Safer, biodegradable, good for sensitive applications.
- Cons: May require longer times or higher concentrations for heavy contamination.
Electrochemical (Brush or Machine):
- Pros: Portable, fast, combines cleaning/passivation, minimal waste.
- Cons: Higher initial equipment cost, learning curve for settings.
Natural Air Passivation:
- Pros: No chemicals.
- Cons: Slow, unreliable if surface isn’t perfectly clean.
Real-World Examples from the Shop Floor
On a recent brewery tank repair, we TIG-welded 304L patches. After mechanical cleaning and citric passivation, the tanks passed both visual and corrosion tests with flying colors. Without it, previous repairs had shown pitting within months.
In structural work for a coastal project, using dedicated stainless tools and full electrochemical treatment prevented any rust claims after two years in salt air.
Advanced Tips for Better Results
- For critical applications, follow ASTM A967 or AMS 2700 specifications exactly.
- Temperature matters—warmer solutions (but not exceeding recommendations) speed up the process.
- Test your process on scrap first, especially with new alloys or solutions.
- For large fabrications, consider vapor degreasing or ultrasonic cleaning before passivation.
- Monitor solution strength over time; depleted baths don’t work well.
Equipment and Shop Setup Recommendations
U.S. welders often use Miller, Lincoln, or ESAB machines for stainless. Pair them with high-purity argon or argon-helium mixes for better control. Invest in a good electrochemical weld cleaner if you do frequent stainless work—it pays for itself quickly in time and quality.
Keep separate tool sets: color-code or label everything to prevent cross-contamination.
Practical Takeaways for Stronger, Longer-Lasting Welds
Passivation isn’t an afterthought—it’s the final step that unlocks the full potential of stainless steel. By understanding how the process works, when to apply it, and how to avoid common pitfalls, you’ll produce welds that look good and stand up to real service conditions.
From proper joint prep and heat control during welding to thorough cleaning and verified passivation afterward, every detail adds up.
The biggest pro-level tip I can share? Treat every stainless weld like it’s going into a pharmaceutical vessel, even if it’s just a shop bracket. Clean obsessively, passivate properly, and test when it counts. Your future self—and your customers—will thank you when those parts stay corrosion-free for years.
This approach has saved me countless hours of rework and helped turn good welders into trusted fabricators who deliver reliable work every time.
FAQ
How long does passivation take on stainless steel welds?
In practice, the chemical treatment itself takes 20-60 minutes, followed by rinsing and 24-48 hours for the oxide layer to fully stabilize in air. Electrochemical methods can be faster for spot work on welds.
Can I passivate stainless steel without acids?
Natural passivation occurs on perfectly clean surfaces exposed to oxygen, but it’s slower and less reliable after welding. For shop reliability and code compliance, chemical or electrochemical methods are the standard.
What’s the best way to remove heat tint before passivation?
Mechanical abrasion with stainless-specific media followed by pickling paste for stubborn areas. Avoid over-grinding, which can work-harden the surface.
Does passivation change the appearance of the weld?
Properly done, it shouldn’t noticeably alter a well-cleaned surface. Over-application or poor rinsing can cause dulling or staining.
Is passivation required for all stainless welding projects?
Not always for non-critical indoor uses, but it’s highly recommended for anything exposed to moisture, chemicals, or requiring corrosion resistance. Always check project specs and industry standards.


