
Applying JB Weld epoxy can feel like a quick fix—until you notice excess epoxy squeezed out around the repair or hardened spots where they shouldn’t be.
What starts as a simple repair can quickly look messy if the cleanup isn’t handled properly. That’s why knowing How to Clean Up JB Weld Epoxy is just as important as applying it correctly in the first place.
JB Weld creates a strong, durable bond, but that same strength can make cleanup challenging once it begins to cure. Timing matters, and the methods you use for fresh epoxy are very different from those needed for fully hardened material. I’ve seen repairs that were structurally solid but needed extra work simply because excess epoxy was left behind.
A clean repair not only looks better but can also make sanding, painting, and finishing much easier later on. I’ll walk you through the best ways to remove fresh and cured JB Weld epoxy, avoid common cleanup mistakes, and leave your repair looking as professional as possible.
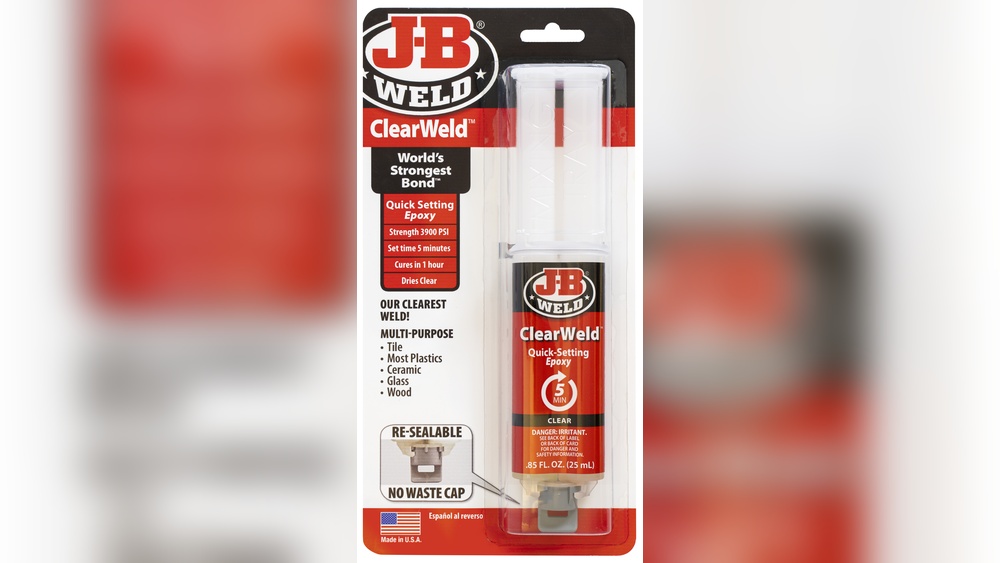
Understanding JB Weld Epoxy and Why Cleanup Matters in Welding
JB Weld is a steel-filled epoxy designed for high-strength, temperature-resistant repairs. The original formula handles up to about 550°F continuous once fully cured, with a maximum short-term threshold around 600°F. It bonds to metal, wood, plastic, ceramic, and more, making it a go-to for hobbyists and pros alike.
Uncured, it’s messy but manageable. Fully cured—usually after 15-24 hours at room temperature—it turns brittle and tough. That’s great for a permanent fix but terrible if you planned to weld afterward.
Epoxy residue acts as a contaminant. It outgasses under the arc, creating porosity or inclusions that fail inspection or break in service.
In welding situations, proper cleanup prevents:
- Porosity and weak fusion: Residue vaporizes and traps gas in the puddle.
- Distortion risks: Aggressive removal methods on thin materials.
- Material incompatibility: Aluminum or stainless needs extra care to avoid embedding particles.
- Costly rework: A contaminated weld often means cutting out the section and starting over.
I’ve repaired farm equipment where someone slapped JB Weld on a cracked bracket, then tried to weld over it. The result? A porous mess that cracked again under vibration. Take the time to clean it right.
Tools and Materials You’ll Actually Use in the Shop
Before you start, gather shop-proven gear. No need for fancy kits—most of this is already on your bench.
For Uncured JB Weld:
- Acetone or lacquer thinner (best for wiping)
- Isopropyl alcohol or brake cleaner as backups
- Rags, paper towels, and gloves
- Plastic scrapers to avoid scratching
For Cured JB Weld:
- Angle grinder with flap discs (40-80 grit) or grinding wheels
- Dremel or die grinder with carbide bits, sanding drums, or wire brushes
- Files (flat, half-round, bastard cut)
- Heat gun (for plastics or heat-sensitive parts) or oxy-acetylene/MAPP torch for metal
- Sandpaper (60-220 grit progression)
- Safety gear: respirator, gloves, eye protection, and fire extinguisher
For Final Surface Prep Before Welding:
- Wire wheel or stainless brush (dedicated to material type)
- Degreaser
- Grinder with clean discs
Pro tip from experience: Keep separate tools for aluminum vs. steel. Cross-contamination causes real problems in TIG welding.
How to Remove Uncured JB Weld Epoxy – Fast and Clean
The easiest time to clean is right after application, before it sets.
Mix and apply JB Weld as directed—equal parts resin and hardener, stirred thoroughly for two minutes. Wipe excess immediately with acetone-soaked rags. Acetone dissolves the fresh mix without much effort.
Work in a well-ventilated area. Acetone evaporates fast and is flammable. For larger spills, use a plastic putty knife to scoop bulk material, then wipe. On porous surfaces like cast iron, you may need multiple wipes as it soaks in.
If it’s starting to gel (after 5-10 minutes), act quickly. Heat from your hands or a warm shop speeds curing. I keep a bottle of acetone in the weld cart specifically for this.
Common beginner mistake: Using water or soap alone. It spreads the mess. Always go solvent first, then soap and water for final rinse if needed.
Removing Cured JB Weld: Mechanical Methods That Work
Once cured (full strength in 24 hours), mechanical removal is the most controlled approach for welding prep.
Step-by-Step Grinding and Sanding:
- Assess the repair. Note material thickness and nearby heat-sensitive areas.
- Don PPE. Cured epoxy dust is irritating.
- Use a 4.5″ angle grinder with a 40-grit flap disc to remove bulk. Work in short passes to avoid overheating the base metal.
- Switch to finer grits (80, 120) to blend edges smoothly.
- For tight spots, switch to a Dremel with carbide burrs or sanding bands.
- Finish with a wire wheel or dedicated stainless brush to remove embedded particles.
- Inspect under bright light. Any dark spots? Keep going.
On flat surfaces like engine blocks or brackets, this leaves a clean, slightly rough profile perfect for welding. Avoid aggressive grinding on thin tubing—it creates heat and thins the material.
I once removed JB Weld from a cracked motorcycle frame. Slow, deliberate passes with a flap disc preserved the tubing integrity, and the subsequent TIG repair held for years.
Filing for Precision Work: Great for small areas or when power tools risk damage. A good bastard file cuts cured epoxy surprisingly well because it’s brittle. Follow with sandpaper.
Using Heat to Remove JB Weld Epoxy Safely
Heat works because JB Weld softens or decomposes above 600°F. This is faster for thick deposits but requires caution.
Torch Method for Metal Parts:
- Use a propane or MAPP torch.
- Heat the area evenly until the epoxy chars or powders (around 600°F+). It often turns dark and brittle.
- Tap or scrape while hot. Much of it will flake off.
- Cool naturally, then grind remaining residue.
This method shines on cast iron or thick steel. I’ve used it on exhaust manifolds where grinding was awkward.
Heat Gun Alternative: Safer for thinner materials or near plastics/rubber. It softens rather than chars. Combine with scraping. Effective but slower.
Warnings from shop reality:
- Aluminum warps or loses temper easily—limit heat and quench carefully if needed.
- Galvanized steel releases toxic fumes—avoid or strip zinc first.
- Always monitor for fire. Epoxy can smoke.
Never use heat on pressure vessels or anything with unknown internal stresses without proper procedure.
Chemical Approaches and When They Fall Short
Solvents like acetone work great uncured but have limited effect on fully cured material. Extended soaking or specialized epoxy strippers (formic acid-based, industrial) can help but are messy, hazardous, and not ideal in a welding shop.
I rarely rely on chemicals for cured JB Weld. They soften the surface but leave residue that still contaminates welds. Mechanical or heat plus mechanical is more reliable.
For skin or hands: Acetone or specialized hand cleaners, followed by soap. Avoid letting it cure on you.
Surface Preparation After JB Weld Removal for Welding
This is where many welders lose quality. Removal is only half the battle.
Key Steps:
- Remove all visible and embedded epoxy.
- Degrease thoroughly with acetone or brake cleaner. Wipe until rags come clean.
- Abrade the surface: 80-grit for most, finer for TIG.
- For aluminum: Use a dedicated stainless brush or flap disc. Avoid steel contamination.
- Check for porosity or cracks exposed by removal. Address with proper welding technique.
- Preheat if material requires it (cast iron especially).
Proper joint prep here determines penetration and strength. A clean, dry, contaminant-free surface lets your arc focus on fusion, not fighting residue.
Material-Specific Advice: Steel, Aluminum, Cast Iron, and More
Mild Steel: Forgiving. Grind, heat, or file. Standard prep works.
Aluminum: Sensitive to heat input and contamination. Use heat gun preferentially. Grind lightly and brush immediately before welding. TIG likes clean, oxide-free surfaces.
Cast Iron: Common for JB Weld repairs on blocks or manifolds. Heat removal works well but control temperature to avoid cracking. Nickel rods or specific cast iron electrodes for repair welding afterward.
Stainless: Avoid carbon steel tools. Use stainless brushes. Thorough degreasing prevents carbon pickup.
Other Materials: Plastics or composites—heat gun and scraping only. No torch.
Common Mistakes and How to Avoid Them
- Rushing removal: Leaves residue that ruins the weld. Take your time.
- Overheating thin metal: Causes warp or burn-through. Use heat selectively.
- Wrong abrasives: Embedding steel particles into aluminum.
- Skipping degrease: Oils or dust from grinding stay behind.
- Welding too soon: Let surfaces cool and dry completely.
- Ignoring PPE: Epoxy dust and fumes are no joke.
Pros I’ve worked with always inspect twice and test a small weld if critical.
Comparison of Removal Methods
| Method | Best For | Speed | Risk to Base Material | Cost | Best Follow-Up |
|---|---|---|---|---|---|
| Mechanical (Grind/Sand) | Precision, all metals | Medium | Low (if careful) | Low | Wire brush + degrease |
| Heat (Torch) | Thick deposits, steel | Fast | Medium-High | Low | Grind remaining |
| Heat Gun | Thin/heat-sensitive | Medium | Low | Low | Scrape + sand |
| Chemical | Uncured or small areas | Slow | Low-Medium | Low-Medium | Mechanical finish |
Choose based on the job. I default to mechanical for welding prep.
Step-by-Step Guide: Full Cleanup and Weld Repair Example
Let’s say you have a cracked steel bracket repaired with JB Weld that now needs welding reinforcement.
- Inspect and mark areas.
- Grind bulk epoxy with flap disc.
- Apply torch locally to stubborn spots, scrape while hot.
- Sand to blend (120 grit).
- Degrease multiple times.
- Set up welder: For 1/8″ steel, 7018 rod at 90-120 amps (adjust for machine and position).
- Tack, then weld with proper travel speed.
- Post-weld clean and inspect.
This process has saved me hours of frustration on repair jobs.
Safety Considerations Every Welder Should Know
- Ventilation for fumes and dust.
- Fire prevention—have extinguisher ready.
- Eye and skin protection.
- Know material hazards (e.g., galvanized zinc oxide).
- Dispose of epoxy waste properly.
Never cut corners on safety. A contaminated weld is bad; a hospital visit is worse.
When to Use JB Weld vs. Welding – Real-World Decisions
JB Weld excels for non-structural, low-heat, or temporary fixes. It’s not a full weld replacement under high stress, vibration, or elevated temperatures. Use it to fill gaps, then weld for strength. Or use it where welding isn’t feasible (near fuel lines, thin plastics).
In fabrication shops, we often combine both: epoxy for sealing, weld for structure.
Advanced Tips from the Shop Floor
- For stubborn residue in pores: Ultrasonic cleaners if available, or repeated heat/brush cycles.
- Painting over cleaned areas: Sand to 220 grit, prime, then topcoat.
- Testing strength: On critical repairs, do a test piece first.
- Storage: Keep JB Weld tubes sealed and in moderate temps.
These small habits separate weekend warriors from consistent pros.
Reflection and Key Takeaways for Stronger Repairs
After years grinding, heating, and welding around JB Weld, the biggest lesson is patience in prep. Clean surfaces lead to clean welds. Understand the epoxy’s limits—great adhesive, but not invincible. Master removal methods, match them to your material, and always finish with thorough degreasing and abrasion.
You now know how to handle uncured messes quickly, tackle cured deposits effectively, and prep for reliable arcs whether you’re running 6010 on pipe or TIG on aluminum sheet. That knowledge saves time, money, and headaches in the shop.
After any epoxy removal, do a final acetone wipe right before striking an arc. It’s the difference between a weld that passes inspection and one that gets cut out. Treat every surface like it’s going under the bead—because it is.
FAQ
How long does JB Weld take to cure before I can remove it?
It sets in 4-6 hours for handling, but full cure is 15-24 hours. Trying to remove too early leaves gooey residue that’s harder to clean. Wait if possible.
Can I weld directly over JB Weld?
Not recommended. Residue causes defects. Remove as much as possible first for sound fusion.
What’s the best way to clean JB Weld from aluminum without damaging it?
Heat gun or careful grinding with aluminum-specific abrasives, followed by stainless brushing and degreasing. Avoid excessive torch heat.
Does acetone remove cured JB Weld?
It helps soften uncured or very fresh material but won’t dissolve fully cured epoxy. Use it for final cleaning after mechanical removal.
Is JB Weld heat resistant enough for exhaust repairs?
Original handles up to 550°F continuous. Fine for many exhaust spots but not directly in the hottest zones—weld or use high-temp alternatives there.


