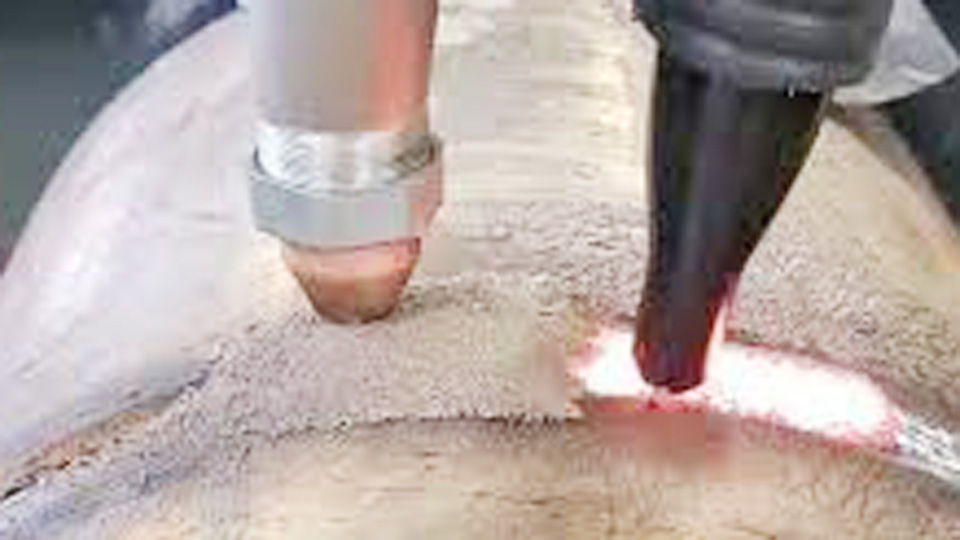
Submerged arc welding looks calm on the surface, but the real work is happening under that thick blanket of flux. The first time I ran an SAW bead, I was surprised by how clean and smooth it came out—no visible arc, no sparks flying—just a solid weld hidden beneath the flux layer.
That’s when I truly understood why asking what does the flux do in submerged arc welding actually matters. The flux isn’t just there to cover the arc; it directly affects weld quality, penetration, cleanliness, and overall strength.
After working with different flux types and seeing how small changes impact the final weld, I’ve learned what the flux really does and why choosing the right one is critical for consistent results.
In this guide, I’ll break it down in simple, practical terms and show you how flux influences the weld from start to finish—step by step, without the guesswork.
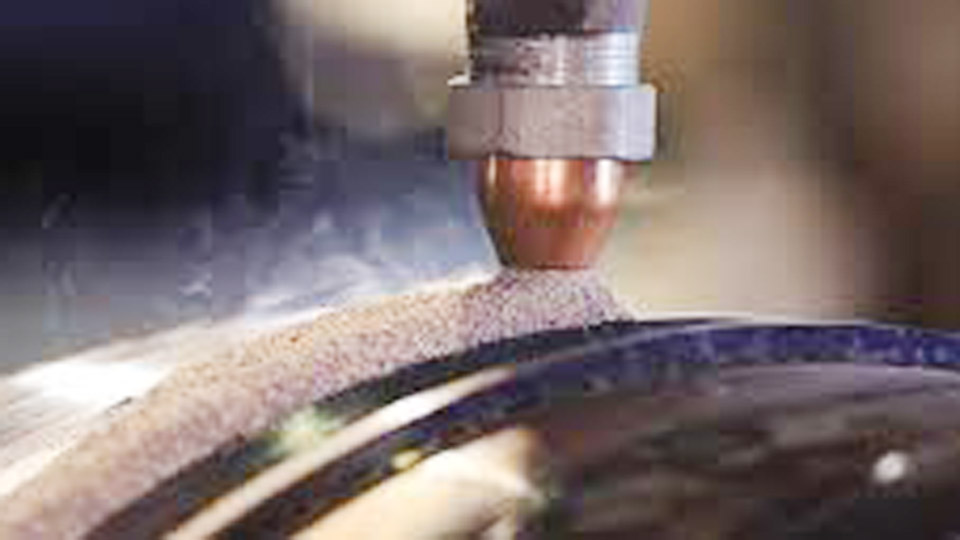
Image by canadianmetalworking
The Basics of Submerged Arc Welding
Submerged arc welding is one of those processes that shines when you’re dealing with thick materials and long runs. It’s an automated or semi-automated method where the arc is buried under a layer of granular flux, hence the name.
Unlike stick welding, where you’re constantly swapping electrodes, SAW uses a continuous wire feed, making it ideal for high-volume work like pipeline fabrication or shipbuilding.
In my experience, SAW stands out for its efficiency on jobs requiring deep penetration and minimal spatter. You’re looking at deposition rates that can hit 10 pounds per hour or more, which is a game-changer for pros cranking out structural beams.
But it’s not for everything—it’s best suited for flat or horizontal positions, and setup takes a bit more planning than grabbing a MIG gun.
How SAW Works Step by Step
Let’s break it down simply. First, you prep your joint—clean it up, maybe bevel the edges for better penetration. Then, position your workpiece and set up the welding head with the wire spool and flux hopper. As you start, the flux pours ahead of the electrode, creating a blanket over the weld area.
The arc strikes between the wire tip and the base metal, melting both the wire and some flux. The molten flux conducts electricity, stabilizing the arc while the unmelted flux shields everything from oxygen and nitrogen in the air. After the weld cools, you chip off the slag—that’s the solidified flux—and you’re left with a smooth, strong bead.
I’ve used this on everything from farm equipment repairs to industrial tanks. One tip: always test your setup on scrap first. I once skipped that and ended up with undercut on a critical seam—lesson learned the hard way.
Why SAW is Popular Among Pros and Hobbyists
For DIY welders and students, SAW offers clean results with less skill needed for arc control, since the flux hides the action. Pros love it for speed and consistency, especially on repetitive tasks. In US shops, it complies well with AWS standards like D1.1 for structural welding, ensuring your work passes inspections.
But flux is key here—if it’s wrong, you get issues like slag inclusion or poor fusion. That’s why understanding its role saves you headaches and keeps your projects on track.
Understanding the Role of Flux in SAW
Flux in submerged arc welding isn’t just filler—it’s a multifunctional player that dictates the success of your weld. At its core, flux creates a protective environment, but it goes deeper, affecting everything from arc behavior to the final metal properties. I’ve relied on it in tight spots, like welding high-strength steels where contamination could lead to brittle failures.
When I first started, I thought flux was optional fluff. Boy, was I wrong. It turned a messy, unpredictable process into something reliable. Let’s unpack what it really does.
Shielding and Protection from Contamination
The primary job of flux is to shield the molten weld pool from atmospheric gases. Oxygen and nitrogen love to sneak in and cause porosity or oxidation, weakening your joint. Flux forms a blanket that blocks them out, melting partially to create a slag layer over the cooling weld.
In practice, this means cleaner welds with fewer defects. On a job welding storage tanks, I saw how good flux prevented pinholes that could’ve led to leaks. Tip: Use enough flux to fully cover the arc—about 1 to 2 inches deep for most setups. Skimp, and you’re inviting trouble.
Arc Stabilization and Conductivity
When cold, flux acts as an insulator, but heat it up, and it becomes conductive, providing a smooth path for current between the electrode and workpiece. This stabilizes the arc, reducing spatter and ensuring consistent penetration.
I’ve noticed this on long runs: stable arcs mean fewer stops for adjustments. For machine settings, aim for 500-800 amps on DC for thick plates, with voltage around 28-35 volts. Adjust based on wire diameter—1/8 inch wire works great for heavy fab.
Influencing Weld Chemistry and Properties
Flux isn’t passive; it can add deoxidizers or alloying elements to the weld metal, improving toughness or corrosion resistance. For instance, it reacts with impurities, refining the bead for better mechanical strength.
In my shop, I’ve used flux to tweak chemistry on stainless jobs, avoiding cracks in high-heat apps. Why use it? For integrity in critical sectors like oil and gas, where weld failure isn’t an option. Pro tip: Match flux to your wire—neutral flux with low-alloy wire keeps things balanced.
Different Types of Flux and When to Use Them
Not all flux is created equal. I’ve experimented with various types, learning that the wrong one can turn a smooth job into a nightmare. Types are classified by activity, basicity, and manufacturing method. Let’s sort them out so you can pick wisely.
Active vs. Neutral Fluxes
Active fluxes add elements like silicon and manganese to the weld, helping clean rusty surfaces and improve bead contour at high speeds. They’re great for single-pass welds on mildly contaminated metal, but watch out—they’re sensitive to voltage changes and not ideal for multi-pass due to potential cracking.
Neutral fluxes stay out of the chemistry game, making them perfect for thick, multi-layer welds where consistency matters. I’ve used them on pressure vessels to avoid altering the deposit. When to choose? Active for quick fillets on scaled steel; neutral for structural work needing toughness.
Acidic, Neutral, and Basic Fluxes Based on Basicity
Basicity index measures the ratio of basic to acidic compounds. Acidic fluxes (under 1.0) excel in high-speed, single-pass scenarios with good slag removal but poor low-temp toughness.
Neutral (1.0-1.5) balance performance and properties, suiting most general apps. Basic fluxes (over 1.5) deliver clean, tough welds for cold environments, like offshore rigs, but might give rougher beads.
In US codes, basic fluxes often meet Charpy impact requirements. I once switched to basic for a winter job—saved me from brittle failures.
Manufacturing Types: Fused vs. Agglomerated
Fused fluxes are melted and crushed, offering uniform particles but limited alloy additions. Agglomerated are baked with binders, allowing deoxidants for better toughness in modern steels.
Agglomerated dominate now for their flexibility. Use fused for basic shielding; agglomerated when you need alloy tweaks. Mixed fluxes blend both for custom needs.
| Flux Type | Pros | Cons | Best For |
|---|---|---|---|
| Active | Cleans rust, good for speed | Voltage-sensitive, not for multi-pass | Single-pass on dirty metal |
| Neutral | Consistent chemistry, crack-resistant | Less forgiving on contaminants | Multi-layer structural welds |
| Acidic (Low Basicity) | Easy slag removal, smooth beads | Poor toughness in cold | High-speed thin plates |
| Basic (High Basicity) | Excellent toughness, clean metal | Rougher appearance | Low-temp, critical apps |
| Fused | Uniform, stable | Limited customization | General shielding |
| Agglomerated | Adds alloys, better deoxidation | Higher cost | High-strength steels |
This table has guided me through selections—print it for your shop wall.
How to Select the Right Flux for Your Welding Project
Choosing flux starts with your job specs. Ask: What’s the base metal? Thickness? Required properties? For carbon steel pipes, neutral agglomerated might suffice; for low-alloy in harsh conditions, go basic active.
Consider productivity—active for fast runs, but check codes like AWS A5.17 for compatibility. I’ve consulted filler makers for pairings, avoiding mismatches that cause porosity.
Joint design matters: deep grooves need penetrating flux. Budget-wise, recyclable flux cuts costs. Test small batches—I’ve wasted flux ignoring this.
Step-by-step selection:
- Identify material and thickness.
- Define needs (toughness, speed).
- Match to type (active/neutral, basicity).
- Pair with wire (e.g., EM12K with neutral).
- Verify with trial welds.
This approach has kept my welds code-compliant and reliable.
Practical Tips for Handling and Using Flux
Flux handling is where many go wrong. Treat it like gold—moisture is its enemy, leading to hydrogen cracking. I’ve learned these the hard way.
Storage and Moisture Control
Store flux in dry, heated cabinets at 250-350°F to prevent pickup. Unopened bags last years; once open, use within days or recondition at 600°F for two hours.
In humid US shops, I use desiccant packs. Tip: Avoid reconditioning more than twice—it degrades performance. For big jobs, invest in a flux recovery system to reuse 50-90%.
Common Mistakes Welders Make with Flux
Biggest blunder: Using wet flux, causing wormholes. Fix: Always bake it. Another: Wrong depth—too thin exposes the arc; too thick wastes material.
Mismatching types leads to slag entrapment. I’ve fixed this by double-checking specs. Overlooking recovery means higher costs—vacuum unused flux post-weld.
Student tip: Start with small quantities to learn feel without big losses.
Machine Settings and Joint Prep for SAW
Prep joints clean—grind rust, bevel 30-45 degrees for penetration. Settings: 400-600 amps, 25-32 volts for 3/32 wire on 1-inch plate. Travel speed 10-20 IPM.
For fillet welds, angle the head 45 degrees. Monitor flux flow—consistent blanket is key. On a tank job, tweaking voltage from 30 to 28 fixed bead shape.
Step-by-step setup:
- Clean and bevel joint.
- Load wire and flux.
- Set parameters (amps, volts, speed).
- Pour flux ahead.
- Weld, then remove slag.
- Inspect for defects.
These keep your welds sound.
Real-World Applications and Examples in the US
In US fabrication, SAW with proper flux shines in industries like construction and energy. For bridges under AASHTO codes, basic flux ensures toughness against fatigue.
I’ve used it on wind tower sections—neutral flux for multi-pass on thick flanges, preventing distortion. In shipyards, active flux handles rusty hulls efficiently.
For hobbyists, try SAW on trailer frames: agglomerated flux with mild steel wire for strong, clean joints. Pros in refineries use it for vessels, complying with ASME Section VIII.
One anecdote: On a pipeline repair, switching to high-basicity flux met API 1104 specs, avoiding rework. It saved days and dollars.
Flux also aids in cladding, adding corrosion resistance to pipes. In auto plants, it’s for chassis—fast and reliable.
Safety note: While flux suppresses fumes, ventilate well per OSHA guidelines. Wear PPE—I’ve skipped gloves once, regretted the burns.
Conclusion
You’ve now got a solid grasp on what flux does in submerged arc welding—shielding, stabilizing, and enhancing your welds for top-notch results. Whether protecting against contamination, tweaking chemistry for toughness, or enabling high-speed runs, flux makes SAW a powerhouse process.
You’re better equipped to pick the right type, handle it properly, and avoid pitfalls that cost time and money. Remember, the key is matching flux to your job’s demands, testing setups, and keeping things dry.
Always recover and reuse flux where possible—it cuts waste and keeps your shop green while saving bucks. Next time you’re in the booth, think of flux as your welding partner, and you’ll turn out stronger, safer work every time.
FAQ
What is the primary function of flux in submerged arc welding?
Flux mainly shields the molten weld pool from air contaminants like oxygen, preventing defects like porosity. It also stabilizes the arc, forms protective slag, and can improve weld properties by adding elements.
What’s the difference between active and neutral flux in SAW?
Active flux adds silicon and manganese to clean surfaces and enhance beads, ideal for single-pass on rusty metal. Neutral flux doesn’t alter chemistry, making it better for multi-pass welds needing consistency and crack resistance.
How do I store SAW flux to avoid problems?
Keep it in a heated oven or cabinet at 250-350°F to prevent moisture absorption, which causes cracking. Recondition wet flux by baking at 600°F for two hours, but limit to twice per batch.
Can I reuse flux in submerged arc welding?
Yes, recover unused flux with a vacuum system—up to 90% is recyclable. Crush and blend slag remnants if possible, but test for quality to ensure it doesn’t introduce defects.
What basicity index is best for tough, low-temperature welds?
Go for high basicity (over 1.5) for excellent toughness and clean metal in cold conditions, like offshore work. It reduces oxygen but may need parameter tweaks for smoother beads.