ast aluminum can be one of the most frustrating materials to deal with once you strike an arc. The surface looks solid, but underneath you’re often fighting contamination, trapped gases, and uneven heat flow that can ruin a bead in seconds.
That’s why learning How to MIG Weld Cast Aluminum properly makes such a big difference when you’re working on repairs or fabrication jobs.
In real shop conditions, cast aluminum doesn’t behave like clean, new sheet metal. It can spit, pop, and create porosity if your prep or settings aren’t right.
I’ve seen welds that looked decent at first glance but ended up weak because the base metal wasn’t handled correctly.
This is where the right approach matters. With proper cleaning, setup, and technique, MIG welding cast aluminum becomes much more manageable—and far more reliable.
In this guide, I’ll walk you through the practical steps, common mistakes to avoid, and the settings that actually work in real-world situations.
Image by xavier-parts
Why MIG Welding Cast Aluminum Matters in Real Repairs
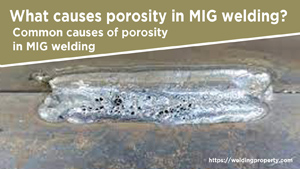
Cast aluminum parts absorb contaminants during manufacturing and service life. Oil, coolant, and oxidation sit in pores. When you weld without addressing this, hydrogen gas gets trapped as the puddle solidifies, creating pinholes that weaken the joint or cause leaks in manifolds and housings.
Distortion is another big issue. Aluminum expands and contracts fast with heat, so uncontrolled MIG can warp thin sections or crack thick castings during cooling. Penetration suffers if your arc lacks energy to break through the oxide layer. Rework eats time and filler, and in pro shops, it hits the bottom line.
Safety plays in too. Aluminum reflects heat intensely, increasing burn risk. Proper shielding gas prevents oxidation that leads to brittle welds.
Mastering this process means fewer failed tests, stronger repairs on automotive, marine, or industrial parts, and confidence when a customer drops off a $500 casting.
Understanding Cast Aluminum vs. Wrought Aluminum for Welding
Cast aluminum differs from sheet or plate in composition and behavior. Common alloys like A356 (used in wheels and heads) contain silicon for fluidity during casting, making them prone to hot cracking if filler doesn’t match. Wrought alloys like 6061 are heat-treatable and cleaner.
In MIG, cast pieces demand more aggressive cleaning because porosity traps contaminants. They also conduct heat differently—thicker cast sections act as heat sinks, requiring preheat to get a stable puddle without chasing the arc.
I’ve seen beginners treat cast like regular aluminum and end up with soot-covered beads full of voids. The key difference: cast often needs beveling and multiple passes with good interpass cleaning. Expect the material to “drink” heat, so settings run hotter than for equivalent wrought thickness.
Essential Equipment Setup for MIG Welding Cast Aluminum
You need a machine capable of consistent spray transfer for aluminum—short circuit won’t cut it on cast. Most DIY and pro setups use a spool gun to handle soft aluminum wire without bird-nesting. Push-pull guns work for longer runs but add complexity.
Wire choices matter hugely. For cast aluminum, 4043 filler (aluminum-silicon) is my go-to. It flows beautifully, wets into the base metal well, and reduces cracking sensitivity thanks to higher silicon. It produces smoother beads with less spatter.
5356 (aluminum-magnesium) offers higher strength and better corrosion resistance but feeds stiffer and can crack more easily on dirty castings. Use 4043 for most repairs unless you need maximum tensile strength on structural fillets.
Wire diameter: .035″ is versatile for thicknesses from 1/8″ up. .030″ works for thinner but risks feeding issues on cast. Avoid .045″ unless you have heavy equipment and thick material.
Shielding gas: 100% argon. Flow rates of 25-35 CFH (higher than steel) to combat aluminum’s reactivity. Helium mixes can help on thick cast but increase cost and heat input—stick with pure argon for most shop work.
Drive rolls: U-groove or knurled specifically for aluminum to prevent flattening the soft wire. Teflon liners inside the gun cable reduce friction. Use a contact tip one size larger than your wire (.045″ tip for .035″ wire) for smoother feeding.
Machine polarity: DCEP (reverse polarity). Inductance settings low for spray transfer. Many US machines have aluminum-specific programs—use them as starting points.
Joint Preparation: The Make-or-Break Step
Skip thorough prep and your weld will fail, period. Cast aluminum’s oxide layer melts at much higher temperature than the base metal, so it must go.
Start by removing paint, grease, and dirt with acetone or a dedicated aluminum cleaner. Then grind or mill out cracks completely—V or U groove them to sound metal. For repairs, bevel edges at 60-70 degrees with a land for good penetration.
Use a dedicated stainless steel wire brush or flap disc (not contaminated with steel) to scrub the joint and surrounding area right before welding. Brush in one direction to avoid embedding oxides. Many pros degrease, brush, then wipe with acetone again. Clean the filler wire too—wipe the spool.
For thick cast sections (over 1/4″), preheat to 200-300°F with a rosebud torch or oven. This reduces thermal shock, improves fusion, and minimizes cracking. Don’t overdo it—above 400°F risks softening the casting. Let interpass temps stay below 300°F.
Back purge or use backing bars on open joints to control penetration and prevent blow-through.
Step-by-Step Guide: How to MIG Weld Cast Aluminum
Here’s the process I follow on a typical cracked bell housing or intake repair using a spool gun setup.
Inspect and prep the part. Grind out the defect to clean, bright metal. Bevel for access. Clamp securely with copper or aluminum backing if possible to sink heat.
Set up the machine. Load 4043 .035″ wire. Set gas to 30 CFH argon. Start with voltage around 20-24V and wire feed speed for 150-250 amps depending on thickness (test on scrap). Aim for spray transfer—listen for a steady hiss, not crackle.
Preheat if needed. Warm the area evenly. Test puddle formation on a scrap section of similar thickness.
Tack the joint. Use short tacks with good fusion. Space them to control shrinkage.
Run the weld. Push the gun at 10-15° travel angle (forehand technique) for better cleaning action and gas coverage. Keep a 1/2-3/4″ stickout. Travel fast—aluminum requires “hot and fast” to avoid excessive heat buildup. Use a slight weave if filling wide grooves, but stringer beads work best on cast to limit heat.
Clean between passes. Wire brush immediately while warm to remove oxide and soot. This is critical on cast.
Control cooling. Cover the weld with a heat blanket or allow slow air cooling in still air. Quenching can crack it.
Inspect and finish. Look for uniform bead, no porosity on the surface. Grind or file as needed. Dye penetrant test critical repairs.
On a recent automotive manifold repair, I preheated to 250°F, ran at 190 amps with .035″ 4043, and got full penetration without distortion by keeping travel speed consistent.
Recommended Machine Settings for MIG Welding Cast Aluminum
Settings vary by machine, thickness, and joint, but here’s a practical starting chart based on shop experience with common US equipment. Always run test beads and adjust for your setup—sound and puddle behavior tell the real story.
Approximate Parameters for Groove Welds (100% Argon, .035″ 4043 Wire, Spool Gun):
- 1/8″ thickness: 18-22V, 300-450 ipm wire speed, 120-160 amps. Travel 15-25 ipm.
- 1/4″ thickness: 22-25V, 450-600 ipm, 170-220 amps. Multiple passes if needed.
- 3/8″+ thickness: 24-28V, 500-700+ ipm, 200-280 amps. Preheat essential.
For fillet welds, drop voltage slightly and increase travel speed. Thicker cast needs higher end of ranges for penetration. Pulse MIG (if available) helps control heat on thinner sections or to reduce distortion.
On my Lincoln setup, I often start low on voltage and bump it until I get a fluid puddle without spatter. Too low and you get lack of fusion; too high and the puddle becomes uncontrollable with porosity risks.
Common Mistakes Beginners and Pros Make with Cast Aluminum MIG
Even experienced welders slip up here.
Inadequate cleaning: Brushing once isn’t enough. Old castings hold oil in pores—multiple acetone scrubs and stainless brushing are non-negotiable. Using a steel brush contaminates instantly.
Wrong technique: Dragging instead of pushing leaves soot and traps oxides, causing porosity. Keep the push angle.
Insufficient preheat or poor heat control: Cold cast sucks heat, leading to cold laps. Overheating causes distortion or cracking on cooldown.
Incorrect filler or settings: Using 5356 on dirty cast increases cracking. Running short-circuit transfer instead of spray fails to melt the base properly.
Poor gas coverage: Low flow or leaks introduce hydrogen. Wind or drafts ruin shielding.
Ignoring feeding issues: Dirty liners or wrong rolls cause erratic wire delivery and unstable arcs.
I’ve fixed plenty of “pro” repairs that failed because someone skipped brushing between passes. Test everything on scrap matching your casting alloy and thickness.
Pros and Cons of MIG vs. Other Processes for Cast Aluminum
MIG Advantages:
- Faster deposition for filling large voids or building up material.
- Good for outdoor or field repairs with proper gas.
- Less skill barrier than TIG for basic beads once setup is dialed.
- Cost-effective for high-volume production welds.
MIG Disadvantages on Cast:
- Harder to control heat precisely, increasing distortion risk.
- More prone to porosity if prep or gas falters.
- Limited on very thin or complex geometries compared to TIG.
- Requires spool gun or special feeder for reliable feeding.
TIG gives better control and cleaner results on critical cast repairs but is slower. Stick (SMAW) isn’t ideal for aluminum. For many hobbyists and small shops, MIG strikes the best balance of speed and results when done right.
Safety Considerations Every Welder Must Follow
Aluminum welding produces intense UV that causes “arc eye” fast—wear proper shaded helmet (shade 10-13 for MIG). Use leather gloves, jacket, and pants. Ventilation is critical; aluminum fumes can irritate lungs.
Keep the area dry—no moisture near the arc. Secure gas cylinders and check hoses. Preheat torches safely away from flammables. After welding, let parts cool before handling to avoid burns from retained heat.
In a busy shop, I always dedicate an aluminum-only brush and cleaner station to prevent cross-contamination disasters.
Real-World Examples from the Shop Floor
One common job: repairing a cracked aluminum transmission case on a classic truck. After grinding the crack into a V, preheating, and running two passes with 4043 at 200 amps, the repair held under load with no leaks. The key was slow cooling wrapped in insulation.
Another: patching a pitted intake manifold. Multiple light passes with interpass cleaning prevented porosity that plagued earlier attempts. The part went back into service cheaper than replacement.
These aren’t textbook—they’re what works when the customer needs it yesterday.
Advanced Tips for Better Results on Cast Aluminum
- Use a push technique aggressively for oxide cleaning action.
- For heavy cast, consider back-step welding to control shrinkage.
- Monitor puddle color—bright silver means good shielding; dull or sooty signals trouble.
- Experiment with slight forehand angle variations based on joint position.
- Post-weld heat treat if the alloy allows and strength is critical, but most repairs skip this.
- Keep wire dry and covered—moisture equals porosity.
A pro tip I’d give any welder tackling cast: always sacrifice a piece of the actual part for settings. Scrap from the same casting behaves closest to reality.
Final Thoughts
You’ve got the idea and knowledge now to tackle MIG welds on cast aluminum with fewer headaches. Focus on prep, match your filler to the job, dial settings through testing, and respect the material’s quirks.
Strong, leak-free repairs become routine instead of frustrating experiments. The difference shows in the parts that stay fixed and the confidence you carry into the next job.
FAQs
Can you MIG weld cast aluminum successfully without a spool gun?
Yes, but it’s tougher. A standard gun with a Teflon liner and U-groove rolls can work for short runs if you keep the cable straight and minimize curves. For reliable feeding on .035″ or larger wire, a spool gun reduces frustration and bird nests dramatically, especially on thicker cast.
What causes porosity in MIG welds on cast aluminum and how do I fix it?
Hydrogen from moisture, oil, or poor gas coverage is the usual culprit. Fix it with aggressive cleaning (acetone + stainless brush), higher argon flow (30+ CFH), and proper preheat. Check for leaks in your gas system and ensure push technique for coverage. Clean between every pass.
Is 4043 or 5356 filler better for MIG welding cast aluminum?
4043 is usually better for castings. It flows easier, wets better into porous material, and has lower cracking sensitivity due to silicon content. Use 5356 when you need higher strength or corrosion resistance, but expect more feeding effort and potential issues on dirty old cast.
How much preheat do I need for thick cast aluminum parts?
Aim for 200-300°F on sections over 1/4″ thick. This helps achieve fusion without excessive amperage that causes distortion. Use a temp stick or infrared thermometer. Avoid exceeding 400°F to prevent altering the casting’s properties. Cool slowly afterward.
Why does my MIG weld on cast aluminum keep cracking?
Rapid cooling, contaminated base metal, or mismatched filler are common causes. Ensure complete crack removal, thorough cleaning, correct 4043 filler, and controlled cooling. Proper joint design with bevels reduces stress concentrations too. Test settings on scrap first.