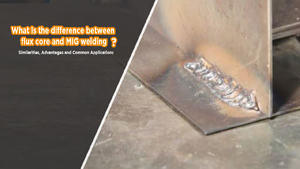
When I first got into flux core MIG welding, I quickly learned how tricky it can be to dial in the perfect settings. One minute your bead looks great — the next, it’s spattering, burning through, or just sitting cold on the metal. The truth is, flux core MIG welding settings play a huge role in everything from penetration depth and arc control to overall weld strength and appearance.
The right balance of wire speed, voltage, and amperage depends on your metal thickness, joint type, and even the position you’re welding in. I’ve burned through plenty of test plates figuring out what works best for mild steel, stainless, and galvanized metals, and it always comes down to one thing — getting your settings right before you strike that arc.
In this guide, I’ll share a complete flux core MIG welding settings chart and some practical, real-world tips to help you weld cleaner, stronger, and more efficiently every single time.

What Is Flux Core MIG Welding and Why Should You Care?
You’re out in the yard, wind whipping around, trying to patch a trailer with your standard MIG setup. The gas bottle tips over, or worse, the breeze scatters your shielding gas, leaving you with a porous mess. Flux core MIG steps in as the no-fuss hero.
It’s like MIG welding’s rugged cousin—uses the same wire-feed gun but with a tubular wire filled with flux compounds that melt to create gas and slag, protecting your molten puddle from air contamination.
How does it work? The flux inside the wire burns off, releasing gases that shield the weld and form a slag layer that slows cooling for better strength. No external gas tank means you’re mobile, which is huge for DIYers hauling gear to remote sites or pros on construction scaffolds.
I remember one summer job site where a storm rolled in mid-weld; my flux core buddy kept going while the gas MIG crew packed up. That’s real-world reliability.
Why does this matter? Safety first—flux core penetrates dirty or rusty metal better, reducing prep time and the risk of weak joints that fail unexpectedly. For weld integrity, it handles thicker stock (1/4-inch and up) with less burn-through than gas MIG on thin sheets. Material compatibility shines here too; it’s forgiving on mild steel with mill scale, saving you grinding hours.
And cost efficiency? Skip the gas refills, and you’re pocketing $50-100 a month on a busy hobby schedule. But get it wrong, and you’re dealing with spatter cleanup or undercut that compromises everything. It’s not magic—it’s about matching settings to your setup for welds that last.
Flux Core vs Gas MIG Welding: Which One Fits Your Setup?
I’ve flipped between flux core and gas MIG more times than I can count, from restoring old Jeeps to building shop tables. Both use a wire-feed system for semi-auto ease, but the shielding method splits them wide open.
Gas MIG (GMAW) pumps argon or CO2 mixes through the gun to blanket the arc, giving clean, spatter-free beads ideal for indoor precision work. Flux core? It self-shields with that flux core, making it the go-to for outdoors where wind laughs at your gas flow.
Let’s break it down in a quick comparison—I’ve welded side-by-side on the same 1/4-inch mild steel plate to see the differences firsthand.
| Aspect | Flux Core MIG | Gas MIG |
|---|---|---|
| Shielding | Internal flux (no gas needed) | External gas (argon/CO2 mix) |
| Portability | High—grab and go, no tank | Lower—tote the bottle |
| Best Environment | Outdoor, windy, dirty/rusty metal | Indoor, controlled, clean surfaces |
| Penetration | Excellent on thick/dirty stock | Good, but needs clean prep |
| Cleanup | More spatter/slag chipping | Minimal—quick and pretty |
| Cost per Weld | Lower (no gas), but wire pricier | Gas adds up, wire cheaper |
| Learning Curve | Forgiving for beginners, but messier | Cleaner start, precise control |
| Weld Appearance | Beaded, slag-covered (post-chip) | Smooth, shiny |
Pros of flux core? That penetration I mentioned—it’s a beast for 3/8-inch structural joints where gas MIG might skim the surface. No gas means you’re welding in a gale without porosity sneaking in, and it’s cheaper long-term for hobbyists like us burning through weekend projects. I once fixed a neighbor’s gate in a downpour; flux core didn’t flinch.
Cons? More smoke and spatter mean extra cleanup—chipping slag after every pass isn’t glamorous. It’s touchier on thin metal (under 1/8-inch), risking burn-through if you’re not careful. Gas MIG wins for aesthetics and versatility on aluminum or stainless, but if you’re stateside tackling farm repairs or fab shop heavies, flux core’s your portable powerhouse. My rule: Gas for the garage showpiece, flux for the field grind.
Choosing the Right Flux Core Welding Wire for Your Project
Wire selection can make or break your day—pick wrong, and you’re fighting the arc like it’s got a grudge. Flux core wires come in self-shielded (gasless, E71T-GS or E71T-11) and gas-shielded (dual-shield, E71T-1), but for most USA hobbyists and pros, self-shielded rules for its simplicity.
Look for AWS classifications: E71T means 70,000 psi tensile strength, all-position capability, and low-hydrogen for crack resistance.
Types break down like this: E71T-11 for single-pass flat/horizontal on cleanish steel—great for trailers. E71T-8 for multi-pass vertical-up, like pipes.
Diameter? 0.030-inch for thin-to-medium (up to 1/4-inch), 0.035 for general fab, 0.045 for heavies over 3/8-inch. I swear by Hobart’s E71T-11 0.035 for everyday; it feeds smooth without bird-nesting.
Practical know-how: Match wire to metal thickness and position. For rusty mild steel, go self-shielded—it eats scale for breakfast. Store it dry; moisture in flux means hydrogen cracks. Common mistake? Using MIG solid wire settings—flux needs knurled rollers and DCEN polarity.
Pro tip: Test on scrap; if the arc stutters, up the voltage a notch. Filler compatibility? Stick to mild steel wires for carbon stock; stainless needs its own (E308T). I’ve botched a stainless exhaust by mixing—lesson learned. Right wire, right weld—every time.
Essential Equipment and Setup for Flux Core MIG Welding
Setting up your rig right turns chaos into confidence. Start with a solid MIG machine—Lincoln 140C or Miller Multimatic 215 for under $1,000; they handle flux core without breaking a sweat. Polarity switch to DCEN (electrode negative)—flip that ground to positive, or your arc goes flatline.
Drive rolls: Knurled, not smooth—flux wire’s softer, crushes easy. Tension? Pinch-test: Glove on, stop the feed with fingers; too tight, and you bird-nest. Gun liner: Teflon for flux to glide. Contact tip: Sized to wire (0.035 tip for 0.035 wire), and V-notch for grip.
Prep work: Clean joints—wire brush rust, but flux forgives more than gas MIG. Ground clamp on clean metal, tight. .Early on, loose ground on a fence post sparked wild; now I double-check every time.
Safety gear? Helmet (auto-darkening), FR jacket, gloves, boots—flux spits like fireworks. Ventilate; smoke’s thicker than London fog. Setup takes 10 minutes, saves hours of troubleshooting. Dial it in, and you’re golden.
Step-by-Step Guide to Preparing for a Flux Core Weld
Let’s walk through it like we’re in the shop together—grab coffee, I’ll spot you on the vice.
Step 1: Inspect materials. Measure thickness, check for oil/rust. Grind bevels on 1/4-inch-plus edges for V-joints—30-45 degrees.
Step 2: Fit-up. Tack corners with low heat; flux pulls tight, so gap 1/16-inch on thin stuff to avoid bowing.
Step 3: Machine prep. Load wire—cut end square, feed till tip. Set polarity DCEN. Install knurled rolls, adjust tension.
Step 4: Dial initial settings (more on chart next). Start conservative; test arc on scrap.
Step 5: Gun angle and stickout. 10-15 degrees drag, 1/2-3/4 inch from tip to work—too long, voltage drops; too short, burn-back.
Step 6: Strike arc. Pull trigger slow; listen for steady sizzle, not popcorn. Travel even, watch puddle—fluid, not soupy.
Step 7: Cool and chip. Slag chips easy hot; wire brush for multi-pass.
My first full frame weld? Rushed fit-up, warped everything. Now, I tack and check square—prep’s 80% of perfection.
Flux Core MIG Welding Settings Chart: Dial In Like a Pro
Here’s where the magic happens—that flux core MIG welding settings chart you came for. This isn’t pulled from thin air; it’s battle-tested on Miller and Lincoln boxes for mild steel, self-shielded E71T-11 wire. Amps approximate via wire speed; voltage for arc stability. Always test—your machine, wire brand, and joint tweak it.
Start with 0.035-inch wire, DCEN polarity, 3/4-inch stickout. For 0.030, drop speeds 20%; 0.045, bump 15%.
| Material Thickness | Voltage | Wire Speed (IPM) | Approx. Amps | Technique Notes |
|---|---|---|---|---|
| 1/8 inch (3.2mm) | 16-18 | 150-200 | 90-120 | Short passes; drag slow to avoid burn-through. Good for sheet fab. |
| 3/16 inch (4.8mm) | 18-20 | 200-250 | 120-160 | Steady travel; weave slight for flat. Trailer frames love this. |
| 1/4 inch (6.4mm) | 19-21 | 250-300 | 160-200 | Medium stickout; pause at edges for penetration. Structural staple. |
| 3/8 inch (9.5mm) | 21-23 | 300-350 | 200-250 | Multi-pass; chip between. Heavy equipment repair sweet spot. |
| 1/2 inch (12.7mm) | 22-24 | 350-400 | 250-300 | Bevel joints; vertical-up for overhead. Bridge work vibes. |
How to use: Pick thickness, set voltage first for arc sound (crisp buzz), then wire speed till puddle wets out even. Too hot? Voltage down, less burn. Porosity? Clean more, check ground. I tweak 10% per test run—scrap’s cheap insurance.
Best Practices for Nailing Flux Core Welding Techniques
Technique’s your secret sauce—settings set the table, but hand speed serves the meal. Drag the gun 10-15 degrees back; pushing floods the puddle. Travel 1/2-inch per second flat—faster overheats edges, slower sags.
Puddle watch: Size of a dime, edges feather in. Weave narrow (1/8-inch) to fill without trapping slag. Positions? Flat/horizontal easiest; vertical-up for pipes—shorten stickout to 1/2-inch.
Tip from the trenches: Whip-pause on starts—quick forward, hold for tie-in.
Welding a roll cage, rushed weave trapped slag; cracked on first bump. Now, I chip mid-run if needed. Prep joints square, tack often. Practice on angle iron—builds muscle memory without heartbreak.
Common Mistakes in Flux Core MIG Welding and How to Fix Them
My hall of shame includes a bird-nested gun mid-job. Top culprit: Wrong polarity—DCEP spits wildly; flip to DCEN, arc smooths.
Burn-through on thin? Drop voltage 2 points, slow wire 20 IPM. Spatter overload? Too hot—cool settings, anti-spatter spray on tip. Porosity pops? Rusty base or moist wire—brush and bake at 250°F.
Undercut edges? Angle wrong—drag steadier. Slag inclusions? Incomplete chipping—hammer hot, brush cold. Bird-nesting: Loose tension—pinch-test fix. My fix-all: 5-minute scrap run before prime time. Spot early, save sanity.
Safety Considerations When Flux Core Welding
Flux core’s sparks fly farther than gossip—I’ve singed sleeves forgetting FR layers. Gear up: Auto-darkening hood (shade 10-13), leather jacket/gloves, steel toes, and FR pants. Sparks bounce; cover skin.
Ventilation’s non-negotiable—fumes pack manganese; fan or respirator in tight spaces. Fire watch: Extinguisher handy, wet floors post-weld. Ground solid—stray arcs shock.
Eye on cooling: Slag flies chipping—goggles under hood. Hydrate; heat builds fast. My close call? Ignored smoke in a trailer—coughed for days. Respect it, weld safe.
Real-World Applications of Flux Core MIG Welding in the USA
Stateside, flux core shines in construction—erecting I-beams on skyscrapers or bridges, where wind’s a factor and speed pays. Automotive? Frame repairs on trucks, no gas hassle in pits.
DIY heaven: Garage warriors patch trailers, gates, or custom racks—portable for tailgates. Fab shops love it for heavy mild steel; shipyards for hulls. Codes? AWS D1.1 compliant for structural if low-hydrogen wire.
My go-to: Restoring a ’72 Chevy—flux core ate rusty rockers like candy. Versatile beast for American muscle and jobsite grit.
Advanced Tips for Professional-Grade Flux Core Welds
Once basics click, level up: Multi-pass on thick—root with low heat, fill hot. Gas-shielded flux for stainless? Cleaner, less smoke.
Tune for position: Overhead, shorten stickout, feather light. Alloy tweaks: 1% nickel wire for cold climates. Pro hack: Log settings per job—your chart evolves.
Union gig, boss eyed my beads; shared my tweak (extra 50 IPM on vertical), earned respect. Experiment safe, own your arc.
Conclusion: Weld Confident with Your New Settings Know-How
We’ve covered from why flux core matters for safe, strong joints to that settings chart that’ll be your shop Bible. You now know wire picks, setups, techniques, and fixes to sidestep pitfalls, all tuned for real USA workflows. Whether DIY-ing a workbench or pro-tacking beams, these insights prep you to choose parameters that match your metal and machine, yielding welds with integrity that won’t let you down.
Start with the chart, test on scrap, adjust by ear and eye—your puddle tells the tale. You’re more prepared because knowledge beats trial-and-error every time. Grab that gun, strike an arc, and build something solid. You’ve got this—confident action starts now. Mark your welder door with personalized settings sticky notes. Saves seconds, stacks wins.
FAQs
What Is the Best Wire Size for Flux Core MIG Welding Beginners?
For starters on mild steel up to 1/4-inch, go 0.030-inch E71T-11—feeds easy, less burn-through risk. Scale to 0.035 for thicker.
Can Flux Core MIG Welding Be Used Outdoors?
Absolutely—self-shielded flux laughs at wind, perfect for fields or roofs. Just ventilate fumes and watch sparks.
How Do I Reduce Spatter in Flux Core Welding?
Dial voltage down 1-2, clean metal well, and spray tip with anti-spatter. Steady drag helps too—less mess, more bead.
What’s the Difference Between Self-Shielded and Gas-Shielded Flux Core?
Self-shielded (gasless) for portability, no tank; gas-shielded adds external mix for cleaner welds on stainless. Pick by site.
Is Flux Core Welding Stronger Than Stick for Structural Work?
Comparable if low-hydrogen wire—flux penetrates deep, but chip slag clean. Follow AWS D1.1 for code jobs.