Welding square tubing with MIG (Metal Inert Gas) is a core skill in metalwork, fabrication, and repair. Whether you’re building frames, furniture, gates, or structural supports, understanding how to MIG weld square tubing can open doors to many projects.
I’ll walk you through the process, from selecting materials and prepping your work, to mastering the weld itself. Along the way, you’ll see practical tips, common mistakes to avoid, and how to get strong, clean welds on square tubing every time.
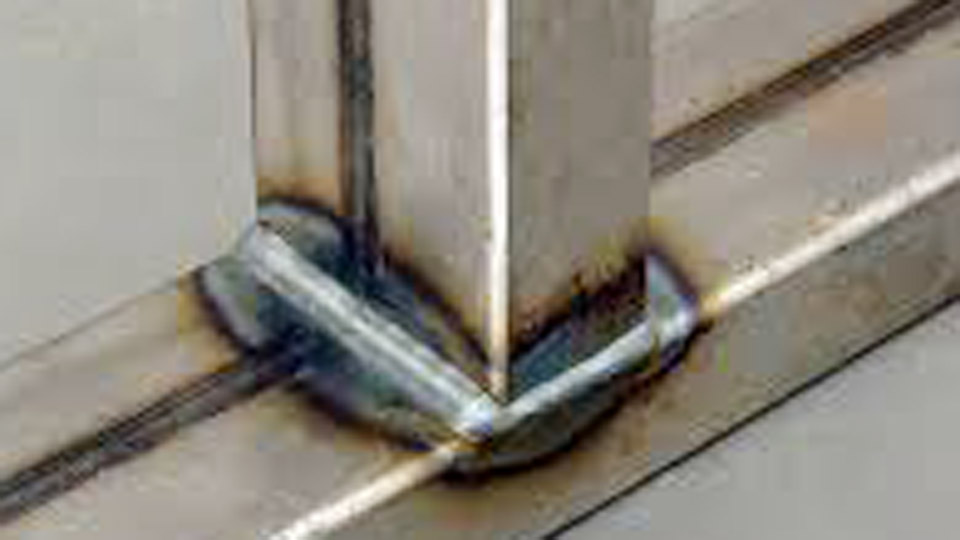
Image inthegaragemedia
Why Mig Welding Is Ideal For Square Tubing
Many welders choose MIG welding for square tubing because it’s fast, versatile, and easier to learn than TIG or stick welding. The MIG process uses a wire electrode fed through a welding gun, with a shielding gas protecting the weld pool from contamination. This setup gives you good control, making it perfect for the corners and flat faces of square tubing.
What makes square tubing unique is its shape and wall thickness. The flat surfaces and 90-degree corners require careful preparation and technique to avoid burn-through, warping, or weak joints. MIG welding offers a balance of heat input and control, making it suitable for both thin-wall and thicker square tubing.
Choosing The Right Square Tubing
Before you strike an arc, you need to pick the right square tubing for your project. Tubing comes in various materials, wall thicknesses, and sizes. Common metals include mild steel, stainless steel, and aluminum.
When choosing, consider:
- Wall thickness: Thinner tubing is lighter but easier to burn through. Thicker tubing is stronger but requires more heat.
- Material type: Mild steel is easiest for beginners. Stainless and aluminum need different gases and settings.
- Dimensions: Standard sizes range from 0.5” to 4” square, with wall thickness from 16 gauge (about 1.5 mm) to ¼” (6 mm) or more.
Here’s a quick comparison:
| Material | Common Wall Thickness | Typical Uses |
|---|---|---|
| Mild Steel | 16 – 11 gauge (1.5–3 mm) | Frames, supports, furniture |
| Stainless Steel | 16 – 10 gauge (1.5–3.5 mm) | Food equipment, railings |
| Aluminum | 14 – 8 gauge (2–4 mm) | Marine, lightweight structures |
Non-obvious insight: The corner radius on square tubing varies by manufacturer and can affect your joint fit-up. Always check before you buy.
Essential Mig Welding Equipment
To weld square tubing with MIG, you’ll need more than just a welder. Here’s what you should have ready:
- MIG Welder: Minimum 140 amps for most small jobs. More power for thick tubing.
- Shielding Gas: For mild steel, use 75% Argon / 25% CO₂ (“C25”). Stainless and aluminum require different mixes.
- Welding Wire: ER70S-6 for mild steel is standard. Match wire to your material.
- Wire Diameter: 0.023” for thin tube, 0.030–0.035” for general work.
- Safety Gear: Auto-darkening helmet, gloves, jacket, and closed-toe shoes.
- Clamps and Magnets: Hold tubing at perfect 90-degree angles.
- Angle Grinder: For prepping, cleaning, and finishing welds.
- Measuring Tools: Square, tape measure, and marker for accurate cuts.
Pro tip: Use a dedicated welding cart to keep your MIG welder, gas bottle, and tools organized and mobile.
Preparing Square Tubing For Mig Welding
Preparation is critical. Skipping steps here leads to weak welds and ugly results.
Measuring And Cutting
- Measure twice, cut once. Use a square to mark lines for perfect fit-up.
- For joints, a chop saw or band saw gives clean, straight edges. An angle grinder with a cutoff wheel also works.
Cleaning The Metal
- Remove mill scale, rust, paint, or oil from all welding areas. Even new tubing can have a thin oily layer.
- Use an angle grinder with a flap disc or wire wheel. Wipe with acetone for final cleaning.
Fit-up And Clamping
- Ensure tubing sits tight with no gaps. Gaps lead to poor welds and burn-through.
- Use magnetic squares or C-clamps to keep everything at 90 degrees.
Tack Welding
- Place small tacks at each corner to hold the tubing in position. Check for squareness before finishing the weld.
Beginners often miss: Even a small gap at a corner can pull out of square as you weld. Triple-check alignment after tacking.

Credit: www.youtube.com
Setting Up Your Mig Welder
Proper settings make a big difference. Adjust your machine for the tubing thickness and material.
Key Settings
- Voltage (V): Controls the heat. Thicker tubing needs more voltage.
- Wire Feed Speed (IPM): Too fast = spatter; too slow = burn-back.
- Gas Flow: 20–25 CFH (cubic feet per hour) is good for most work.
Here’s a basic guideline:
| Wall Thickness | Voltage | Wire Speed | Wire Diameter |
|---|---|---|---|
| 16 gauge (1.5 mm) | 16–17 V | 180–200 IPM | 0.023” |
| 11 gauge (3 mm) | 18–20 V | 230–250 IPM | 0.030” |
| 1/4” (6 mm) | 22–24 V | 280–300 IPM | 0.035” |
Always test on scrap tubing before starting your real weld.
Basic Mig Welding Techniques For Square Tubing
Choosing Your Weld Joint
Square tubing often uses one of these joints:
- Butt joint: Two tubes face each other, edges touching.
- Corner joint: Tubes meet at a 90-degree angle, making an “L.”
- T-joint: One tube joins at the middle of another, forming a “T.”
- Lap joint: One tube overlaps another.
Each joint needs a slightly different technique, but the main principles are the same.
Torch Angle And Travel
- Hold the gun at a 10–15 degree push angle (pointing away from the weld pool, pushing the bead).
- For corners, aim the wire at the center of the joint.
- Move at a steady speed—too slow, you burn through; too fast, you get a weak weld.
Making The Weld
- Start with a short burst to fill the tack weld.
- Move in a small, steady circle or “C” motion, about ¼” wide, as you weld.
- Keep a consistent stick-out (distance from tip to work) of about ⅜”.
Finishing The Weld
- Let the weld cool slowly. Rapid cooling (like with water) can cause cracks.
- Clean with a wire brush or grinder to inspect for holes or defects.
Common mistake: Don’t weave too wide on thin tubing—this overheats the metal and causes warping.
Welding Different Thicknesses Of Square Tubing
Matching your technique to the tubing thickness is critical for good results.
Thin-wall Tubing (16–14 Gauge)
- Use lower voltage and wire speed.
- Short welds (“stitch welding”) help avoid heat buildup.
- Pause between sections to let the metal cool.
Medium-wall Tubing (11–10 Gauge)
- Weld continuously but keep a steady pace.
- You can use a wider bead and more heat.
Thick-wall Tubing (¼” And Up)
- Multiple passes may be needed for full penetration.
- Preheat thick tubing if working in cold conditions.
- Consider beveling the edges for a stronger joint.
Advanced tip: On thin tubing, back up the joint with copper or aluminum. This absorbs heat and prevents burn-through.
Welding Stainless Steel And Aluminum Square Tubing
While mild steel is most common, sometimes you’ll weld stainless steel or aluminum.
Stainless Steel
- Use a tri-mix gas (90% helium, 7.5% argon, 2.5% CO₂).
- Use stainless wire (ER308L or ER309L).
- Clean thoroughly; stainless shows every imperfection.
Aluminum
- Use 100% argon gas.
- Use aluminum wire (ER4043 or ER5356).
- MIG welding aluminum square tubing is tricky—keep your wire clean and feed smooth.
Both require a spool gun or push-pull system for best wire feed.
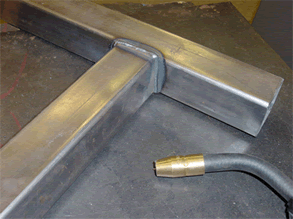
Credit: www.westermans.com
Welding Square Tubing In Different Positions
Your welds may need to be done flat, horizontal, vertical, or overhead. Each position has its challenges:
- Flat: Easiest. Let gravity help.
- Horizontal: Watch for the bead sagging down.
- Vertical up: Start at the bottom, move upward in a “V” pattern.
- Overhead: Use short, quick welds to avoid drips.
Pro insight: Tack all sides before final welding, especially on complex frames. This keeps everything aligned as heat pulls the metal.
Avoiding Common Mig Welding Problems
Even experienced welders run into issues. Here’s how to avoid or fix them:
- Burn-through: Lower voltage, faster travel, use stitch welds.
- Porosity (holes): Check gas flow and nozzle. Clean your tubing thoroughly.
- Warpage: Weld in short sections, alternate sides, clamp securely.
- Cold lap (weak bead): Slow down, increase voltage, improve fit-up.
Unexpected tip: Wipe tubing with a clean rag between welds. Dust or oil can cause porosity even after prep.
Inspection And Testing Of Welds
A strong weld isn’t just about looks. Here’s how to check your work:
- Visual inspection: Look for even, smooth beads with no holes or cracks.
- Hammer test: Tap the weld with a hammer. It should ring, not crack.
- Destructive test: For critical joints, weld sample pieces and bend them until they fail. The weld should hold, not crack at the joint.
Welds on square tubing used for structural or safety-critical projects should always be tested properly.
Cleaning And Finishing Welded Square Tubing
Cleaning up your welds makes the project look professional and removes sharp edges.
- Use a flap disc on an angle grinder to smooth out the bead.
- For visible projects, sand to a uniform finish.
- Wipe with acetone before painting or coating.
- Apply primer and paint if the tubing will be outdoors.
If you want a “seamless” look, grind the weld flat and blend it with the tubing. If strength is the main goal, leave the weld slightly raised.
Building Strong Frames With Mig-welded Square Tubing
Many people use square tubing for frames—workbenches, carts, shelves, or even car chassis. Here are steps and tips for success:
- Plan your cuts: Draw a detailed plan. List cut lengths and joints.
- Dry-fit: Clamp everything together before welding.
- Tack in place: Tack all joints, check squareness, adjust as needed.
- Weld in sequence: Start with opposite corners or sides to spread heat evenly.
- Re-check alignment: Welds can pull the frame out of square. Use a tape and diagonal measurements.
- Finish all welds: Once square, complete the welds.
For very large frames, weld on a flat surface and use temporary cross-braces to keep everything straight.
Real-world Examples And Applications
MIG welding square tubing is used in many industries and DIY projects:
- Automotive: Roll cages, bumpers, racks
- Furniture: Table frames, bed frames, chair supports
- Construction: Railings, gates, supports
- Agriculture: Equipment frames, fencing
For example, a basic workbench frame might use 2” x 2” x 11-gauge tubing. With proper MIG welds, it can support several hundred pounds.
Safety Tips For Mig Welding Square Tubing
Safety is as important as technique. Always:
- Wear a welding helmet with at least shade 10.
- Use gloves and a long-sleeve cotton jacket.
- Work in a well-ventilated area; welding fumes can be harmful.
- Keep a fire extinguisher nearby.
- Never weld near flammable materials.
Hidden danger: Grinding produces tiny metal particles. Always wear safety glasses, even when cleaning up a weld.
Troubleshooting: What To Do When Things Go Wrong
If your welds aren’t turning opaque, you see excessive spatter, or your joint keeps warping, try these steps:
- Double-check settings: Sometimes a small voltage tweak fixes a lot.
- Change wire: Old or rusty wire causes feed problems.
- Check ground clamp: A poor ground leads to weak or inconsistent arc.
- Practice on scrap: Don’t be afraid to experiment with different techniques.
Cost Considerations And Efficiency
MIG welding is generally cost-effective for square tubing projects, but budgeting is smart:
- Tubing cost: Mild steel is cheapest; stainless and aluminum cost more.
- Gas and wire: Factor in consumables for large projects.
- Time: MIG is faster than TIG or stick, especially for long seams.
Investing in quality clamps and a good welder saves frustration and time in the long run.
Quick Reference For Mig Welding Square Tubing
For fast answers, check this summary:
| Application | Tubing Size | Wire Type | Gas Mix | Best Tip |
|---|---|---|---|---|
| Workbenches | 2” x 2” x 11ga | ER70S-6 | 75/25 Argon-CO₂ | Use corner clamps |
| Furniture | 1” x 1” x 16ga | ER70S-6 | 75/25 Argon-CO₂ | Low voltage, short welds |
| Car Chassis | 1.5” x 1.5” x 0.120” | ER70S-2 | 75/25 Argon-CO₂ | Full weld penetration |
Wrapping Up
MIG welding square tubing is a skill that pays off for countless projects. With the right preparation, equipment, and practice, you’ll get strong, clean welds—making your builds last for years.
Frequently Asked Questions
How Do You Prevent Burn-through When Mig Welding Thin Square Tubing?
Use lower voltage and wire speed. Make short welds and let the metal cool between planned sections. If needed, back up the weld with a copper bar to absorb heat.
Is It Better To Push Or Pull The Mig Gun On Square Tubing?
Pushing the gun (angle the tip forward in the direction you’re welding) gives a flatter, cleaner bead and better gas coverage. This is usually best for square tubing.
What’s The Strongest Joint For Welding Square Tubing?
A corner joint with properly beveled edges and full weld penetration gives the best strength. For critical structures, always test and reinforce as needed.
Can You Mig Weld Galvanized Square Tubing?
It’s possible, but you must grind off all zinc coating from the weld area. Galvanized fumes are toxic, so work outdoors or use strong ventilation. Wear a respirator if needed.
What’s The Best Way To Keep A Frame Square While Welding?
Tack all joints first, then check diagonals with a tape measure. Use corner clamps and weld in a sequence to balance heat. Re-check squareness after every few welds.