If you’re looking to master TIG welding mild steel, you’re in the right place. I’ve been welding for years, and I’ve spent countless hours tweaking settings, experimenting with techniques, and learning what works best for mild steel. TIG welding, or Tungsten Inert Gas welding, is my go-to for precision and clean results.
It’s like painting with metal—smooth, controlled, and satisfying when done right. In this article, I’m sharing everything I’ve learned about the perfect settings for TIG welding mild steel. If you’re a beginner or a seasoned welder, I’ll break it down step-by-step, so you can get those beautiful, strong welds every time.
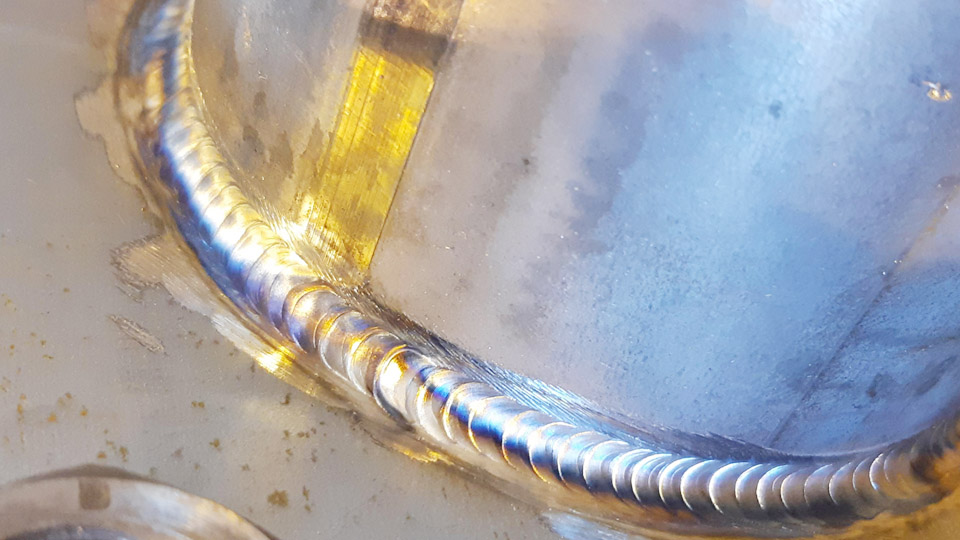
Image by reddit
Why TIG Welding Mild Steel Is Special
TIG welding mild steel is a craft that demands patience and precision. Mild steel is one of the most common materials I weld because it’s versatile, affordable, and widely used in everything from car frames to furniture. Unlike stick or MIG welding, TIG gives me unmatched control over the weld pool, which is crucial for creating clean, strong joints.
The settings need to be just right. Too much heat, and you’ll burn through the steel. Too little, and your weld won’t penetrate properly. I’ve learned that getting the settings dialed in is the key to success. Let’s explore what makes TIG welding mild steel unique and how to set up your machine for the best results.
TIG Welder’s Settings
Before we get into the nitty-gritty, let’s talk about the basic settings on a TIG welder. When I first started, I was overwhelmed by all the knobs and dials. But after some trial and error, I realized it’s all about understanding a few key components: amperage, polarity, gas flow, and tungsten type.
Each of these plays a role in how your weld turns out. For mild steel, you need to balance these settings to control the heat and ensure a clean weld. Let me walk you through each one, based on what I’ve found works best.
Amperage: The Heart of Your Weld
Amperage controls the heat of your TIG welder. Too much, and you’ll melt through the steel like butter. Too little, and your weld will be weak. For mild steel, I follow a simple rule: about 1 amp per 0.001 inch of material thickness.
So, for 1/8-inch mild steel (0.125 inches), I set my machine to around 125 amps. This gives me enough heat to penetrate without overheating.
Here’s a quick guide I use for amperage settings based on mild steel thickness:
| Material Thickness | Amperage Range |
|---|---|
| 1/16 inch (0.0625″) | 60–80 amps |
| 1/8 inch (0.125″) | 100–140 amps |
| 3/16 inch (0.1875″) | 140–180 amps |
| 1/4 inch (0.25″) | 180–220 amps |
These are starting points. I always adjust slightly based on the joint type and my welding position. For example, vertical welds need a bit less amperage to prevent the weld pool from sagging. I also use the foot pedal to fine-tune the heat as I weld, which gives me more control.
Polarity: Getting the Current Right
For mild steel, I always use DCEN (Direct Current Electrode Negative). This setting focuses the heat on the workpiece, not the tungsten electrode, which is exactly what you want for a deep, strong weld.
I made the mistake early on of trying AC (Alternating Current), which is better for aluminum, and ended up with a mess. Stick with DCEN for mild steel—it’s a game-changer. Most TIG welders default to DCEN, but double-check before you start.
Gas Flow: Shielding Your Weld
Argon is my gas of choice for TIG welding mild steel. It creates a stable arc and protects the weld pool from contamination. I typically set the gas flow to 15–20 cubic feet per hour (CFH). If I’m welding in a drafty shop, I bump it up to 25 CFH to ensure good shielding.
Too little gas, and you’ll see porosity—those tiny holes in your weld that weaken it. Too much, and you’re wasting gas and money. I always check my regulator and make sure the gas is flowing before striking an arc.
Tungsten Type and Size
Choosing the right tungsten electrode is critical. For mild steel, I prefer 2% thoriated tungsten (red-tipped) because it holds a sharp point and handles heat well. If you’re concerned about thorium’s radioactivity, 2% lanthanated (blue-tipped) is a great alternative.
I usually use a 3/32-inch tungsten for most mild steel jobs, but for thinner materials (under 1/16 inch), I switch to a 1/16-inch tungsten to keep the arc precise.
Here’s a quick reference for tungsten size based on amperage:
| Amperage Range | Tungsten Diameter |
|---|---|
| 50–100 amps | 1/16 inch |
| 100–200 amps | 3/32 inch |
| 200–300 amps | 1/8 inch |
I grind my tungsten to a sharp point for mild steel, which helps focus the arc. A dull tungsten spreads the arc and makes your weld sloppy.
Preparing Your Mild Steel for Welding
Before I even touch my TIG welder, I make sure my mild steel is ready. Preparation is half the battle. Mild steel often comes with mill scale, rust, or oil, and these can ruin your weld. I use a wire brush or grinder to clean the surface until it’s shiny.
For stubborn rust, I might use a chemical cleaner, but I’m careful to rinse and dry the metal thoroughly afterward. I also bevel the edges of thicker steel (over 1/8 inch) to ensure good penetration. A clean, well-prepped surface makes a huge difference in the quality of your weld.
Setting Up Your TIG Welder: Step-by-Step
Now that we’ve covered the basics, let’s walk through how I set up my TIG welder for mild steel. This is the process I follow every time I start a new project, and it’s saved me from a lot of headaches.
Check Your Machine: I make sure my welder is set to DCEN and the gas bottle is full. I also check that my torch and cables are in good condition—no cracks or leaks.
Select Tungsten: I grab a 3/32-inch 2% thoriated or lanthanated tungsten and grind it to a sharp point.
Set Amperage: Based on the steel thickness, I dial in the amperage. For example, 125 amps for 1/8-inch steel.
Adjust Gas Flow: I set my argon flow to 15–20 CFH and test the regulator to ensure it’s working.
Test Your Setup: Before welding, I do a quick test arc on a scrap piece of mild steel. This helps me fine-tune the settings and make sure everything feels right.
Once everything’s dialed in, I’m ready to weld. It’s like setting up a canvas before painting—you want everything perfect before you start.
Techniques for TIG Welding Mild Steel
Settings are only half the story. Technique matters just as much. Over the years, I’ve picked up a few tricks that make TIG welding mild steel easier and more consistent.
Maintaining a Steady Arc
I keep my arc length short—about 1/8 inch or less. A short arc gives me better control and prevents the weld pool from getting too wide. If the arc gets too long, the weld starts to look messy, and you risk burning through the steel.
Adding Filler Rod
For most mild steel welds, I use ER70S-2 or ER70S-6 filler rod. The rod diameter depends on the material thickness—1/16 inch for thin steel, 3/32 inch for thicker stuff. I dip the rod into the weld pool at a steady rhythm, making sure not to touch the tungsten. If the tungsten gets contaminated, I stop, regrind it, and start again. Patience is key here.
Controlling Heat
Mild steel conducts heat well, so it’s easy to overheat. I use my foot pedal to lower the amperage when I see the weld pool getting too hot. If I’m welding a long seam, I’ll pause occasionally to let the metal cool. This prevents warping and keeps the weld strong.
Welding Positions
Most of my mild steel projects are done in the flat position, which is the easiest. But sometimes, I need to weld vertically or overhead. For vertical welds, I use a slightly lower amperage and move upward to keep the weld pool from sagging. Overhead welding is trickier—I keep my movements smooth and my arc tight to avoid drips.
Common Mistakes and How to Avoid Them
Even after years of welding, I still make mistakes sometimes. Here are the most common ones I see (and have made myself) when TIG welding mild steel, along with how to fix them.
Burn-Through
Burning through the steel happens when the amperage is too high or you linger too long in one spot. I avoid this by double-checking my amperage settings and keeping my torch moving at a steady pace.
Porosity
Porosity looks like tiny holes in your weld and is usually caused by inadequate gas shielding or a dirty surface. I always make sure my gas flow is set correctly and clean the steel thoroughly before welding.
Contaminated Tungsten
If your filler rod or steel touches the tungsten, it’ll contaminate it, causing an unstable arc. When this happens, I stop, regrind the tungsten, and start over. It’s frustrating, but it’s the only way to get a clean weld.
Warping
Mild steel warps if it gets too hot. I prevent this by using a lower amperage, welding in short sections, and letting the metal cool between passes. Clamping the workpiece securely also helps.
Helpful Suggestions for Better TIG Welds
Based on my experience, here are some tips to take your TIG welding to the next level:
Practice on Scrap: Before tackling a big project, I always practice on scrap steel. It helps me dial in my settings and get a feel for the material.
Invest in a Good Foot Pedal: A foot pedal gives you real-time control over the amperage, which is a lifesaver for preventing burn-through.
Keep Your Workspace Clean: Dust and debris can contaminate your weld. I sweep my shop and keep my welding table clean.
Use Quality Filler Rods: Cheap filler rods can lead to weak welds. I stick with reputable brands like ER70S-2 or ER70S-6.
Stay Comfortable: Welding for long periods can be tiring. I make sure my chair and table are at the right height to avoid strain.
Conclusion
TIG welding mild steel is a skill that takes time, patience, and practice to master. But once you get the settings right—amperage, polarity, gas flow, and tungsten—you’ll be amazed at the results. I’ve spent years fine-tuning my approach, and I still learn something new every time I strike an arc.
If you’re building a car frame, a piece of furniture, or just practicing in your garage, the key is to start with the right setup and refine your technique over time. Keep experimenting, stay patient, and don’t be afraid to make mistakes. That’s how I got better, and I know you can too.
Common Questions About TIG Welding Mild Steel
What’s the best tungsten for TIG welding mild steel?
I recommend 2% thoriated or 2% lanthanated tungsten. Both work great for mild steel, but lanthanated is a safer option if you’re worried about thorium’s radioactivity.
How much argon flow do I need?
I set my argon flow to 15–20 CFH for most jobs. If it’s windy, I increase it to 25 CFH to ensure good shielding.
Can I use AC for TIG welding mild steel?
No, stick with DCEN. AC is better for aluminum, but it’ll make a mess on mild steel.
What causes burn-through when welding mild steel?
Burn-through happens when your amperage is too high or you stay in one spot too long. Lower your amps and keep the torch moving.
How do I prevent warping in mild steel?
To avoid warping, use lower amperage, weld in short sections, and let the metal cool between passes. Clamping the workpiece also helps.
What filler rod should I use for mild steel?
I use ER70S-2 or ER70S-6 filler rods. They’re reliable and produce strong, clean welds.